How to make a beautiful birdhouse with your own hands. DIY birdhouse: how to make a reliable and comfortable house for birds (61 photos). Required tools and materials
Birds are invariably an indispensable assistant in the fight against all kinds of pests of green spaces. To attract them to your garden plot, you should make a house for them. If you give the birds a comfortable home, then there will be no need to worry about the safety of the harvest. Although a birdhouse is usually called a birdhouse, not only starlings, but also other birds can live in it. Such apartments are home to sparrows, flycatchers, tits, blacklings and swifts.
The location and size of the bird house must be chosen in accordance with the characteristics of different birds. For example, it is more convenient for tits when the height of the birdhouse is about 30 cm, the bottom is 12 cm, and the diameter of the entrance is 3–3.5 cm. As for wagtails, these birds do not have the necessary tenacity of their paws, so a small one should be installed before the entrance ladder. Such a house is suspended under the roof of buildings, at a height of 3 to 5 m. The pika bird feels comfortable in a house with two through holes located on the right and left. The presence of additional entrances allows the bird to hide from predators.
Selection of materials
When thinking about how to make a bird house, you should first take care of preparing the necessary material for construction.
Coniferous wood is not suitable for building a birdhouse because it releases resins, causing the interior to become sticky.

Toxin-releasing materials are also unacceptable for the construction of a bird house, including fiberboard and chipboard. Plywood is also not an option, because it practically does not allow sound to pass through, and feathered friends need very good audibility to avoid danger. In addition, plywood does not retain heat well, so it will be difficult for birds to hatch their brood. The best material for a birdhouse is larch wood. The inner surface of the boards should remain rough. This will make it easier for the birds to get out. On a smooth surface, you can make horizontal notches using a chisel.
Drawing and dimensions of a wooden structure

A drawing of the product can be made directly on the boards. They need to be laid out on the table. For marking you will need a pencil and a square. Particular care should be taken to lay out the boards for the front and back walls, as well as for the side surfaces. For these purposes, boards of different widths are needed. At the end you should get 7 blanks with preset parameters:
- 2 side parts 15 cm wide, made from edged boards;
- 3 parts for the front, back wall and lid, with a typical size of 30x20 cm;
- 2 pieces measuring 15x15 cm, used for the bottom of the roof and the bottom of the birdhouse.
To simplify the connection of parts, they need to be cut out as carefully as possible, and then signed with a pencil.
The typical size of a bird house is 20 cm wide, 15–20 cm deep and 30 cm high. Spacious bird quarters are not always the best idea. Of course, a large house will house more chicks, but feeding a brood consisting of many individuals is not always within the power of the feathered parents! If the chicks do not receive the necessary care and are poorly fed, they will not be able to make long flights and will grow up sick. And, conversely, in a compact house it is possible to shelter only 3 chicks, but they will grow up healthy and capable of maintaining the strength of the population of their species.
Blueprints


Assembly sequence
Initially, the front wall is connected to the side ones. Nails should be driven in along the edges and center of the board. It should be a U-shaped structure. Before further connection, it is important to check the reliability and rigidity of the elements that are already connected. To strengthen it, you can hammer in a few more nails between those that were hammered in earlier.
To avoid driving a splinter into the skin, it is better to work with wood while wearing gloves.
The back wall and bottom of the structure are assembled using the same method. To round the internal corners, you can nail a wooden bead to the bottom. All elements are fixed with nails. If necessary, you can strengthen the structure with additional nails. Now you need to prepare the roof, which must be removable. This will allow you to clean the birds' home if necessary. The edges of the roof should protrude beyond the dimensions of the birdhouse itself. This is especially important to do on the façade side. This way you will protect the bird house from rainwater and other precipitation.

The roof must consist of two parts - a sleeve and a main part. The roof is held in place by a second piece. It needs to be adjusted to size and the two parts connected with nails. Now a board or perch is installed on which the birds will sit before entering their comfortable home.
When painting a finished birdhouse, it is better to use soft colors. Dirty green and brownish tones are perfect. In this case, it will be more difficult for predators to detect the bird’s house.
Economy version of the birdhouse
In some cases, you can make a temporary birdhouse using available materials, such as cardboard. Although this type of construction cannot be compared with its wooden counterpart, it may well become a haven for birds for the season. Thick corrugated cardboard is used as the starting material. The following materials are needed for work: corrugated cardboard, starch, self-adhesive paper with a laminated coating and twine. Tools: scissors, ruler, cardboard cutter, pencil, square, compass.
First, all the blanks are marked; they all must be duplicated. You need to make a paste from starch. Finished parts need to be glued in pairs. All walls will be double, which increases their strength. A hole for the tap hole is cut in the front wall. 4 small holes are made in the back wall for twine, thanks to which the house can be tied to a tree. The walls of the birdhouse are glued end to end at right angles. The end result should be a box. While drying, it should be wrapped with thread.

The roof should consist of two parts glued together. Its outer part must be made with allowances. This product will be more durable if you paste it on the outside with laminated paper.
From a box or plastic bottle
If there is nowhere to get lumber, then you can make a bird house from a ready-made box, for example, from juice or milk, with a capacity of more than 1 liter. It must first be washed and dried. After this, the tap hole is cut out. To strengthen the bottom, you can use thick cardboard. Small holes are made on top of the box so that the wire on which the birdhouse will be attached can be threaded through. The outside of the product can be covered with decorative laminated paper.

Another option uses very few materials: a plastic bottle, paint to color the bottle or laminated paper, wire and a knife. A hole for the tap hole is cut in the upper part of the 5-liter bottle. Two holes should be drilled in the roof for the wire on which the structure will be attached. Birds feel uncomfortable in a transparent house. Therefore, to create coziness, the bottle can be painted or covered with laminated paper.
As you can see, making a simple version of a birdhouse is not at all difficult. However, in order for the bird house to fully perform its tasks, it is important to install it correctly.
Installation rules

It is necessary to follow some installation rules. It is commonly read that birdhouses need to be installed in early April, but birdhouses can be installed at any time of the year. The installation height is on average 3–5 m, this applies to cottages and villages. In cities, such structures are mounted at a height of 8–10 m.
The inlet should be on the side with the least amount of wind. The birdhouse should be installed in the shade or partial shade; it should not be exposed to direct rays of the sun. The structures need to be suspended at a certain distance from the branches. This will protect birds from domestic cats and other predators.
The position of the birdhouse should be strictly vertical. A slight forward bend is acceptable, but no backward bend is allowed. If the structure is made of durable materials, then you need to provide access inside for annual cleaning.
Before you start making a house, you need to first of all think about the functionality of the structure, and only then about the decor. Birds don’t care how you decorate their home; they care about the size of the entrance hole and the internal volume of the birdhouse.
The location and size of the structure must be chosen in accordance with the different characteristics of the birds.

Let's look at the standard sizes of birdhouses and examples of drawings for different types of birds.

Housing parameters for starlings
Width x depth of bottom (roof) - 90 – 110 x 90 – 110

- height 300 – 400 mm.
- The diameter of the hole in the birdhouse for the starling is 45 – 55 mm
- The hole in the tap hole is made round, the inner edges are carefully processed, and burrs are removed.

Parameters of the house for tits
Width x Depth - 100 – 120 x 100 – 120

Minimum – maximum value in mm.
- Height 240 – 310 mm.
- The diameter of the tap hole is 30 – 40 mm.
- The shape of the tap hole is round.

Wagtail housing dimensions
Width x Depth - 300 – 350x 400 – 450

Minimum – maximum value in mm.
- Height 110 – 150 mm.
- Taphole width 35 – 40 mm.
- The shape of the tap hole is rectangular.
- Threshold (special platform) width from 80 to 120 mm

In general, the design of a birdhouse may differ from standard models. So, you can make bird houses with several rooms so that several bird families can live in them at once.

The roof can consist of two tiers. Reinforcement must be done reliably and correctly. You can’t tilt it back; it’s better to tilt it slightly forward, so it will be easier for the birds to get out of the hollow.

Manufacturing methods
Let's look at some of the most common ways to make a bird house with your own hands.

Making a birdhouse from wood
Making a birdhouse out of wood is perhaps the most classic, traditional way. The algorithm of actions is as follows:
- Choose a material, preferably hardwood boards.
- Make a drawing, then transfer the diagram to the blanks for the house.
- Prepare the necessary tools and available materials: screws, nails; waterproof paints; hammer, screwdriver or screwdriver, hacksaw, wood glue, ruler, brushes, pencil.
- Cut out the blanks according to the drawings. It is advisable to leave a rough surface on the inside of the board.
- Drill a hole in the front wall. Attach the bar that will secure the birdhouse to the back wall.
- Now you need to assemble the structure. Fasten the facade and side walls with wood glue, and while it dries, secure the parts with nails or self-tapping screws.
- Try to do so that there are no gaps left. Next, connect the bottom to the side and front walls in the same way. The back wall is glued and fixed last. Secure the perch.
- Make a protruding roof to protect from rain and wind. It is better to make it removable to make it easier to clean the birdhouse. Connect the smaller roof part with the larger one using self-tapping screws.
- The house can be painted and then securely fixed in the chosen location.

Making a birdhouse from a plastic bottle
There is also a very simple way to make a birdhouse from a plastic bottle. To do this, you need a plastic bottle; it is convenient to use a two-liter container; waterproof acrylic paints, preferably brown, green or beige; brush; stationery knife; scissors; glue for plastic things; drill and drill bits 1/4 and 1/16; pliers; wire; scotch. So, the algorithm of actions is as follows:
- First you need to make a round hole in a two-liter bottle. To do this you need a stationery knife. The hole should be made at a distance of 3 cm from the bottom.
- Next we install the perch. To do this, drill a hole with a drill, just below the finished hole and insert a long dowel there.
- Then we paint the bottle house with harmless paints that are resistant to moisture. It is advisable to choose dark colors (green, blue, brown). Feathered friends prefer the house to be dark. To add brightness to the birdhouse, you can decorate it with beautiful bright ribbons.
- The next step is to build a loop with which we can attach the house to a tree or pole. To do this, we drill two small holes in the bottle cap, through which we thread a wire and carefully twist the ends.
- Natural bedding material should be placed at the bottom of the bottle. This can be sand or twigs; hay or scraps of fabric will also work.
- The roof is made in the form of tiles. It can be made either from plastic blanks or from unnecessary disks. To do this, you need to cut out the desired shape of the workpiece and glue it one by one and paint it with paints.
- The bottle should be hung high on a thick tree trunk, where the birds will not be disturbed.

This is a very interesting way to invent a bird house. It can be done quickly within an hour; children really love to take part in making such a simple home for their feathered friends.

At the same time, a birdhouse made from a plastic bottle perfectly protects birds from wind, rain, and withstands external temperature changes.

Exclusive models of birdhouses
Of course, a bird house is an excellent decoration for every garden and personal plot. DIY birdhouse ideas can be very diverse and daring in their execution. When choosing an aesthetic design, remember to consider the birds' immediate needs. So a straw hat will look very nice as a house. Due to the fact that it is made of natural straw, the birds will feel very cozy and comfortable there.

You can make an original birdhouse with your own hands from stones. Many birds will like such a home; it will reliably protect our friends from external environmental influences.

There is a wide variety of carved wooden birdhouses. These can have complex, tall, intricate designs. Here the imagination of creative people has no limits. There are also no restrictions when choosing a color palette or accessories. The roof of such a wooden house can be dismantled with metal sheets. This will give it additional protection. If you wish, you can make a concrete composition using cinder blocks.

A birdhouse made from an old aluminum teapot or samovar looks unusual and exclusive. Such a bird house can become a highlight in any interior of your garden or plot.

All constructed structures can be decorated with unusual drawings, paintings, and ribbons. It is very interesting to decorate in the form of windows, doors, chimneys, fences and other details that imitate a real house. To decorate a birdhouse, you can use any available materials and, of course, your imagination. Do not forget the main rule that all decorative elements must be reliable and safe for birds.
Drawings and diagrams for birdhouses


Every gardener knows that birds are not only living “decorations” of our garden, delighting us with their sonorous trills from spring to autumn. These cute feathered creatures help us all summer, protecting our crops from insect pests and even small rodents. To lure birds to you, you need to provide them with a place to live. Therefore, it is worth training our skillful hands and learning how to make birdhouses from wood.
What you need to know before you get started
It's good if you already have experience in carpentry and carpentry. In this case, making such a simple structure as a birdhouse will not be difficult for you. But even if you are completely new to this business, it’s okay: we will tell you in detail how to make models of varying complexity. In any case, to work you will need the following tools:
- ruler;
- a simple pencil with a soft lead;
- hacksaw;
- nails or screws;
- hammer or drill (screwdriver);
- a drill of the required diameter to make holes;
- screwdriver;
- steel wire with a diameter of 1 mm;
- tow or clay;
- plane;
- sandpaper;
- glue;
- if necessary or desired - drying oil.
All these tools and materials should be at your fingertips while working, regardless of the level of complexity of the birdhouse being made.
We should also talk about the wood from which you will build the birdhouse. We strongly do not recommend using:
- coniferous wood (pine boards, etc.);
- plywood and any other similar glued compressed material.
Even after careful processing, softwood boards continue to release resin. This will make the walls of the birdhouse sticky, which is very harmful and even destructive for both adult birds and chicks. Fiberboard and chipboard are known for releasing toxins during operation that will not bring any benefit to birds. Plywood, seemingly the most convenient and inexpensive material, is also not suitable: it does not transmit sounds well, which is very important for ensuring safety.
Plywood does not retain heat well, which is so necessary when nursing chicks.
The best wood for a birdhouse is deciduous, for example, birch, aspen, oak, linden.
The optimal thickness of the board should be 20 mm - this is enough to maintain a suitable temperature inside the structure.
Note! The boards for the birdhouse do not need to be sanded; they must be rough at least on the inside of the product. This will make it much easier for birds to get out of their homes, clinging to uneven surfaces with their claws. It would be useful to make several notches on the board with a chisel.
Now let's talk about the size of the future birdhouse. Ornithologists argue that the structure should be compact to accommodate, in addition to adults, only 3-4 chicks. In this case, all offspring will have enough warmth, attention and food to grow healthy and strong. Otherwise, all the chicks from the brood will be weak, sickly and incapable of long flights.
The standard, optimal sizes of a birdhouse (house for small birds) are as follows:
- height - 30 cm;
- bottom width - 13–15 cm;
- taphole diameter - from 3.5 to 5 cm.
Important! Birds are different, and they need different houses. It's all about the shape, the size, and the design itself. There are many varieties of man-made bird houses, for example, there are titmice, sheep houses, nesting boxes, and triangular (wedge-shaped) dwellings. Therefore, if you know what kind of residents are on your site, do not be lazy and do exactly what they need.
So, the tools and materials are prepared, it’s time to get down to business.
Video: what to consider when making a birdhouse
Safety precautions
Working with wood requires following safety rules. When making even the simplest birdhouse, you can injure yourself with the tool or get a splinter in your finger. To prevent this from happening, remember the simple rules for carpentry and carpentry:
Instructions for making wooden bird houses with drawings and photos
Making bird houses can be quite a fun activity. It would seem like an ordinary birdhouse of a simple shape, what could be unusual about it? It turns out that bird houses can be made in several ways from different materials.
The simplest option with a pitched roof
Perhaps after renovation or construction you still have rectangular cuttings of suitable boards. They are ideal for building a birdhouse, and you don't have to look for materials.
We suggest you use a simple drawing of a birdhouse.
- Take the prepared boards and use a pencil to mark all the elements: bottom, lid, walls, according to their sizes in the drawing. In our case, the bottom is a square with sides of 13 cm; the back wall of the product is 4 cm lower than the front to provide the roof with a slope for rainwater drainage; There are cuts along the top of the side walls for slope.
Attention! For a removable roof you will need 2 parts: one of the same size as the bottom, the second of a larger size for the canopy.
- Saw off each element sequentially so that all paired parts have the same dimensions. At this stage, you can plan the outer surfaces of the boards with a plane..
- Make a round entry hole in the front wall. You can make it rectangular, but a circle shape is preferable.
The hole should be located at least 5 cm from the top edge; this distance will protect the chicks from encroachment by cats.
- Now you need to assemble the birdhouse. Fasten the facade and side walls with wood glue, and while it dries, secure the parts with nails or self-tapping screws. Next, connect the bottom to the side and front walls in the same way. The back wall is glued and fixed last..
Try to do so that there are no gaps left.
By attaching rubber layers to the ends or attaching the roof to hinges, you can protect the birds as much as possible from invading cats.
A simple, but at the same time convenient and reliable birdhouse is ready. All that remains is to secure it in the chosen place. But we’ll talk about this separately: there are a lot of options for installing and fastening birdhouses.
Video tutorial on how to make a simple birdhouse with a flat roof
Birdhouse with a gable roof
Now, using the same principle as in the previous paragraph, we will make the birdhouse a little more complicated. Its gable roof not only looks more beautiful, but also keeps rainwater and snow out even more effectively.
The drawing below shows all the dimensions of the parts.

If desired, you can paint the birdhouse with drying oil. This will help protect the wood from mold and pests. Painting with non-toxic water-based compounds is also allowed.
A house made of logs that can be made without a diagram - a hollow house
You can build a birdhouse not only from flat boards. There is a Russian folk version of a bird house, which is hollowed out from a piece of log and is called a nest box. When preparing firewood, you can easily cut off a piece of round log of suitable diameter, which will make a good bird house.

Video tutorial: original do-it-yourself birdhouse made from a log
A bit of design: decorating a house with wine corks
It turns out that corks are good for more than just closing wine bottles or using them for decoration. They are great for decorating the sides of a birdhouse. The advantages of the material are undeniable:

So, you will need:
- wine corks in the required quantity;
- prepared frame for a birdhouse;
- sharp knife;
- hot glue gun;
- wooden twigs.
It is not recommended to use a screwdriver when working with such material. The sharp tips of the screws can extend beyond the cork and injure birds. Therefore, we will use hot melt glue.
Progress:
- First of all, you need to make the walls. Apply glue to whole corks or cut edges of corks cut in half and glue them. For 1 row, depending on the width of the wall, you will need 2–3 plugs.
- Place the plugs on the glue against the walls of the birdhouse up to its roof. Where the frame structure narrows, use corks cut in half or even smaller. On the facade of the birdhouse, where the entrance is located, lay out the central row vertically.
- To decorate the roof, cut rounds of cork up to 5 mm thick and lay them like tiles.
- All that remains is to decorate the sides of the roof and the joints of its doors with moss, twigs or pieces of cork. Wait until the glue is completely dry and hang the birdhouse in the garden.
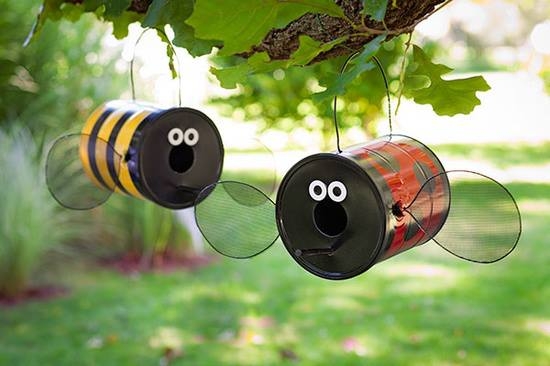
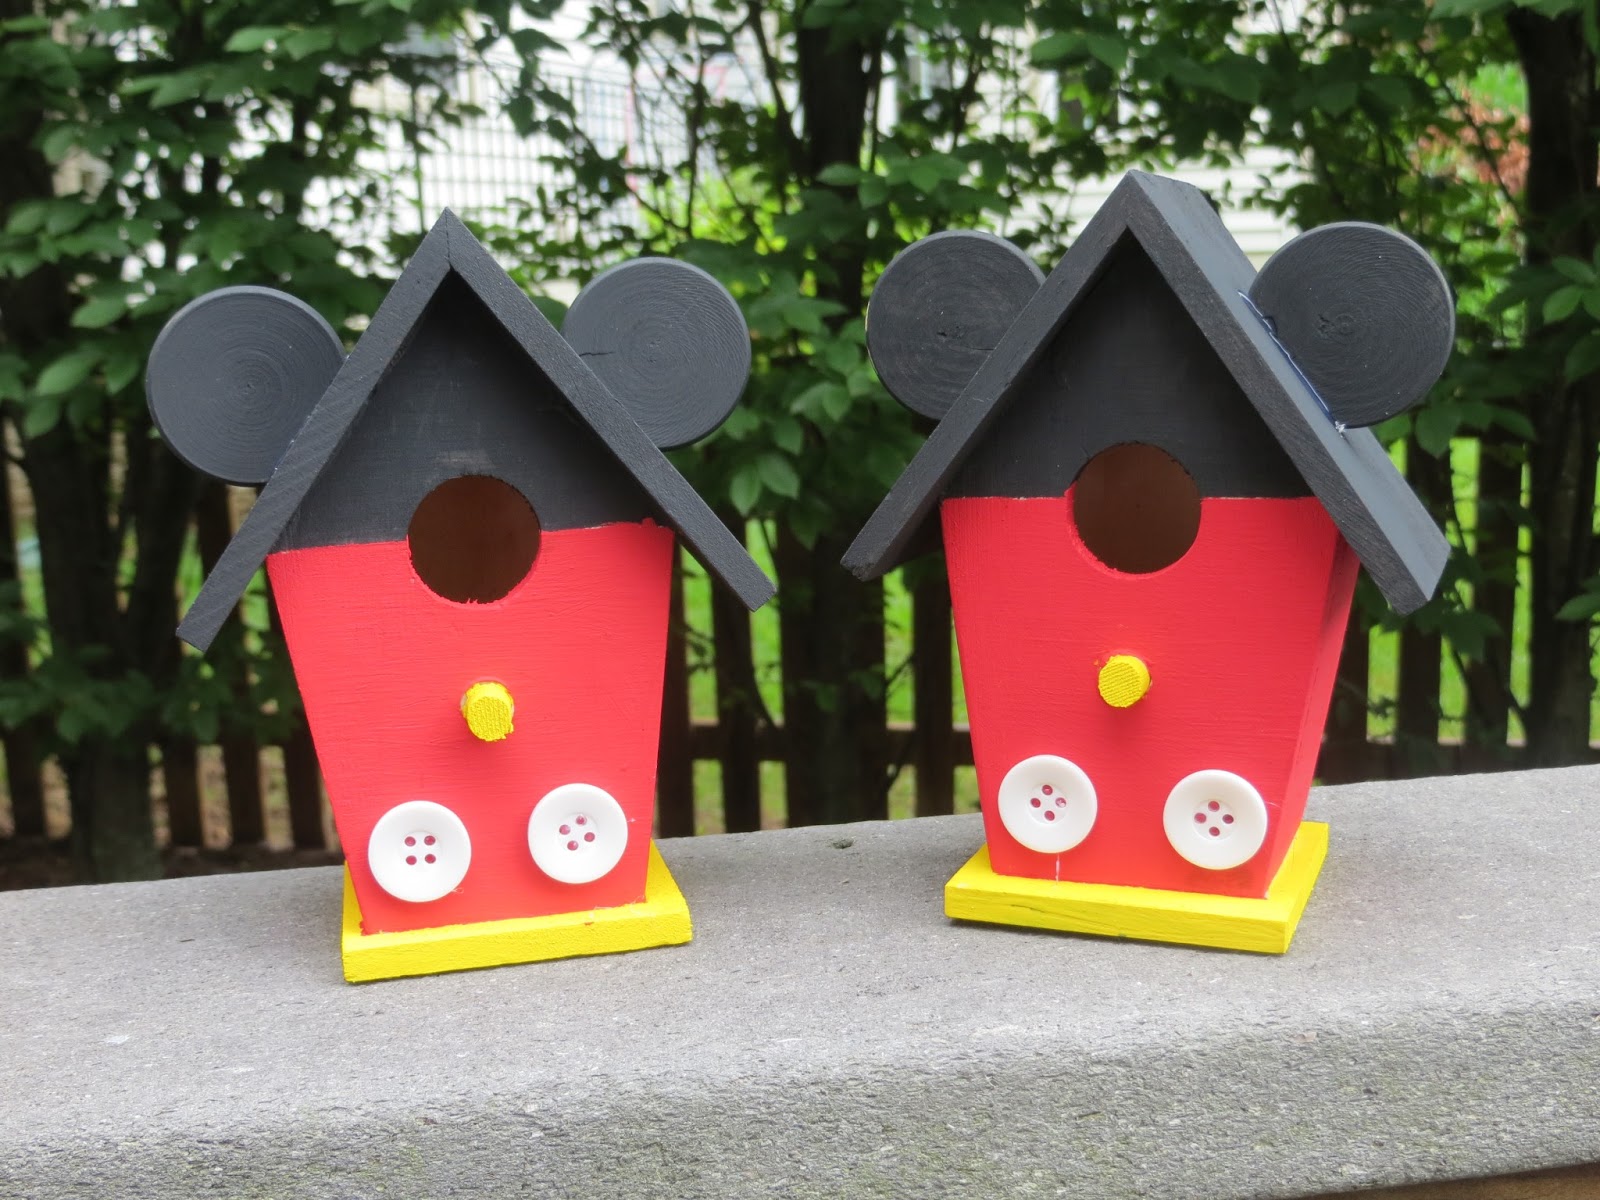
Photo gallery: how else can you design the finished product?
 A smiling birdhouse warmly welcomes future residents
  Let your children decorate birdhouses using decoupage technique
  You can design a birdhouse like a real house, with a window, door and fence
  You can decorate the birdhouse with Khokhloma painting
  You can build a birdhouse hut from small blocks of wood, as they say, without a single nail
  A simple birdhouse, the frame of which is covered with corks, looks like a beehive from afar
  Painting with waterproof acrylic paints is a real art
  Such a branded entrance
  You can completely paint the birdhouse on all sides
  Roof tiles can also be made of thin boards
  House for the Angry Bird
  European design that your child can easily handle
  Simple painting is one of the win-win options if it is done efficiently and accurately
The nuances of securing a birdhouse
When securing a birdhouse, it is important to adhere to two rules:
- It should be convenient for birds to approach the birdhouse and climb inside.
- Natural barriers must be maintained for cats and other predators.
The best place to install a birdhouse is a tall tree, the roof of a house or a pole. When securing the house, tilt it slightly forward: this will provide additional protection for the chicks.
So, attachment methods:
- Drive a medium-sized nail, hang a wire loop on it, bend it and hammer it into the trunk so that the loop does not fly off. Place the birdhouse in this loop and align it.
- You can nail the birdhouse at the ends.
- You can drive 4 nails into a post: 2 from below and 2 from above. Between the lower and upper ones, maintain a distance equal to the height of the birdhouse. Carefully place the house in the gap and press it against the post.
- It is better to simply screw the birdhouse onto a living tree with iron wire or rope. This can be done by nailing a wooden plank to the back wall of the house in advance, which will be attached with wire to the trunk.
Do not forget that your manipulations can harm the trees. It may be better to use nails if you are attaching the birdhouse to a wooden post.
And the location of the birdhouse has its own nuances:
- Firstly, the structure must be located at a height of at least 3–4 meters.
- Secondly, the tap hole should be directed in the direction opposite to the direction of the winds that prevail in the area.
- And thirdly, do not mount the birdhouse in an area exposed to the sun: the rays will quickly heat the wood, and the birds inside the house will feel uncomfortable.
Bird safety is also an important factor. The more branches there are on a tree, the easier it is for small predatory animals to get to the birdhouse.
If you are installing several bird houses, keep a distance between them of 50 cm or more. The fact is that starlings do not tolerate close proximity, especially with birds of other species.
Finally, we suggest watching a few more inspiring videos.
Video: how birdhouses are made in a carpentry workshop
Video: the simplest birdhouse made by a schoolchild
Building birdhouses is not only a useful activity for your garden, but also a pleasant pastime for the whole family. As you can see, making a bird house is not at all difficult, and even children can take part in this work with you. Please tell us in the comments which birdhouses you consider to be the best for birds, and what are the features of their manufacture. Good luck and easy work!
Share with your friends!Gardeners attract birds to their plots for a reason. It's nice to listen to birds singing, watch their behavior and the chicks growing up. And most importantly, the singing family is able to rid the garden of bugs and insects - pests. If you make DIY birdhouse and hang it among the fruit trees, there will be no need to use chemicals to kill insects in order to protect garden plants. Biologists have calculated that chicks can eat almost as much larvae and bugs every day as they weigh.
Who will live in the house?
As warm spring days approach, birds return home from warm regions. For swifts and wagtails, starlings and flycatchers, swallows and titmice in early spring there is not enough food, and there is nowhere to hide. It is impossible to predict which feathered family will settle in the prepared house. One thing is known: in order to feed their brood, starling parents bring their babies about a thousand larvae and beetles per week.
If birdhouse (with your own hands) made or bought in a store) will remain in the garden for the winter, sparrows or titmice will settle in it. However, with the onset of spring, the “legal” owners (starlings) will evict the tenants and take over the home.
For flycatchers, which also live in garden plots, huts are built that are smaller than birdhouses, but according to the same design. But for pikas you need a house with two additional through holes in the side walls.

The size of the entrance to the house for tits should be no more than 3-3.5 cm. And housing for wagtails should have not a perch at the entrance, but a small stand - a ladder. This bird's paws do not have sufficient tenacity.
Important! Before you start making a shelter for birds, first decide for whom exactly it is intended, since the dimensions of the home must correspond to the size of the bird.
How does a nest box differ from a feeder?
During the frosty and snowy winter months, people help birds survive. Small devices and devices for feeding birds are called “feeders”. Little birds are treated not only to bread crumbs. Tits love to peck pieces of lard. Other birds will not refuse rowan grains and berries. Feeders look like hanging mini verandas. These are original bird canteens in the open air.
DIY birdhouse make it more closed. In such houses, the feathered family builds a nest in the spring and hatches chicks. This home should be inaccessible not only to predatory crows, but also to cats. If a feeder can be made even from an ordinary plastic bottle, then a house for permanent residence should be not only strong, but warm and reliable.
“Duplyanka” is a birdhouse made from a single piece of log with a hollowed out core. The round entrance resembles a natural hollow, which gives the house its name.

What materials do craftsmen use to make a home for birds? Natural ones are best suited, such as:
- tree;
- plywood;
- rough boards;
- waterproof cardboard;
- Lagenaria pumpkin.
To improve their moisture-resistant properties, ready-made birdhouses are treated on the outside with a protective agent.
Important! Birds do not like the strong smells of paint and drying oil. Therefore, acrylic enamels or wax impregnations are used for coating.
About bird houses and design ideas
Even an old sneaker can find a “second life” as a birdhouse if you attach it to a board and then to a tree with the heel side up! The birds will be happy to live with him.

It will be very warm DIY birdhouse, made from pieces of thick felt or knitted from coarse woolen threads. An additional roof made of plastic or tin must be fixed over such houses to protect against rain.
Important! Housing should be comfortable and safe for the feathered family and their chicks.
One of the interesting and easy-to-make options is a bird house made from a gourd pumpkin (lagenaria).
The sequence of work is as follows:
- take dried fruit without cracks or damage;
- wash its surface with a rough sponge and hot water to remove possible contamination;
- dry thoroughly;
- mark with a simple pencil the place for the entrance (entrance to the house);
- Use a sharp knife to cut a hole and clean its edges with a piece of sandpaper;
- shake out the seeds from the pumpkin;
- use an awl to pierce a hole under the tap hole and insert a stick pre-lubricated with PVA glue into it;
- pierce the top of the pumpkin across the “tail” and thread strong twine into the hole;
- lovers of drawing will be able to color an unusual DIY birdhouse;
- cover the finished house with a protective layer of acrylic varnish;
- hang a designer bird shelter from a tree or pole.
Such an unusual and beautiful nesting box will serve as a decoration for the garden and will bring double benefits. After the mature chicks fly out or in the fall, the product is removed, freed from feathers, straw and other residues, disinfected, dried and put away until next spring.
Simple and cost-free
The most budget-friendly option for making a birdhouse is a house made from a juice bag. Prepare 15-20 wooden ice cream sticks in advance. The bag is washed from the remaining juice, dried, a hole is cut with a knife for entry with a diameter of 5-6 cm. The entire surface of the bag is glued with sticks from the outside (so that it looks like a hut). From the inside, a small rough board is attached to the front wall so that the chicks can get out. A rope is threaded through the top of the bag, using which the house is hung from a tree branch. The Teremok is ready to receive guests.

Classic wooden birdhouse
With your own hands you can make not only a simple hut, but also a fairly solid home for your feathered friends. You will need the following tools and materials:
- wooden planks up to 2 cm thick;
- pole and wire for attaching the birdhouse;
- ruler or square;
- a simple pencil;
- hammer;
- screwdriver;
- jigsaw or saw;
- drill;
- PVA glue;
- nails or screws.
The blanks are marked on the boards and cut to size.

On the front wall, a taphole with a diameter of 5-6 cm is sawed at a height of approximately 10-15 cm from the bottom. Traditionally, the entrance hole is made round, and its dimensions must correspond to the size of the future residents. This must be taken into account so that neither the crow nor the cat can climb into the nest and drag the chicks away.
A hole is drilled just below the entrance and a stick 8-9 cm long is inserted into it. On this perch the birds will rest and announce the surroundings with their trills. Sometimes this stick is also used by the enemies of starlings and flycatchers.

The lid is attached at an angle to prevent water from getting inside the house. To do this, 2-3 cm is cut off on both side walls towards the front part. The inclined plane of the roof, in addition, prevents predators who have climbed onto the birdhouse from maintaining their balance.
Important! The inside of the front wall must be rough, otherwise the chicks will not be able to get out. If the boards are smooth, small notches are made on their surface.
Assembly of finished house parts
First, nail the pole to the back wall of the birdhouse. The sleeve strips are then attached to the inside of the lid. Moreover, there should be a distance in front for the visor. The next step is to connect the back wall to the side parts and nail the bottom, attach the front front wall. All parts must be connected tightly, without gaps or cracks. When using nails, pre-drill small holes at the joints. This is done to prevent the wood from bursting.

The lid is not nailed down, but inserted tightly on top. This is done in order to subsequently easily care for the birdhouse after it is released by the birds. The roof should protrude forward a few cm, creating a small canopy over the entrance.
Important! During work and assembly, you must ensure that no nail points stick out on the inner surface of the walls. Otherwise, the birds that will live in the hut may get injured.
How to secure a birdhouse
After completing assembly, it is important to choose the right place where it will hang. birdhouse. With your own hands you need to prepare a strong wire. You should not nail the pole with the house to the tree. It is tightly attached at a height above 3 meters, attached with wire to the trunk.
It is recommended to hang the bird house with a slight slope forward. To do this, use a small board, which is placed under the upper part of the back wall when installing the birdhouse. This step will protect the nest from rain and make it easier for the chicks to get out.
Important! The bird house is mounted in such a way that the entrance faces south or southeast. Then cold winds will not blow inside and the chicks will be warm and comfortable.
Both feeders and nesting areas for feathered singers are not located in open space. Birds are very cautious and shy. They will only use the houses if they feel safe.

Do I need to care for birdhouses?
Then the home is dried, ventilated and cleaned until the next bird season.

Many gardeners renew paints and exterior surfaces in advance to ensure that all odors are gone by spring. And in mid-March and early April, install cozy bird houses on your site.
Building birdhouses is a long-standing and very useful tradition. Step-by-step instructions on how to make a birdhouse with your own hands will help you make it quickly and easily. You can also start building houses with children; this is a great way to keep your child busy and teach him to do manual labor.
How to make a birdhouse with your own hands from wood
This is what classic wooden birdhouses look like
A wooden birdhouse is the most durable and reliable house, but the work to create it is also the most labor-intensive. But the result can exceed your wildest expectations.
To build a wooden birdhouse, you will need:
- pine planks 1.5–2 cm thick and 12, 16 and 20 cm wide;
- round rail for the perch;
- electric jigsaw or hacksaw;
- drill;
- Phillips screwdriver or screwdriver;
- sandpaper or sanding machine;
- ruler;
- marker;
- self-tapping screws;
- carnations;
- hammer;
- paints, varnish and brushes (for decoration).
It is better to take hardwood boards
Manufacturing instructions
How to do:
- Create a drawing of the future house and mark the wood according to it. First make markings for the front and back walls.
If you decide to trim a tree before marking, do it with glasses so that sawdust does not get into your eyes, and with gloves so that you do not have to remove splinters
- Then - the side walls.
These are the optimal birdhouse sizes
- Mark the roof. This birdhouse has a gable roof; you need to make two parts. All parts are cut out using a jigsaw or hacksaw.
The future roof of the birdhouse can be gable or single-pitch
- Mark the mounting holes. The boards are quite thick; the center of the holes should be 7–10 mm from the edge. In this case, the screws will accurately hit the middle of the end of the adjacent part.
Sawing and marking of parts should be done sequentially
- On the front wall, mark a place for the entrance (entrance to the birdhouse).
The diameter of the taphole should not be less than 4.5 cm, and the height from the bottom edge should not be less than 20 cm
- A little lower, mark a hole for the pole-perch on which the bird sits before entering the house. Using a drill with a drill bit of the same diameter as the self-tapping screws, drill the intended holes.
- You can start assembling. First, the pole is attached using a thin self-tapping screw.
Instead of a perch, you can make a shelf
- Assemble the walls of the birdhouse, fastening them in any order with self-tapping screws.
The boards must fit tightly together
- Install the bottom.
The assembled structure must be checked for strength
- Assemble the roof and attach the pipe using a self-tapping screw screwed in from the inside.
Screws or self-tapping screws are used
- Reinstall the roof.
A pipe on the roof of the house will look elegant
- To attach the birdhouse to the tree, attach two loops to the back wall. Decorative details are attached using nails and narrow slats. For reliability, you can glue them with moisture-resistant glue.
It is best to attach a birdhouse to a tree with wire
- Paint the product as your imagination dictates.
It is best to use odorless paints
By the way, bird houses first appeared in Russia during the time of Peter the Great, and the idea of artificial nests was discovered in Western Europe.
Making a birdhouse out of a box
A cardboard box may become wet when exposed to rain, so you will have to additionally cover the surface with laminated paper or varnish.
Such houses are easier to make than wooden ones
Required tools and materials
It is better to take very thick corrugated cardboard
To create a birdhouse from a cardboard box you will need:
- corrugated cardboard;
- glue;
- carpenter's tape;
- self-adhesive laminated paper;
- stationery knife;
- scissors;
- ruler;
- marker;
- compass or circle with a diameter of 4.5–5 cm.
Manufacturing instructions
It is easier to make a birdhouse out of cardboard than a wooden one, but the cardboard house will also serve less.
How to do:
- In accordance with the selected dimensions, all parts are cut out of corrugated cardboard in duplicate.
Such blanks are made faster than wooden ones, but require no less attention
- Using glue, identical parts are connected. This is done to increase the strength of the structure. An entrance is cut out in the front wall with a utility knife, and holes are made in the back wall for string, with which the birdhouse will be hung from a tree.
Finished parts are glued together in pairs
- The body parts are glued together. To increase strength from the inside, the joints can be glued with carpentry tape.
The walls are glued together end-to-end
- The roof is assembled from two parts. The smaller one is located inside the case. It should protrude 1.5–2 cm beyond the body. For strength, cover the edges of the roof with colored plastic tape.
Be sure to cover the roof; in this case, the birdhouse will honestly serve until the end of the season
- To make the house last longer, it needs to be covered with self-adhesive paper or varnished.
You can entrust the finishing to your child
You can also make a bird feeder at the same time. The photo below shows an example of the simplest feeder. While you will make a birdhouse from more complex materials, a child can make such a feeder.
Tell your child what feeders are for and how important they are for birds in winter.
The entrance to the birdhouse should be directed to the south, east or southeast so that the wind does not blow into the house.
This option is the easiest and most affordable
If you don’t want to tinker with wood or cardboard, then in a few minutes you can build a bird house from a plastic bottle. Of course, it will not be as cozy as the options described above, but the birds will be quite comfortable in it. Three- or five-liter containers are best suited for making a birdhouse. But if there are none, then you can get by with a standard one and a half liter bottle.
Required tools and materials
A plastic bottle is one of the lightest and most affordable materials.
It's better to remove the label
You will need:
- two one and a half liter and one liter bottles;
- about two meters of wire with a diameter of 2 mm;
- scissors or stationery knife;
- dye.
Manufacturing instructions
How to do:
Make sure that the top does not block the entrance
Don't forget to use odorless paints
This birdhouse is a great idea for a craft for kindergarten or school.
The total height of the birdhouse should be from 30 to 35 cm. The size of the bottom should be made from 10*10 to 15*15 cm. The distance from the bottom to the tap hole should be 15–20 cm. The diameter of the entrance hole (taphole) is 30–40 mm. It is worth noting that different sizes of the entrance will be optimal for different birds, so for a starling it is 32–35 mm, for a nuthatch it is 28–30 mm, for a tit or sparrow it is 25–29 mm.
Despite the general opinion that wild birds can eat anything, birds should be fed with caution, since they absolutely cannot eat some foods.
Ideal for feeding birds:
- sunflower seeds;
- millet, millet, oats and wheat;
- unsalted lard and meat;
- dried rowan and hawthorn;
- maple or ash seeds;
- nuts, cones and acorns;
- pumpkin and watermelon seeds.
You can give calcium supplements, for example, crushed egg shells.
It is strictly forbidden to feed birds rye and wheat bread, as the yeast in them can ferment. Birds should not eat seeds or skins of citrus fruits. And also you should not feed the feathered inhabitants with salty, fried, spicy and sour foods.
Making a bird house is not difficult, especially since modern industry provides a wide selection of materials. Making a birdhouse with your own hands is a fun activity. If you and your children liked to do construction, then you can provide housing for many inhabitants of the park or forest.
