Electricity from the ground with your own hands. The most unusual ways to get electricity. Emergency power source
From year to year, the cost of electricity in our houses and apartments is increasing, which makes most people think about saving it. But there are also those who are trying in every possible way to extract at least a little free energy, for example, electricity from the ground. Since the number of these people is steadily growing, it makes sense to consider the issue in more detail, which will be done in this article.
Myths and reality
There are a large number of videos on the Internet where people light 150 W lamps from the ground, start electric motors, and so on. There are even more different text materials that tell in detail about earth batteries. It is not recommended to take such information too seriously, because you can write anything, but carry out the appropriate preparation before shooting a video.
After viewing or reading these materials, you can really believe in various fables. For example, that the electric or magnetic field of the Earth contains an ocean of free electricity, which is quite easy to obtain. The truth is that the energy reserve is truly enormous, but extracting it is not at all easy. Otherwise, no one would use internal combustion engines, heat themselves with natural gas, and so on.
For reference. Our planet’s magnetic field really exists and protects all living things from the harmful effects of various particles coming from the Sun. The field lines of this field run parallel to the surface from west to east.
If, in accordance with the theory, we conduct a certain virtual experiment, we can see how difficult it is to obtain electricity from the earth’s magnetic field. Let's take 2 metal electrodes, for the purity of the experiment - in the form of square sheets with sides of 1 m. We will install one sheet on the surface of the earth perpendicular to the lines of force, and raise the second to a height of 500 m and orient it in space in the same way.
Theoretically, a potential difference of about 80 volts will arise between the electrodes. The same effect will be observed if the second sheet is placed underground, at the bottom of the deepest shaft. Now imagine such a power plant – a kilometer high, with a huge surface area of the electrodes. In addition, the station must withstand lightning strikes, which will definitely strike it. Perhaps this is the reality of the distant future.
Nevertheless, it is quite possible to obtain electricity from the ground, albeit in tiny quantities. It can be enough to light an LED flashlight, turn on a calculator, or charge your cell phone a little. Let's look at ways to do this.
Electricity from two rods
This method is based on a completely different theory and has nothing to do with the Earth’s magnetic or electric field. And this theory is about the interaction of galvanic pairs in a saline solution. If you take two rods of different metals and immerse them in such a solution (electrolyte), a potential difference will appear at the ends. Its value depends on many factors: composition, saturation and temperature of the electrolyte, size of the electrodes, immersion depth, and so on.

Such generation of electricity is also possible through the ground. We take 2 rods from different metals, forming a so-called galvanic pair: aluminum and copper. We immerse them in the ground to a depth of approximately half a meter, keeping the distance between the electrodes small, 20-30 cm is enough. We water the area of land between them generously with saline solution and after 5-10 minutes we take measurements with an electronic voltmeter. The meter readings may vary, but at best you will get 3V.
Note. The voltmeter readings depend on the soil moisture, its natural salt content, the size of the rods and the depth of their immersion.

In fact, everything is simple, the resulting free electricity is the result of the interaction of a galvanic couple, in which moist earth served as an electrolyte, the principle is similar to the operation of a salt battery. A real experiment about the potential difference across electrodes driven into the ground can be seen in the video:
Electricity from ground and neutral wire
This phenomenon also does not arise from the Earth’s magnetic field, but due to the fact that part of the current “drains” through the grounding during hours of greatest electricity consumption. Most users know that home voltage is supplied through 2 conductors: phase and neutral. If there is a third conductor connected to a good grounding circuit, then a voltage of up to 15 V can “walk” between it and the zero contact. This fact can be recorded by connecting a load between the contacts in the form of a 12 V light bulb. And what is typical, passing from the ground to “zero” current is absolutely not recorded by metering devices.
It is difficult to take advantage of such free voltage in an apartment, since reliable grounding cannot be found there; pipelines cannot be considered as such. But in a private house, where a priori there must be a grounding loop, electricity can be obtained. A simple circuit is used for connection: neutral wire - load - ground. Some craftsmen have even adapted to smooth out current fluctuations with a transformer and attach a suitable load.

Attention! Do not follow the lead of “good” advisers who suggest using a phase conductor instead of a neutral conductor! The fact is that with such a connection, the phase and ground will give you 220 V, but touching the ground bus is deadly. This is especially true for “craftsmen” who do similar things in apartments, connecting the load to the phase and battery. They pose a risk of electric shock to all neighbors.
Conclusion
Extracting electricity from the planet’s magnetic field with your own hands is unrealistic. The methods described above are another matter, but their practical value is small. Maybe charge your phone while hiking, but then you’ll have to carry metal pipes with you. Regarding the second method, it should be noted that the voltage between ground and zero does not always appear, and if it does, it is very unstable. Other methods require a large amount of copper and aluminum with an unknown result, which the author of the installation shown in the figure honestly warns about:

The energy potential of the Earth is unimaginably huge. The planet's magnetic field, together with solar radiation, contributes to the generation of colossal amounts of electrical energy. This is confirmed by electrical spark discharges in the form of lightning. During a lightning discharge, although very briefly, a power of about 100 million kW develops. The only problem is how to extract this energy and use it to your advantage.
Electric potential of the atmosphere
The potential difference between the earth's surface and the ionosphere is about 300,000 Volts. The electric field strength near the surface reaches 150 volts per meter (V/m) and decreases exponentially with increasing altitude. At an altitude of 30 km, the voltage value is about 1 V/m. At the ionospheric level, the field strength tends to zero, due to an increase in the conductivity of the medium as a result of ionization under the influence of solar radiation.
Many of us have felt the effects of atmospheric charge accumulation. For example, in dry, windy weather, when leaving the car, you can feel a discharge of static voltage. The fact is that the electric charge accumulates on the car thanks to the tires. Rubber tires are a good insulator that prevents the charge from flowing to the ground. When leaving the car, the accumulated charge from the body goes into the ground through our body in the form of a spark and a slight but unpleasant electric shock.
The idea of harnessing lightning energy looks tempting, but there are a lot of technical difficulties along the way. The enormous energy contained in lightning is very short-lived and unstable. You need to catch the discharge and direct the energy into some kind of storage device. Since the location of a lightning strike is unpredictable and the peak power is very high, modern technology does not have sufficient capabilities to cope with this task.
Theoretically, if you take two sheets of metal with an area of 1 m2 and space them at a distance of 500 m vertically relative to the surface of the earth, the voltage between them will be about 80 V. Obviously, the feasibility and efficiency of such a “power plant” is very doubtful, given the scale of the required structure for posting sheets.
Despite the fact that the Earth's atmosphere is literally saturated with electricity, there is no effective way to extract and use this energy today.

Ground battery
This method has nothing to do with the magnetic or electric fields of the planet. It is based on the phenomenon of the occurrence of electric current between dissimilar metal electrodes in an electrolyte environment.
Pins made of various metals can be used as electrodes. A pair of copper with aluminum or zinc has optimal efficiency. You can use a galvanized steel electrode. By driving the electrodes into the ground at a distance of about 20 cm and watering the ground between them with a solution of table salt, you can detect the presence of a voltage between the electrodes in the region of 3 V.
The efficiency of this power plant depends on many factors: soil moisture, salt concentration in it, electrode area, temperature and many others. By increasing the number of electrodes and using series-parallel circuits for connecting earth elements, it is possible to obtain different levels of voltage and power of the earth battery. By collecting about a hundred cells in series, it is quite possible to get 220V from the ground. The second option is to use a boost voltage converter.
Considering the quantity and cost of non-ferrous metals used, this method, like the previous one, is hardly justified economically. In addition, the saline solution will spoil the soil, making it unsuitable for plant growth.

Electricity from the neutral wire
As a rule, a three-phase network with a solidly grounded neutral is used to power residential buildings. Individual consumers are supplied with phase voltage from one phase and a neutral wire. If the house has a reliable grounding circuit with low resistance, then during periods of intense consumption of electrical energy, a potential difference is formed between the neutral wire of the supply network and the grounding conductor. This difference can reach 12-15 V. The problem lies in the instability of the voltage between zero and ground, which directly depends on the amount of power consumed by the house. The maximum voltage is achieved only at peak current consumption.
The methods of generating electricity described above are quite workable. Using pulse electronic converters, it is possible to obtain a voltage of any value. However, for actual use in everyday life, the described methods are not suitable due to the very low power of such current sources. The exception is a circuit with metal electrodes, but to achieve acceptable power, you will need to occupy a large area with metal pins and periodically water it with a salt solution. Getting enough electricity from the ground to use is not as easy as it seems. Despite the fact that magnetic and electric fields envelop the planet, today there is no technical possibility to use this potential. Such methods cannot be considered as a source of energy supply to the home. With your own hands, you can only build a power source for a pair of LEDs, a clock or a radio with a very low level of power consumption.
Where to get energy? It is no secret that people will sooner or later exhaust the reserves of oil, gas, coal and even uranium that still remain on the planet. A completely reasonable question arises: “What to do next? Where to get energy? After all, our whole life is based on the use of energy. It turns out that after hydrocarbon reserves run out, the existence of civilization will end?
There is an exit! These are the so-called alternative energy sources. By the way, many of them are being used, and successfully, already at the present time. The energy of wind, tides, sun and geothermal sources is successfully used and converted by people into electricity. But that's how to put it.
Currently, there are hundreds of theories and developments on the creation and use of unusual alternative energy sources. The alternative energy sources described in this article are unusual only in the sense that they have not yet become popular, are not widely used, are impractical, unprofitable, etc.
But this does not mean at all that they will not be able to be effectively used, perhaps in the very near future. After all, oil as a source of energy has been known since ancient times, but only since the end of the industrial revolution, oil could be obtained and processed into a usable form.
It is not known what we will use to generate energy in the future, but there are certainly alternatives to traditional energy sources, and it is quite possible that at least one of the methods listed below for generating electrical energy can become widespread and popular.
Here are 5 unusual alternative energy sources that give rise to real hope for efficient use in the future:
The first experimental power plant using salt water was created by Statkraft in Norway. A power plant uses the physical effect of osmosis to generate electricity. Through this effect, energy is extracted from the increasing entropy of liquids by mixing salt and fresh water. this energy is then used to rotate the hydraulic turbine of an electric generator.
Demonstration power plants using solid oxide electrolyte fuel cells with a capacity of up to 500 kW have been developed. In fact, the element burns fuel and directly converts the released energy into electricity. It's the same as a diesel electric generator, only without a diesel engine and a generator. And also without smoke, noise, overheating and with much higher efficiency.
The thermoelectric effect is used to generate electrical energy. This is a fairly old technology, which has again become relevant in our time due to the massive use of energy-saving light sources and various portable electrical receivers. Industrial developments already exist and are being successfully used, for example, heating and cooking furnaces with built-in thermogenerators, which during their operation make it possible to obtain not only heat, but also electricity.
Experimental installations have been created that make it possible to generate electricity through the use of kinetic energy - pedestrian paths, turnstiles at railway stations, a special dance floor with piezoelectric generators built into it. There are ideas in the near future to create special "green gyms" in which a group of exercise bikes could, according to the manufacturers, generate up to 3.6 megawatts of renewable electricity per year.
In this case, the energy source is a special nanogenerator that converts micro-oscillations in the human body into electrical energy. The device only needs the slightest vibrations to generate an electric current that allows it to maintain the functionality of mobile devices. Modern nanogenerators turn any movement and movement into a source of energy. Options for the joint use of nanogenerators and solar batteries are very promising and interesting.
What do you think about this? Perhaps you are aware of other new alternative sources of electricity. Share in the comments!
The idea of obtaining free electricity is using the potential difference between the network zero and the ground.
A small disclaimer: this method of generating energy works 100 percent. This is not a hoax, some incomprehensible device that draws electricity from the ether, some kind of miracle device on magnets, etc.
We will use the voltage difference between the 220 V network zero and ground.
In simple terms, there are wires from the power plant to consumers - zero and three phases. Since the wires have their own resistance, therefore, there will be a voltage drop on them. This is the tension we will catch. This potential also creates a phase imbalance.
It is legal?
Yes, the power grid is not punished for this, since we will not use the phase. And in fact this is not theft.Will electric meters take this energy into account?
It all depends on the type of electricity meter. There are meters with one shunt (with one measuring element) - the most common and two-shunt (with two measuring elements). One shunt I just don’t take into account zero - since their measuring shunt is located on the phase.How much electricity can you get?
It all depends on the number of subscribers in the network and the power of all wiring. Usually it's somewhere between 3-10 volts. If you connect a step-up transformer, you can light an LED lamp. The voltage after the step-up transformer is about 100-220 V.Scheme

Any transformer from a radio, tape recorder, etc. It is advisable to use a low voltage of 3-9 Volts on the secondary winding.
Please note that you use all manipulations at your own peril and risk.
Precautionary measures
Be sure to install a 5-10 ampere fuse or circuit breaker in the circuit between zero and the transformer. This is necessary so that the entire structure does not burn out if the phase with zero is suddenly changed. The probability of this event is, of course, negligible, but you need to be prepared for anything. Rather, there is a high probability that the zero will break - and this happens all the time. And the machine gun will definitely save you.Even when working with zero, be sure to turn off the network. Well, even free light should not be left unattended.
Electricity is becoming more expensive every day and it’s time to learn how to generate energy yourself, but it’s not difficult, read carefully. The article describes how free energy for the home is obtained from the energy of air and earth with your own hands.
DIY energy from thin air
We create a wind generator with our own hands at home
A simple, low-power windmill can be created at home. Based on the selected type of wind generator, you can begin assembling it. An example of wind generator assembly will be considered on a hybrid model that combines a Darrieus and Savonius generator. Rotor assembly The base of the rotor will be made up. 6 neodymium magnets of type D30xH10 mm, followed by 6 ring magnets made of ferrite D72xd32xH15 mm and two metal disks D230xH5 mm, the parts will be fixed using epoxy resin and glue.
DIY windmill rotor On each of the metal disks, 6 neodymium magnets are placed, and their polarity must be alternated and placed at an angle of 60 degrees, the diameter of the circle of the installed magnets should be 165 mm.
 Rotor dimensions
 Rotor dimensions Ring magnets are placed on the second disk in a similar way. In order for the magnets to “sit” firmly in their places during operation, they are filled with epoxy resin.
Assembling the stator
The basis for the stator will be 9 coils with 60 turns wound on each, the thickness of the wire used should be 1 mm. Next, the 1, 4, 7 coils for the first phase, 2, 5, 8 for the second phase and, respectively, 3, 6, 9 for the third are connected in series.
The supporting frame of the wind turbine consists of:
- Square profile pipe 25x25 mm with a wall thickness of 2 mm, length 920 mm.
- Adapter flange with a diameter of 50 mm from a square pipe to a round pipe with a diameter of 50 mm
- A pipe made of a water pipe with a diameter of 50 mm and a length of 150 mm
- Self-tapping screws 19 mm (3 pcs.)
If you have the opportunity to use a welding machine, then weld a piece of 50 mm pipe to a 15 cm long square pipe, without using an adapter flange or self-tapping screws.
Engine mount:
- Diode bridge (30 – 50 A)
- Clamps for mounting an engine with a diameter of 60-80 mm (2 pcs.) or two bolts with M8x40 nuts.
- A piece of PVC pipe with a diameter of about 75 mm and a length of 280 mm
Tail rudder:
- Square piece of thin sheet metal or tin 300 x 300 mm
- Self-tapping screws 4 x 19 mm (2 pcs.)
- A piece of PVC pipe with a diameter of 200 mm, a length of 600 mm with a wall thickness of 5-6 mm. For example, PVC sewer pipe class SN8 200×5.9 - 1000mm.
- Bolts M6x20 mm (6 pcs.)
- Washers 6 mm (9 pcs.)
If you lift a pipe with a wall thickness of 1-2 mm, then with strong gusts of wind the blades will bend and may collapse.
Blade cutting
To make the blades, you need to cut the pipe into four identical plates 145 mm wide. From one piece of pipe you should get four plates with a width of 145 mm and one slightly smaller. This will be three sets of blades (nine in total) and a piece of waste. Place a 60cm long PVC pipe on a table, floor or any flat surface. Draw a straight line along the axis of the pipe using a piece of square pipe (you can use a meter ruler or any other sufficiently long object with a straight edge). Let's call this line A.
Take a tape measure and set a 145 mm measurement from line A at each end of the pipe, make marks at each end of the pipe. Connect the resulting marks with a straight line along the axis of the pipe. Repeat the described operation three more times. We will get four sectors 145 mm long and the last segment should be about 115 mm long.
You have four identical sectors measuring approximately 75 degrees and one sector measuring 60 degrees. Cut the pipe along these lines using a jigsaw, so that you get four strips 145 mm wide and one about 115 mm wide.
Lay out all the strips with the inner surface of the pipe facing down. From one sector we get two blades. To do this, make marks on each strip along the narrow side at one end, retreating 115 mm from the left edge. Repeat the same from the other end, retreating 30 mm from the left edge. Connect these points with lines, intersecting the strips of the cut pipe diagonally.
Cut the plastic along these lines using a jigsaw. Place the resulting pipe sectors with the inner surface of the pipe down. Now let's cut off the corner at the base of the blade. To do this, make a mark on each along the diagonal cut line at a distance of 75 mm from the wide end of the blade. Make another mark on the wide end of each blade 25mm from the long straight edge. Connect these points with a line and cut the resulting corner along it.
This will prevent the blades from being twisted by side winds.
It must be like this
Blade processing.
From the resulting blanks, we need to give the future blades an aerodynamic shape. The figure shows a cross-section of the blade profile. You must file and sand the blades to achieve the desired profile. This will improve their efficiency and also make them spin quieter.
The leading edge should be rounded and the trailing edge should be pointed. To reduce noise, any sharp corners should be rounded. Just don't get carried away. The blades should not be thin.
Cutting out the tail rudder.
The dimensions of the tail rudder are not critical. You need a piece of thin sheet measuring 300 x 300 mm, preferably thin metal or tin. You can cut the tail rudder into any shape, the main criterion is its rigidity.
To drill holes in the blades, use a 6.5 mm drill. Mark two holes on the wide end of each of the three blades along their straight (back) edge. The first hole should be 9.5mm from the straight edge and 13mm from the bottom edge of the blade. The second is at a distance of 9.5 mm from the straight edge and 32 mm from the lower edge of the blade.
Drill these six holes into the blades.
The treadmill motor comes with a bushing attached to it. To remove it, tightly secure the shaft protruding from the bushing with pliers and turn the bushing clockwise. It unscrews clockwise, which is why the blades rotate counterclockwise.
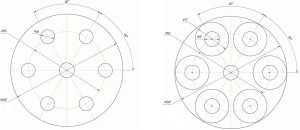
- Make a template for the sleeve on a piece of paper using a compass and protractor.
- Mark three holes, each 6 cm from the center of the circle and equidistant from each other.
- Place this template on the sleeve and punch pilot holes through the paper at the marked locations.
- The accuracy of installing the blades at an angle of 120 degrees to each other and, accordingly, balancing the wind wheel depends on how the holes are drilled in the hub.
- Drilling holes in the bushing is carried out in two stages. First, holes are drilled that are closer to the center of the bushing. Drilling and tapping holes in the bushing - use a 5.5 mm drill and an M6 tap
- Screw the blades to the hub with three M6x20 mm bolts, one for each blade. At this moment, the outer holes close to the boundaries of the bushing have not yet been drilled.
- Measure the distance between the leading edges of the tips of each blade.
- Adjust them so that you form an equilateral triangle and all the tips of the blades are equidistant from each other.
- Mark and tap the top second hole on the hub through the hole in each blade.
- Make marks on each blade and bushing so that you do not mix up where each one is attached at a later stage of assembly.
- Unscrew the blades from the hub and drill and tap these three outer holes.
Manufacturing a protective casing for the engine.
- On our piece of PVC pipe with a diameter of 75 mm, draw two parallel lines along its length at a distance of 20 mm from each other.
- Cut the pipe along these lines.
- Cut one end of the pipe at a 45° angle.
- Place needle-nosed pliers into the hole created and inspect the pipe through it.
- Align the bolt holes on the motor down the middle of the slot in the PVC pipe and place the motor into the pipe.
Final assembly of the wind generator
Place the motor on the square pipe and screw it to it using clamps or bolts if there are holes for mounting.
Place the diode on a square pipe behind the motor at a distance of 5 cm from it. Screw it to the pipe with a self-tapping screw.
Connect the black wire coming out of the engine to the “positive” incoming contact of the diode (it is marked AC on the “plus” side).
Connect the red wire coming out of the engine to the “negative” incoming contact of the diode (it is marked AC on the “minus” side).
To attach the tail rudder, position it so that the end of the square pipe opposite the one on which the engine is located runs through the middle of the rudder. Press the steering wheel against the pipe using a clamp or vice.
- Screw the shank to the pipe using two self-tapping screws.
- Place all the blades on the hub so that all the holes line up.
- Using M6x20 mm bolts and washers, screw the blades to the bushing.
- For the three inner circle holes (closest to the hub axis), use two washers, one on each side of the blade.
- For the other three, use one at a time (from the side of the blade closest to the bolt head).
- Pull tight.
- Securely secure the motor shaft (which went through the hole in the bushing) with pliers and, with the bushing on, turn it counterclockwise until it is completely screwed in.
- Using a gas wrench, tightly screw the 50 mm diameter pipe to the adapter flange.
- Install the pipe vertically into some device so that the flange is located horizontally (for example, in the hole in a tabletop or in a vice).
- Position the square pipe carrying the motor and tail on the adapter flange so that it is in balance.
- Once balanced, mark the square tube through the holes in the flange to install the screws.
- Drill two holes with a 5.5mm drill bit. For convenience, remove the tail and adapter sleeve so that they do not interfere with drilling.
Screw the supporting square pipe to the flange with two self-tapping screws.
The final touch that will give your wind generator an original look will be its painting. Here you can do everything as you wish. The only recommendation in order to extend the life of your wind generator is to choose weather-resistant exterior paint.
After painting, install the casing on the generator and secure it with two clamps. The wind generator is ready.
In the simplest version, we get a voltage of 3 V. This, of course, is not enough for a home, but the system can be complicated, thereby increasing the power.
Neutral wire – load – soil
Voltage to living quarters supplied through 2 conductors: phase and neutral. When creating a third, grounded conductor, a voltage of 10 to 20 V arises between it and the zero contact.
This voltage is enough to light a couple of light bulbs. Thus, to connect electricity consumers to “ground” electricity, it is enough to create a circuit: neutral wire - load - soil. Craftsmen can improve this primitive circuit and obtain a higher voltage current.
Many thanks to the sites for the excellent material: www.0el.ru,lidol.ruotlad.ru
