How to divide a large phalaenopsis orchid. How to properly plant an orchid at home. Possible errors during reproduction
How to plant an orchid? This question invariably arises from the owner of this beautiful flower. Essentially, you need to replace the soil once every three years, and also for emergency reasons, which you will learn about below. If you do not replant orchids, this will result in sad consequences: greasy and compacted substrate, inability of the root system to fit into the pot, rotting, etc. Let's figure out why, under what conditions and when to replant orchids.
Remember! Replanting an orchid should not be done just like that, because the plant takes a long time to get used to its new place of residence. You need to disturb a flower only if there is a good reason. It is advisable to do this in spring, when the orchid enters the active growth phase.
Reasons for planting orchids
The reasons for planting orchids can be planned or emergency. The planned ones include changing the substrate every two to three years (depending on the quality) due to its compaction and decomposition. This allows you to maintain comfortable living conditions for the orchid.
Emergency reasons include the following:
- Soil decomposition occurs quickly.
- Root system rotting.
- The appearance of harmful insects in the substrate.
- The root system does not fit into the pot.
Most orchids purchased in stores are hybrids. They are adapted to growing at home and can bloom for a long time (up to six months), but they do not have a resting phase as such. That is why it is difficult to choose the most suitable time for transplantation. Most experts are inclined to believe that plants need to be replanted in the spring (this is the very beginning of the active growth stage) or after flowering (when the flowers fall and before budding).
Step-by-step algorithm
The step-by-step algorithm is simple, but requires some preparation. First, make sure you have inventory. We need a basin or other large container in which we will clean and process the root system. Also make sure you have a flower pot that will fit the size of your particular orchid. You can’t do without the following devices:
In principle, you can purchase a ready-made substrate. However, experienced flower growers recommend preparing it personally, using high-quality ingredients. In this case, it will be possible to achieve full development and growth of the plant, reliable protection from diseases and pests.
Now you can start transplanting. Proceed, adhere to the following algorithm:
Remember! The root collar, or rosette, does not go deep into the substrate, but remains on the surface.
How to plant baby orchids?
How to plant baby orchids? The planting process itself is similar to transplanting an adult orchid, but there are some subtleties that you need to know. In particular, you should understand what a child is. This is the name given to a small plant that forms on the mother specimen: in leaf axils, on peduncles, on the trunk (from dormant buds), on the roots. The location of appearance depends on the type of orchid.
You can plant the baby in a separate container after its roots reach at least two centimeters in length and at least 3-4 leaves appear on the stem. In principle, the roots indicate the readiness of a young plant to grow independently.
You need to separate the baby from the adult using a sharp, disinfected instrument. In this case, a small part (up to 1 cm) of the baby is left. You can completely cut out the baby only from the axil of the leaf. Then the cut sites on both the child and the adult must be treated with an antiseptic (ground cinnamon or crushed activated carbon). It remains to dry well.
Take a small transparent container with a hole in the bottom. Next, lay out a small layer of drainage. Install the baby and, holding it, fill in the substrate. Be careful not to damage the roots. Now you need to build a greenhouse to ensure the growth of the plant. A plastic bottle, glass jar or plastic bag will do. You can water the baby three days after planting. Sphagnum moss can be used to maintain moisture. Remember that the baby must grow for at least a year, and only then can it be cared for like an adult.
Advice! Immediately before planting in the substrate, it is advisable to soak the plant’s roots in water with growth stimulants. This will ensure accelerated growth of the root system.
Features of cuttings at home
You need to know the features of cuttings at home if you want to propagate orchids in this way. By the way, it is considered the most difficult and time-consuming. But at the same time, if everything is done correctly, the method is quite effective. Please note that cuttings are only suitable for monopoidal and fast-growing orchid species, such as vanda or dendrobium. In principle, you can use the method for sampodial orchids, but the result will be slightly worse.
You can resort to cuttings only after the orchid has completely faded.
Cuttings are performed as follows:
- Cut the side shoot into cuttings, each 6-10 centimeters long. In this case, each cutting should have at least 2-3 dormant buds.
- Treat the cut areas with cinnamon or activated carbon. Dry for five hours.
- Place the shoots horizontally on a nutrient substrate (wet sphagnum moss or a special product, as in the photo, will do) and leave it like that until roots appear (at least five of them).
- Plant the cuttings in the substrate, placing them vertically. Keep in mind that you need to maintain a temperature of 23-25 degrees and a humidity of 30%-40% in the room, and also do not forget about sufficient lighting, but without direct sunlight.
Note! You can also take cuttings from a faded peduncle. The only difference is that the length of one cutting should be about 10-15 centimeters.
Reproduction in different ways
Flower propagation can be done in different ways: by aerial roots, bulbs and by dividing the bush. The method of planting by means of aerial roots is considered the simplest and most accessible for every gardener. It is used for mature and well-grown plants. The procedure boils down to dividing the roots. The separated part is then simply planted in the substrate and waits for the plant to grow.

Dividing an orchid bush is a method suitable for sympoidal species, which include cymbidiums, dendrobiums, cattleyas, odontoglossums, oncidiums, miltonias, etc. The reason is that these plant varieties have several growing points, so the rhizome can be easily divided into separate parts.
So, first the plant needs to be soaked in warm, settled water for half an hour, and then cleaned of the old soil. Using a disinfected sharp object, you need to divide the rhizome so that at least three pseudobulbs remain in each part. The cut areas need to be processed, the plant dried, and then planted in a prepared container with substrate.
It is rational to plant with bulbs if the orchid is cramped in the pot. The procedure is performed during a planned transplant. The algorithm is as follows:
- Remove the plant from the container in which it is growing.
- Clean the roots from the substrate by soaking.
- Cut the bulbs using a disinfected sharp tool. Only bulbs with roots are suitable.
- Treat the cut areas.
- Plant the plants in containers with soil prepared for them.

It is advisable to plant the bulbs in dry soil and then spray it daily.
Features of planting orchids of different varieties
The peculiarities of planting orchids of different varieties must be remembered. Let's take a look at the rules for planting popular varieties:
- Cymbidium. It needs to be replanted every three to four years after flowering. Seating is mainly done with bulbs. Moreover, the plant must have at least six pseudobulbs.
- Cumbria. She has a negative attitude towards transplants, so there is no need to disturb the plant for no reason. Planned seating is carried out every two to three years. You need to plant them in bulbs, acting carefully so as not to damage the roots. After this, you cannot water the plant for a week.
- Cattleya. An orchid is replanted by dividing the bush, but not more than once every two to three years.
- Wanda. At home, only vegetative propagation is possible by separating the children. It is advisable to do this during planned seating.
- Dendrobium and phalaenopsis. These varieties are propagated by any of the species, including through broken fragments.
As you can see, planting an orchid at home is as easy as shelling pears. The procedure is available to every gardener. You need to do everything correctly, adhering to the algorithm, so that everything works out exactly: the new plant takes root, and the old one does not die. Now you will not have problems propagating plants at home, because you know how and what to do. Remember that you need to select the appropriate planting method for a particular orchid variety in order to achieve maximum results. You can watch a video that explains in detail how to properly replant a plant.
There are several ways to propagate an orchid at home. Depending on the nature and growth rate, one or another method of propagating the flower is selected. Although, in principle, you can try all methods for any type of orchid.
How orchids reproduce at home
Reproduction at home is carried out by seeds, cuttings, “babies”, and dividing the bush. For monopodial orchids - those without pseudobulbs, fast-growing and with one stem, propagation by cuttings and children is more suitable.
And epiphytic orchids - with aerial roots and sympodial - with roots-pseudobulbs, many horizontal stems and less fast-growing, it is better to propagate by dividing the bush.
Since orchids reproduce quite well, provided, of course, that normal conditions are created for them - optimal temperature, humidity, lighting, then growing a flower at home is in most cases successful.
Therefore, the opinion that the orchid is capricious, it requires complex care, and its reproduction is difficult is not entirely true.
Important! Orchids are not bred or planted in autumn and winter, as well as during the flowering period. The best time for breeding is spring before or after flowering. Flower stalks must be removed from faded plants.
With the right approach and choosing the right time for propagation, young plants that take root and grow are practically guaranteed.How to propagate a flower by dividing a bush
An adult flower is removed from the pot and the soil is lightly shaken off the roots. Then, before dividing the orchid, soak its roots in warm (+30-35 ° C) water for 20-30 minutes and then separate (cut) the stems with roots from each other so that each new bush has at least three pseudobulbs. 
The cut areas on the roots are sprinkled with wood or crushed activated charcoal and the roots are allowed to dry for some time (2-3 hours). Then the seedlings are planted in prepared containers or pots. At first, the separated plants are not watered for 2-3 days, then watering is done in the usual mode for the plant.
Important! Before propagating orchids by dividing the bush, make sure that the plant is at least two years old. Until this age, it is advisable not to plant a flower.
 Propagation by roots produces viable, strong new plants that retain all the characteristics of the mother bush.
Reproduction by "children"
Babies are sprouts emerging from the “dormant” buds of the roots, peduncle or stem. For propagation, root children or peduncle children are taken. Such sprouts already form their own roots during germination, but when they notice the appearance of a child or children, they are not immediately cut off.
Before planting the flower with children, such sprouts are given time to build up the root system. This usually takes 5-6 months, sometimes 7-8. A child with 3-4 leaves and 4-5 roots of its own, the length of which will be more than 5 cm, is suitable for transplantation.  When the roots have become the required length, the baby is cut off. Places of cuts on the mother plant and on the baby are sprinkled with charcoal - activated or charcoal. After 2-3 hours, the baby is planted in a container or pot. You can plant the sprout in slightly moistened soil or slightly wet the soil along the rim of the flowerpot.
Did you know? Children can appear on their own, or you can stimulate their appearance. Used for stimulationpastes based on cytokinin. The drug encourages the kidney to start growing.
How to root a young orchid correctly? Cover the top of the plant with a glass or plastic (light disposable) glass. This creates the greenhouse effect necessary for rooting. 
Observe the sprout, periodically moistening the soil - once every 2-3 days, as well as ventilating and raising the “roof”; if the plant remains green, does not dry out and begins to grow in the ground, then the greenhouse cap is removed. And then the flower is cared for as usual. Dendrobium and phalaenopsis orchids reproduce well and grow quickly.
Cuttings
Speaking about how to propagate an orchid at home using cuttings, it should be noted that such a method exists. It is more labor-intensive and time-consuming than the previous ones, but many types of orchids reproduce quite well by cuttings.
Answering the question of whether it is possible to grow an orchid from a leaf to make a strong, strong plant - it is definitely possible. But “from a leaf” is not entirely accurate - both the tops of the side shoots and the peduncle of the plant are cut. 
The side shoot should have 2-3 internodes - it is cut off, and the cut points are treated with charcoal or activated carbon, the shoot is kept for 1.5-2 hours and laid out horizontally on soil well moistened with water.
Before growing a flower from a peduncle cutting, you need to wait until it has completely bloomed. Then cuttings of 10-14 cm with 2-3 dormant buds are cut, the sections are treated with charcoal, and the cuttings are allowed to dry for about two hours. Then the cuttings are laid in the same way as cut shoots - horizontally.
Next, greenhouse conditions are created for the cuttings - they are covered with glass or transparent plastic, film and the temperature in the greenhouse is carefully monitored - not lower than 29-30 ° C and humidity. 
Also, often water the soil every 1-2 days, while ventilating it and preventing condensation from settling inside. It would be useful to feed the plants with fertilizers - organic or mineral - once every 10-12 days.
Did you know? There are special containers of different sizes with a transparent plastic lid and ventilation holes for flowers. They create optimal conditions for the greenhouse effect, so it is very convenient and not troublesome to root sprouts.
This is how the cuttings are cared for until they form roots from the buds. As soon as the roots are of a sufficient length of 3-5 cm, you can divide the cuttings and root the sprouts, planting them in the soil.
Phalaenopsis is one of the most spectacular orchids. Most people, seeing the lush flowering and unusual coloring of butterfly flowers, want to place the same specimen on their windowsill, which means the question arises of how this plant reproduces.
Like most plants, Phalaenopsis reproduces by seeds and vegetatively, but there are features that complicate this process.
Plucking and rooting a leaf, like a violet, or cutting a cutting will not work, because the methods of propagating phalaenopsis are very different from those used for most indoor plants. Therefore, below we will tell you how to propagate phalaenopsis with step-by-step photos.
Vegetative
Vegetative propagation allows you to get an exact copy of the mother's copy, i.e. with the same color, shape and size of flowers. At the same time, methods of vegetative propagation of phalaenopsis have their own characteristics, since throughout their life this type of orchid grows mainly at the top, slowly growing leaves and a thick, shortened stem. Next you will see a photo of caring for the propagated plant.
We tell you more about one of the popular methods of propagating phalaenopsis with a peduncle in
Daughter sockets
Sometimes at the base of the rosette of adult greatly expanded phalaenopsis from axillary buds Daughter rosettes may appear.

Phalaenopsis with two rosettes.
When such a rosette forms several of its own leaves and 2-3 roots about 5 cm long, it can be safely separated from the mother plant and planted in a small pot with substrate. Under favorable conditions the daughter rosette can bloom in 2-3 years.

Interesting! Daughter rosettes are usually formed:
- on too old plants;
- when overfeeding with growth stimulants and fertilizers;
- if the apical growth point is damaged.
Children's department (keiki)
 Children can also be formed from dormant peduncle buds. There is a special term for such children - keiki.
In healthy keiki plants, as a rule, are rarely formed only under the influence of unfavorable conditions or other stress factors.
However, there are varieties and hybrids of phalaenopsis, prone to the formation of children on the peduncle. Their keiki form spontaneously and are sometimes able to bloom when attached to an adult plant.
Advice! To stimulate root growth, you can wrap the base of the keiki with sphagnum moss and spray it periodically.

Can artificially stimulate reproduction of children on a peduncle using a special cytokinin paste.
To propagate with paste, you must carefully remove the scales covering the bud on the peduncle, and use a toothpick or cotton swab to apply the hormonal paste to the bud. After a while, the bud will begin to enlarge and a baby will be formed.

When the baby has several normally formed leaves and 2-3 roots, it can be separated from the mother plant. It is advisable to separate the young plant along with a piece of peduncle.

Reproduction by children.
Bush division method
In exceptional cases you can resort to dividing adult phalaenopsis. Dividing an orchid using the method of dividing a bush is quite traumatic; people resort to it to rejuvenate the mother plant:
- In an adult phalaenopsis that has a fairly long stem, part of the lower leaves is removed, leaving only the top;
- After a while, the rudiments of young roots begin to actively form on the bare stem;
- Then the top with several roots is cut off with a blade or a sharp knife, and the sections are sprinkled with coal;
- The top is planted in a moist substrate or placed on a tray with sphagnum and until normal roots form, it is sprayed and fertilized leaf by leaf;
- The lower part of the plant, i.e. the “stump” with roots, is cleaned of any remaining substrate, dry and damaged roots, and is also planted in a new pot, or normal care is continued in the same pot;
- After a while, a baby may form on the stump;
Such plants it will take several years to recover and again please the owner with flowering.

Method of dividing a bush.
By cuttings
Phalaenopsis cuttings also have their own characteristics. Used as cuttings pieces of peduncle with bud, which are placed in a container with a moist substrate.
However, getting keiki from such cuttings It's hard enough and it is much more effective to stimulate the growth of children on the peduncle without separating it from the plant.

Cuttings.
Read more about the propagation of phalaenopsis by cuttings.
Roots and leaves
 Unlike other plants, propagation of phalaenopsis by roots is impossible, because it does not have rhizomes with buds or other underground formations.
Sometimes this method of propagation refers to the resuscitation of plants that, for some reason, have completely lost their leaves and only part of the stem with living roots remains.
Reproduction by leaves is also impossible at home, because the plant is not able to form growth buds on the leaf, which means that the leaf separated from the plant will inevitably dry out.
Seeds
Propagation by seeds at home very difficult. In addition, the resulting plants may not be similar to the mother plant and you will have to wait 4-5 years for flowering.
Phalaenopsis seeds are dusty and indistinguishable to the naked eye. One box contains more than 1 million seeds, which do not have their own supply of nutrients. They are not able to germinate on their own. In the wild, germination is facilitated by symbiotic fungi, which, by combining with the seeds, provide them with the necessary nutrients.
Phalaenopsis seeds.
Germination is carried out under artificial conditions on a special nutrient medium under sterile conditions. It is quite difficult to create the required level of sterility at home, so such manipulations are carried out mainly in special laboratories. Although some orchid lovers purchase nutrient media and successfully sow at home.

The plants are kept on a culture medium for 3-12 months, and then the resulting seedlings have to be grown for several more years in conditions of high humidity.
Attention! It is difficult to wait for such plants to bloom, because not all of them can grow to adulthood.
Useful videos
On how to propagate an orchid, see the video below:
Video with the four main methods of reproduction:
The following video reveals the nuances of the method of propagation by dividing the bush:
In this video you can see how phalaenopsis seeds are sowed:
Conclusion
In conclusion, I would like to note that propagating your favorite phalaenopsis plant is not so difficult, although it is worth studying the specifics of this process before touching the plant.
It is always necessary to adequately assess the condition of the flower in order to choose the best way to breed orchids, which will allow you to preserve the mother plant and quickly restore it.
In addition, young plants need to be properly cared for and replanted (you can find photos of these processes on our website).
Amateur flower growers who grow tropical plants at home sooner or later face the problem of how to plant or replant an orchid or other exotic flower.
In order for the plant to delight with beautiful flowers in the future, develop and grow well, several preparatory stages should be carried out before the procedure. If everything is done correctly, the orchid will respond with more abundant flowering than before, strong stems, and a healthy appearance.
Those who are involved in growing indoor flowers know that replanting a plant is always stressful, so It is necessary to follow the rules for transferring a flower to a new place of residence.
First of all, timing. In spring, the orchid emerges from the dormant period and gains strength for future flowering, so the spring months are optimal for planting the plant. It is during the months of lengthening daylight hours that the highest quality material for replanting occurs in the pot. A more suitable time is early March.
The frequency of transplantation is of great importance. Typically, experts recommend performing a planned procedure, if there are no emergencies, once every 2-3 years.
There are several reasons for transferring a plant to another container:
- Insufficient volume of container in which the orchid grows. During the period of activity, not only flower stalks grow, but also the root system. It can fill the space of the pot so much that it begins to displace the substrate; small root processes are tightly intertwined, which negatively affects the condition of the plant as a whole. In this case, the flower is transferred to a larger container;
- Replacing the old substrate. With prolonged growth, the soil loses its properties and cannot support the release of all the nutrients necessary for the orchid, so the plant develops poorly. If the pot is filled with a substrate in which sphagnum moss predominates, replanting is carried out once every 2 years, if bark predominates in the soil - once every 3 years.
Before transplanting an orchid, you should stock up on the necessary tools. These should be:
- a small pruning shear for indoor plants or well-sharpened scissors;
- if an orchid is being planted - several transparent pots, in case of transplantation - one, but of a larger volume;
- activated carbon, wood ash, other bactericidal preparation for dusting cut areas;
- the right amount of substrate suitable for the species that is being planted.
You need to remember that all instruments must be disinfected. An exotic beauty should not become infected with anything when moved to a new place.
Step by Step Actions

Containers and drainage must be disinfected before the procedure, as well as pruners or scissors. The substrate must correspond to the orchid variety.
Phalaenopsis

This is a delicate orchid; it is planted in the same way as all exotics. The difference is that when transferring to other pots, a small amount of the old substrate can be left on the roots. Completely replacing the soil mixture can cause severe stress to the plant, and it will hurt for a long time.
It is worth purchasing ready-made soil for orchids in a specialized store. You need to choose one without peat. It is better to avoid the presence of sphagnum moss. They can simply cover the substrate on top. Moss is replaced every 2-3 years.
It is worth adding pieces of pine bark to the prepared soil for Phalaenopsis orchids, but they must be without signs of resin. Before mixing with the rest of the substrate, the bark is boiled for 2-3 minutes, then dried in the oven and broken into small pieces.
Mixing charcoal into the substrate is well received by Phalaenopsis. The acceptable ratio is 4:1 (4 parts soil, 1 coal).
Dendrobium

The name translated means – growing (living) on a tree, the most numerous genus of the family. It grows up to 90 cm, so when planting a flower you should take into account the size and select the appropriate pot taking into account the growth of its roots. In this case, the flowerware can be anything: ceramic, wooden, glass. The main condition is the presence of drainage holes.
With good care, the plant begins to bloom in the fall and ends in the spring, but flowers can appear at any time. It all depends on the speed of development of the Dendrobium life cycle. It can bloom at the most inopportune time for flowering.
Seating methods

You can plant orchids using several methods popular among gardeners:
- dividing the plant. The method is good for adult orchids. There must be at least 3 mature plants in the pot. The procedure is carried out in accordance with step-by-step instructions. The orchid is divided into the number of shoots that are needed. All sections are sprinkled with bactericidal preparations;
- young shoots. Often, many shoots are formed when the plant is in a room with high temperatures. In this case, the juveniles for seeding are watered abundantly to obtain high-quality material. The shoots are called air babies, since they grow at the expense of the mother bush. In this case, the shoot is cut off from the main plant and placed in a separate pot. This method is most accessible to beginner gardeners;
- lateral cuttings. This method is good for fast-growing orchids. For the cutting, the apical part with leaves and aerial roots is selected. The separated material is immediately placed in a separate container, watering is carried out a day after planting;
- bulbs. Most often used when transplanting orchids into a new pot. Bulbs with several roots are selected, cut off with a sharp knife, and the cuts on the flower and planting material are disinfected. The bulbs are placed in a dry substrate that does not need to be watered for about two weeks. Spraying a new plant daily is enough.
The future development and flowering of the plant largely depends on the chosen method.
Proper seating of a blooming orchid
The orchid is a rather capricious plant, and during the flowering period it is especially weakened, so it can receive double stress from the transplant and will not recover. Professional gardeners advise planting a blooming orchid only in critical cases when the plant is in danger of completely withering.
If the transplant procedure cannot be avoided, then before starting work, it is necessary to cut off all flower stalks by 2-3 centimeters. This will make it easier for the plant to withstand a stressful situation.
The remaining steps must be carried out according to step-by-step instructions.
How to care for an orchid after transplantation
Caring for the flower after transplantation is of no small importance.
First of all, the pot with the plant must be shaded or placed on a windowsill where there is rarely sun. The air in the room should not warm up above 22 degrees.

The first watering of the new settler is carried out no earlier than after 5-6 days. The flower pot is placed in boiled water for half an hour. After this, the orchid is left alone for a couple of weeks. At the same time, you need to spray the plant with a sprayer, but without fanaticism. The water should be settled and warm.
This applies both to cases where the orchid does not want to bloom at all, and to cases when the plant blooms all winter.
Possible problems after transplantation
Most often, orchids refuse to grow in an incorrectly selected substrate. Therefore, it is so important to either buy soil in a specialized store specifically for orchids, or prepare it yourself, observing all the nuances.
Another problem can be improper watering. If the roots dry out, the leaves become limp - this can only mean one thing - lack of moisture. In this case, the flower pot is placed in a bowl of water for half an hour or an hour.
It is very difficult to find flower growers who are indifferent to orchids. These plants are highly valued for their abundance, duration, spectacular flowering and amazingly beautiful coloring of the petals. Phalaenopsis is one of the most “non-capricious” and low-maintenance varieties, so even a novice orchid grower can grow it. However, difficulties often arise with plant propagation. To avoid them, you need to study the process and the corresponding technology in advance.
What does a Phalaenopsis orchid look like?
Phalaenopsis is one of the many genera included in the Orchidaceae family. At the moment, about 70 of its representatives are known, not counting hybrids bred through selection (there are more than five hundred of them). Most of the “natural” varieties can be found in Southeast Asia, as well as on the islands that form the border between the Indian and Pacific oceans - Indonesia, Kalimantan, the Philippines, the Sunda and Malay archipelago.
Literally translated from Greek, “phalaenopsis” means “moth-like” (phalaina – “night butterfly” and opsis – “similar”). The plant owes its name to a small incident. A researcher of tropical flora from the Netherlands, Karl Blume, having discovered the first phalaenopsis on one of the islands of the Malay Archipelago, at dusk mistook its inflorescence for a flock of moths. He had to get close to the plant to realize his mistake.
Phalaenopsis differs from other orchids in the absence of tuberidia or pseudobulbs - characteristic ovoid thickenings on the stems. An adult plant looks like a rosette of leaves arranged in two rows. The stem is very short, so it seems that she is lying on the ground.
The average height of phalaenopsis is 50–70 cm. An adult plant is a rosette of 4–6 leaves. A maximum of two new leaves can grow in a year. They are very dense, fleshy, rich dark green in color.
The flower stalks of the plant are long (70–80 cm), slightly curved, branching. Flowers with a diameter of 2–12 cm (depending on the type) are collected in racemes or panicles. The buds do not bloom immediately, so the flowering period is quite long (2–6 months). There can be more than a hundred of them in one inflorescence. Most often, the petals are painted in delicate pastel shades - pink, lilac, pale lemon, light green, snow-white. A scarlet, inky purple, olive green or chocolate lip contrasts effectively with them. Often this tone is also present on the petals in the form of strokes or specks. The flowers of most natural varieties emit an unobtrusive, pleasant aroma.
The plant does not have a clearly defined dormant period. It usually blooms at home twice a year - in spring and autumn. If you create conditions close to ideal for the orchid, you can achieve a third flowering.
Video: the amazing diversity of phalaenopsis
Plant propagation at home
Phalaenopsis belongs to the so-called monopodial orchids. This means that the only point of growth is at the top of the shoot. It is more difficult to propagate them, since sympodial orchids, which grow not upward, but to the side, have significantly more such “buds”.
Before you start propagating a flower at home, you need to familiarize yourself with the basic rules:
- Before the procedure, any instrument must be thoroughly disinfected, knives and pruners must be sharpened, hands must be washed with soap.
- All damage caused to the plant during the process is immediately processed. “Wounds” can be sprinkled with crushed chalk, activated carbon, colloidal sulfur, sifted wood ash, and cinnamon. Iodine and brilliant green, suitable for other indoor plants, are not recommended for treating orchid sections.
- The roots should be handled as carefully as possible. They are thick, but fragile, and break very easily.
- Young orchids that have taken root are placed in a substrate suitable for them, first well moistened with soft water, heated to a temperature slightly above room temperature. After transplantation, the phalaenopsis is provided with a constant temperature of 25–28ºС and diffused light (light partial shade is also suitable). For a month, protect it from direct sunlight and do not water it (limit spraying).
Only completely healthy plants are suitable for propagation, without the slightest signs of damage by pathogenic fungi, plants, or insects. The conditions for keeping the orchid should be as close to ideal as possible. Proper lighting is especially important. The minimum duration of daylight is 12–14 hours.
You should not take propagation material from newly purchased orchids. Store-bought plants are often treated with artificial flowering stimulants and other harmful chemicals. Allow the flower to adapt to normal conditions for at least a year.
The substrate for young plants is prepared mainly from small (0.5–1 cm) pieces of pine bark. It is better to take it from a pot with an adult orchid. The remaining additives (sphagnum moss, coconut fiber, fern rhizomes, peat chips, charcoal) together make up no more than half of the total volume of the mixture.
Step by step instructions
Most often, at home, phalaenopsis reproduces vegetatively. The plant has only one growth point, but you can slightly “tweak” the nature.
Planting the “babies” formed on the peduncle
Planting “babies” is the most common method of propagating phalaenopsis. The “offspring” is separated from the mother plant 1.5–2 months after flowering. The procedure most often occurs in the spring. Growth buds are formed in the leaf axils or on the peduncles of orchids over two years old that have at least 4 healthy leaves. Sometimes they form on faded peduncles no older than one and a half years.
The appearance of “babies” can be stimulated in several ways:
- The difference between daytime (28–30ºС) and night (18–20ºС) temperature. In this case, high air humidity (70% or more) and daylight hours of at least 12 hours must be ensured.
- "Sunbathing." The orchid is left in direct sunlight for an hour a day in early spring. When a slight purple “tan” appears on the leaves, this is not a problem, but if it changes color to inky purple and there are still no “babies”, stop the procedure.
- Artificial "drought". The plant is not watered for 12–14 days, protecting the orchid from direct sunlight. Moisturizing the substrate is resumed 2-3 days after the roots acquire a silver-gray tint. In this way, the flower is made to believe that its death has come, in the face of which its instinct to procreate is activated.
- Use of fertilizers with a high nitrogen content. The method is quite risky. Orchids are not very fond of this macronutrient, so there is a real risk of destroying the mother specimen. Even if it gives birth to a “baby”, you definitely won’t have to wait for it to bloom this year.
There is no consensus among flower growers regarding when exactly it is necessary to separate the “baby” from the mother plant. Most people think that you need to wait for at least one root to appear. Others are of the opinion that this greatly depletes the “parent”, so they cut off the “offspring” when the first pair of leaves appears.
- Separate the “baby” from the mother plant. Process the cuts. Dry overnight in the open air.
- Fill transparent cups with a mixture of finely chopped sphagnum moss with pine bark and fern rhizomes (1:3:1). The more homogeneous the soil, the better. You need to make 3-4 drainage holes in the containers.
- Moisten the substrate. Plant young orchids in the ground and place the containers in a home mini-greenhouse, florarium or homemade greenhouse. Provide a constant temperature of 23–25ºС and bright, diffused light.
- As it dries, moisten the substrate with a solution of a root formation stimulator - Kornevin, Heteroauxin, Zircon, Epin (3–5 ml per liter of water). Ventilate the plantings daily for 5–7 minutes.
- If the bottom pair of leaves turn yellow, this is normal. You cannot cut them - the developing roots receive nutrition from them. When the time comes, they will dry out and fall off on their own.
- Wait until the roots are 4-5 cm long, then transplant the phalaenopsis into mature potting soil. The procedure is not quick and usually takes about a year.
Alternative way:
- Pour water into a glass, heated to a temperature slightly above room temperature. You can add a tablet of succinic acid to it.
- In the morning, place the cut and dried “baby” so that the bottom is located at a distance of 1–2 mm from the water. You can, for example, take a piece of foam plastic, cut a hole of the appropriate diameter and place it on a glass.
- After 6 hours, remove the “baby” from the water. The rest of the time, dry it in the open air.
- Continue manipulation daily until roots appear. The water should be fresh every day. Then proceed as described above.
Video: is it worth cutting off and rooting suckers?
Video: stimulating root growth in an orchid offspring
Propagation by cuttings
The method is considered the simplest and least labor-intensive. It is used to propagate orchids that bloomed 2-3 months ago. Orchid cuttings - pieces of peduncle. If the plant has flowered more than a year ago, it will not be possible to use it as planting material.
- Cut the flower stalk as close to the base as possible. Treat the “wounds” on it and on the mother plant.
- Using a sharp scalpel or razor blade, cut it into pieces 5–7 cm long at a slight angle. Each of them should have at least one “dormant” bud, preferably approximately in the middle of the cutting. It is believed that the lower the growing point, the stronger the bud. Accordingly, it is more likely that it will develop into a viable plant in a short time.
- Fill shallow, wide containers with finely chopped sphagnum moss. Spray it with a biostimulator solution. Place the parts of the peduncle horizontally on a moistened substrate.
- Cover the plantings with glass or plastic film. Provide a constant temperature of 25–28ºС, bright diffused light, and humidity of at least 70%. Ventilate the plantings, spray the dried substrate with a root formation stimulator solution.
- Wait until roots 3–5 cm long and two pairs of leaves appear. In fact, the same “babies” are formed on the cuttings. If part of the peduncle dries out, this is normal; it nourishes the young plant. Before transplantation, separate dead tissue from the “offspring”, trying to minimally injure it.
- Replant the phalaenopsis in adult orchid soil.
There is another option:
- Place the cut, faded peduncle in soft, warm water. Add activated carbon (one tablet per 0.2 l) or potassium permanganate crystals (to a pale pink color) and succinic acid (0.5 l tablet) or a biostimulant (3-5 drops per liter) to it.
- Place the container in direct sunlight, covered with a plastic bag or glass cap. Spray daily with a solution of any biostimulant (Epin, Zircon, Kornevin, Heteroauxin) or a specialized fertilizer for orchids. Reduce the concentration by 2–2.5 times compared to that recommended by the manufacturer. Change the water every 3-4 days.
- Under the influence of drugs, high humidity, heat and light, the growth buds on the peduncle “wake up”, forming “babies”. They are cut from the cuttings and rooted as described above.
Video: orchid cuttings
Plant division
This method is rarely used by amateur flower growers. There is a high probability of rot developing. Accordingly, you can lose the plant. The selected phalaenopsis should be large and completely healthy. Other requirements are age (minimum 4–5 years) and number of leaves (6–8 pieces or more).
- Using a sharp, disinfected knife or pruning shears, cut off the top of the plant, dividing it roughly in half. Leaves and aerial roots must be present on both parts. Process both cuts.
- Plant the separated shoot in a mixture of finely chopped sphagnum moss and pine bark (1:2). The substrate must be dry. Provide the conditions that phalaenopsis requires for normal growth and development (temperature, lighting, air humidity). As the soil dries, do not water it, but spray it with a biostimulator solution. As soon as two pairs of new leaves appear, replant the flower in soil suitable for mature orchids.
- Provide the old plant with long daylight hours, warmth and regular feeding with special preparations for orchids. After 2–3 months, lateral buds will appear at the cutting site, which will develop into “offshoots” or new shoots. The orchid will acquire a normal appearance in about 1.5–2 years.
Video: propagation of phalaenopsis by dividing the rosette
Germination of seeds
Growing orchids from seeds at home is a complex procedure that requires the grower to strictly follow all instructions, attentiveness, accuracy and patience. Until recently, it was believed that this was impossible in principle.
The specificity of the procedure is determined by the structure of the seeds. Firstly, they are very small (they can only be seen through a microscope). Therefore, collecting them yourself is very problematic. Secondly, they lack endosperm - the tissue surrounding the embryo, where amino acids, vegetable oils, starch and other substances necessary for its nutrition are stored. The future orchid cannot feed on its own, absorbing them from the soil. In addition, due to the absence of the same endosperm, the seeds are very vulnerable. Any interaction with pathogenic fungi, bacteria, or negative environmental factors leads to their death.
You can germinate seeds at home if you prepare a special nutrient substrate and maintain complete and absolute sterility throughout the entire process. Green “balls” will appear in the container in 5–6 months. You will have to wait at least 4–5 years for the orchid to bloom.
- Prepare a nutrient substrate based on agar-agar. It is a mixture of polysaccharides produced from certain types of ocean brown and red algae. For 10–15 g you will need 200 ml of distilled water, 10 g each of glucose and fructose (can be replaced with sugar), calcium carbonate solution and phosphoric acid.
- Fill the agar-agar with water and let it swell. Pour jelly into boiling water, add glucose and fructose. Stir until all the crystals dissolve and the mass becomes homogeneous. Acid and alkali are used to provide the necessary acidity (pH - 4.8–5.2). The indicator is easy to determine using litmus tests.
- Sterilize clear glass test tubes or flasks for chemical reagents. Vessels must have tight-fitting plugs. If there is no alternative, small jars with screw-on lids will also work.
- Pour 30–40 ml of nutritional mixture into each container. Sterilize them in a water bath for 20 minutes.
- Let the “jelly” harden and wait 4-5 days. If mold does not appear in the flasks during this time, the disinfection was successful.
- Pour the seeds with a 1% bleach solution for a quarter of an hour. During this time, periodically shake the container vigorously.
- Cover the pan with boiling water with a wire rack or mesh. The cells must be such that the flask with the “substrate” can be secured. The lid should lie right there so that the steam gets to it.
- Using a sterile syringe, gradually extract the seeds from the disinfection solution and transfer them to the container without touching the “jelly.” Seal the containers hermetically and place them in a greenhouse or florarium. The conditions are similar to those created for cuttings.
- After six months, remove the seedlings from the vessel. To do this, you need to pour about 50 ml of warm water into it and shake the contents in a circular motion. Then the mass is poured into a wide bowl, a few drops of a 1% Fundazol solution are added and left for 10–15 minutes.
- After this time, use a soft thin brush to remove the plants one by one and plant them in a substrate of moss, pine bark and fern rhizomes (equal parts) with the addition of 2-3 tablets of activated carbon, crushed into powder.
- After another 5–6 months, phalaenopsis can be transplanted into a substrate for adult plants.
Video: propagation of orchids by seeds at home
Cytokinin paste: what is it and how to use it
A phytohormonal preparation that helps, among other things, stimulate the formation of growth buds in orchids. It stimulates cell division at the site of application. The product can only be used if there is a peduncle on the plant. Experienced orchid lovers are advised to apply the drug to the highest or lowest “dormant” bud. The best time for the procedure is the end of February or March.
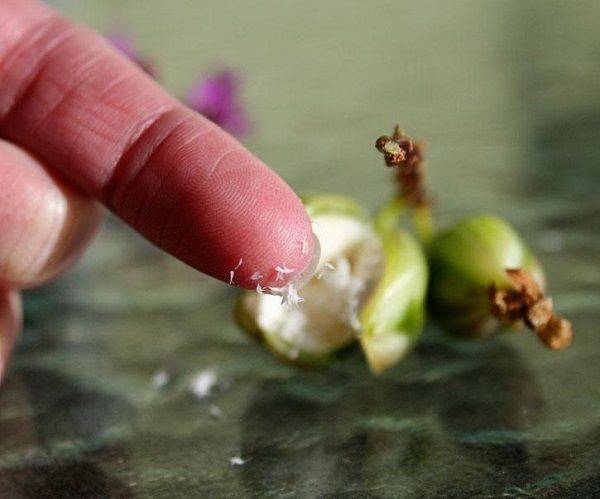
- Using a sterile razor blade, scalpel, or needle, remove the integumentary scale from it. Remove loose tissue with tweezers. There should be a small light green dot underneath them.
- Very carefully and shallowly scratch it 2-3 times with a clean needle.
- Place cytokinin paste on a toothpick (a ball with a diameter of about 2.5 mm is enough). If possible, distribute the drug evenly over the kidney, lubricating it entirely. It is important to comply with the norm. If there was not enough paste (a ball with a diameter of 1.5–2 mm), a peduncle will most likely form. If you overdo it, several deformed, non-viable “babies” will develop.
- In a week or a week and a half, it should hatch and begin to develop. Place the phalaenopsis with the developing “offsprings” in a warm and bright place, apply fertilizer regularly. At this time, the orchid needs more nitrogen than usual.
Cytokinin paste is used very sparingly (maximum three buds are “awakened” on the orchid at the same time) and targeted (the drug should not come into contact with leaves, flowers, or roots). The plant must be mature (young ones may lose leaves).
Video: using cytokinin paste for orchid propagation
Possible problems when propagating phalaenopsis
Young plants need especially careful care. To make it easier to control the condition of the roots, phalaenopsis that have grown roots are planted in transparent pots. This method can also be practiced for adult plants, since aerial roots are involved in the process of photosynthesis.
It is important to choose the right substrate. All components are pre-sterilized by treating them with steam, heat or cold. Pine bark must be soaked for two days in warm water or a pale pink solution of potassium permanganate. Fundazol or any other fungicide (0.5% solution) is also suitable.
The main danger threatening a young orchid is rot. Often the grower himself contributes to its development by regularly watering the plant. If the process has gone far, it will no longer be possible to save the phalaenopsis. This is evidenced by vague black spots on the leaves, a moldy substrate, and an unpleasant putrid odor. You need to start acting when individual brown “speckles” appear on the roots.
- Remove the orchid from the pot. About half an hour beforehand, you need to water the plant generously.
- Clean the roots from the substrate and cut off all infected tissue with a sharp, disinfected knife. Do the same with the leaves affected by the fungus.
- Soak the roots for 25–30 minutes in a solution of any fungicide (Kuprozan, Abiga-Pik, Horus, Skor). Sprinkle the “wounds” on the leaves with crushed activated carbon, chalk, and cinnamon.
- Replant the phalaenopsis by sterilizing the pot and completely changing the substrate. Add Trichodermin and Glyocladin granules to the soil.
- Within 2–3 months, replace the irrigation water with a pale pink solution of potassium permanganate or 0.5% - Baikal-EM, Bayleton, Previkur.
Phalaenopsis is relatively undemanding in care and this compares favorably with most orchids, not inferior to them in the beauty of flowering. In principle, there is nothing difficult about getting a new plant at home. You just need to study all the nuances of the procedure in advance and follow the recommendations exactly.
