Installing a stove in a cabin with your own hands. Homemade potbelly stove with your own hands. Installation of a stove-stove in a garden house
Avid summer residents who spend not only the summer on their property, but also part of the spring, as well as deep autumn, need to take care of heating their country house. As a rule, holiday villages are not connected to a gas supply; at the same time, building a brick stove or fireplace is quite difficult and expensive. Therefore, the best option is solid fuel stoves, which are the subject of this article.
General information
When you hear the word potbelly stove, many people imagine crudely welded, unattractive steel structures in the form of a metal box on legs, with a door and a chimney. Until recently, these ovens were just that. They had low efficiency, so it was quite difficult to heat large rooms with their help.
This heating option also has a right to exist. However, recently modern potbelly stoves, which look quite nice and can be an addition to a country house interior, have become increasingly popular.
Their main advantage is higher operating efficiency, although the price of these products is also much higher. Next, we will take a closer look at the features of such furnaces.

Features of modern potbelly stoves
Design Features
Modern potbelly stoves are an improved design of a metal stove. They are capable of heating a room with a volume of up to 100 cubic meters and retaining heat for a long time.
Among the features of their design, the following points can be highlighted:
| Sealed doors | Glass doors framed by a metal frame fit tightly, which prevents smoke from entering the room. |
| The presence of valves on the doors and air intakes of the ash pit | Valves allow you to regulate the air supply, which determines the intensity of combustion. |
| Heat-resistant lining of internal walls | Allows you to protect the metal from overheating and retain heat for a long time. |
| Availability of re-burning | Afterburning ensures complete combustion of residual flue gases and thereby increases the efficiency of the furnace. |
| Dividing the chimney into exhaust and heat exchange | This design allows you to retain heat longer. The heat exchanger is a “smoke bag” that is located inside the structure. The metal pipe that goes outside has valves that also help retain heat. |

Advantages
Modern potbelly stoves, thanks to improved design, can be used as the main or additional source of heat in a country house.
They have a number of advantages over traditional brick kilns, among which the following points can be highlighted:
- A potbelly stove for a summer house with a hob, which many modern models have, makes it possible to cook food.
- Does not require complex maintenance, unlike brick structures.
- Installing a potbelly stove in a country house with your own hands does not cause any problems even in a built house, since it does not require the construction of a foundation. This is due to the low weight of the structure. (See also article.)
- Low cost compared to brick structures.
- Possibility to fire with several types of fuel– peat, firewood and wood briquettes.
- These designs are fireproof. The only thing is that when using them you must follow basic safety rules.
- If necessary, the oven can be moved to another room, in which it is possible to bring the chimney to the street.
Advice!
In order for heating to be more efficient, it is necessary to take care of the thermal insulation of the house and eliminate all cracks in doors and windows.

In the photo - a version of a modern potbelly stove
Election Features
To ensure that the purchase is not in vain and works as efficiently as possible, when choosing a product you need to pay attention to the following points:
- The dimensions and volume of the stove depend on the size of the room that is planned to be heated. You can find out what heating area the product is designed for from the instructions that come with it.
- If the house is built from a “cold” material, such as concrete, then the power of the product should be greater than for buildings made of wood or, for example, aerated concrete.
- The choice of model largely depends on the fuel with which you plan to heat the stove.
- It is advisable to give preference to models with a hob. This will allow you to cook food in the event of a power outage.
- One of the most important parameters of the product is safety. Therefore, it is better to purchase a potbelly stove in stores rather than from individuals.
- Modern designs can have a variety of designs. Therefore, when choosing a product, you should pay attention to its appearance so that it fits into the interior design of the room.
Note!
Cast iron can withstand higher temperatures than steel, and this material is more durable.
If you take all these points into account when choosing, your purchase will be able to heat your country house for many years.

Installation of a potbelly stove
As mentioned above, every summer resident can install such a stove with his own hands.
This operation is performed as follows:
- Before installing a potbelly stove in your dacha, you should choose a place for it. The structure should be located most advantageously from the point of view of heating the surrounding space.
- Next you need to make a chimney for the potbelly stove in the country. To do this you will need a metal pipe of suitable diameter.
The simplest option is to bring the pipe out the window. If the stove is constantly located in the same place, then the chimney can be brought outside through the roof. - Then, in the place where the potbelly stove will stand, you need to lay fire-resistant material. Of course, the floor must be absolutely flat so that the stove stands stable.
- Next, the structure is installed and connected to the chimney.
Note!
The chimney connections must be sealed.
Asbestos cord can be used to seal the connections.
A small country house, garage or workshop can be heated using a small compact metal stove called a potbelly stove. It can be made either from an old steel pipe, a gas cylinder, a barrel, or even an old flask, or welded from sheets of metal. The most important thing is that the metal used to make such a furnace is not too thin.


Potbelly stove made from a gas cylinder, an old flask, a barrel and a stove running on waste fuel
Materials and tools
To create a potbelly stove you will need:metal with a thickness of 3±0.5 mm: thinner sheets will quickly burn out, in addition, under the influence of high temperature they can warp and the oven will become shapeless; thick-walled metal will take a very long time to warm up;
chimney pipe;
rods 16 mm;
a sheet of metal with a thickness of 0.3 mm for constructing a box for collecting ash;
tape measure, ruler, chalk;
welding machine 140-200A;
grinder for cutting metal; to make round holes it is more convenient to use a gas cutter;
metal brush for cleaning welding areas;
emery wheel for adjusting doors;
drill and drill bits.
Schemes of potbelly stoves
The main advantage of a rectangular stove, unlike oval products made from pipes or gas cylinders, lies in a larger heated surface area, so its efficiency will be much greater. The optimal size for a potbelly stove is 800x450x450 mm. A stove of this size will not take up much space and will easily fit even in a small room.
The simplest design is the “Gnome” stove, which consists of a box with a pipe welded to it
An important difference Loginov ovens is the presence of two plates ( reflectors) in the upper part of the combustion chamber. Because gas path at the same time, the heat transfer of such a potbelly stove increases significantly higher than that of a conventional metal stove.
Advice. If you need to reduce the size of the Loginov oven, then it is advisable to change only its width. If the length and height of the structure changes, its efficiency may decrease significantly.

Detailed diagram of Loginov's potbelly stove
The main stages of making a potbelly stove
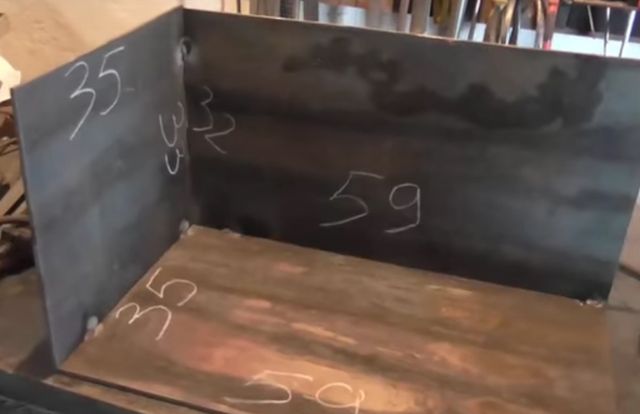
1. All the details are marked on a sheet of metal: 6 steel rectangles for the walls of the oven, 1 rectangle for creating a smoke reflector, plates for the grate and latch for the door.2. Cut out sheet metal can be found at any metal depot. The guillotine, unlike the grinder, allows you to cut (chop) it more accurately. In this case, there will be no need to straighten the sheets.
3. The furnace body is made in the form of a rectangle. Their sides are joined together at an angle of 90° and welded together.
Welding the box
4. To avoid mistakes, the furnace box is first only tacked by welding in several places, and only then, after checking its horizontal and vertical positions, its seams are welded.
Important! All connections in the body are thoroughly welded; for checking seams To ensure tightness, you can coat the joints with chalk or kerosene.
5. Welding seams are cleaned with a wire brush.
6. The internal space of the potbelly stove is divided into three parts: the firebox, the smoke circulation chamber and the ash pan. To separate the firebox from the ash pan, a grate is laid between them, on which the fuel will be placed. To do this, at a height of 10-15 cm from the bottom of the stove, welded on the sides and on the back of the box corners 5x5 cm, on which the grille will be located.
Advice. It is better to make the grate from 2-3 detachable parts. Otherwise, when replacing a burnt grate, it will be difficult to remove it from the firebox.
7. The grating is welded from thick steel rods or strips 30 mm wide. They are attached to 2 stiffeners - rods with a diameter of 20 mm. Since the grates burn out over time, it is better to make such a grate removable.


Manufacturing of grate
8. At a distance of 15 cm from the top of the box, two strong rods are welded on which the one or two removable reflectors– thick-walled sheets of metal that will delay the flow of hot gases and send them for afterburning. However, they should not completely block the oven. To allow hot smoke to enter the chimney, an indent of about 8 cm is made from the front (for the first sheet) and back of the stove.


Diagram of the passage of gases in a simple potbelly stove and stove with an installed reflector

Pipe hole
10. The front part of the stove with holes cut in it for the firebox doors and ash pan is welded last.
11. The size of the firebox door must be sufficient to allow fuel to be added and grates to be changed without effort. The hole for the ash pan is made a little smaller.
12. The hinges are welded first to the door, and then to the body of the potbelly stove. They can be bought ready-made or welded from two tubes of different diameters. Door handles can be made from a strip of metal or rod.

Welding the door
Important! When attaching the doors, you should fit them to the body as tight as possible; To do this, they are straightened (leveled) and cleaned with an emery wheel. The wedge latches that close the doors are fitted to the body as tightly as possible.
13. You can cook food or heat water on such a stove. To do this, a hole of the required diameter is cut in the upper part of the box. Stove burner, which will be inserted into this hole, can be purchased at any hardware store.
14. Design for ease of use installed on legs or a welded pipe stand.
15. The chimney pipe is connected to the stove using a sleeve.
16. For inserting a gate valve To regulate the smoke output, two holes are drilled in the pipe. A metal rod is inserted into the holes and bent at 90°. A metal “penny” is attached to it in the center of the pipe - a gate, the diameter of which should be slightly less than the diameter of the pipe itself by 3-4 mm.

Gate valve for adjusting smoke output
Chimney device
To prevent precious heat from escaping through the pipe too quickly, it must have a special design. Such a device has two main parts: vertical height from 1.2 m, installed at an angle of 90° above the stove and an inclined part called hog, 2.5-4.5 m or more long, in which the smoke burns out. It is the hog that provides up to 1/4 of the heat of the entire oven.
Chimney Hogs
A tall person can touch a heated pipe, so the hog must have a protective mesh cover. To avoid burns, the distance from the floor to this pipe should be 2.2 m. The vertical part of the pipe coming from the stove is additionally wrapped with thermal insulation.
Important! The pipe should be located away from plastered walls at a distance of 1.2 m. The distance from wooden structures is 1.5 m.
Advice. Laying pipes through a wooden ceiling and roof is a rather labor-intensive process. It is much easier to bring it out through a hole in the wall or window.

Exhausting smoke through the window
Rules for safe installation of a metal stove
A potbelly stove heats up much hotter than a brick stove, so all flammable objects should be kept at a sufficient distance from the stove. If the floor in the room is wooden, it is installed only on bricks or metal sheets. The metal, in turn, is laid on an asbestos sheet with its removal 35 cm or more from the edges of the stove. In the front part in front of the firebox it should protrude by 5.5 cm. Asbestos can be replaced with felt impregnated with clay. You can also install such a screen to reflect heat on concrete.Important! A working oven requires supervision. You should not leave the room where the potbelly stove is heated for a long time.

Installing a potbelly stove on a brick base
We increase the efficiency of the furnace
A potbelly stove can heat a room in literally a matter of minutes. Moreover, you can throw whatever comes to hand into the firebox: since it does not have an extensive network of chimneys, and the smoke in it comes out “directly,” you don’t have to worry about them getting clogged.But if a conventional heating stove installed in premises for permanent residence has an extensive network of chimneys that retain heat, in a potbelly stove it goes directly into the pipe, so its efficiency is not very high. That is why it is too “gluttonous” and requires a lot of fuel.
To reduce fuel consumption, you can use the following tips from experienced stove makers:
door to the firebox and vent in such an oven should be as airtight as possible; otherwise, the air supply to the potbelly stove will increase, and the fuel will burn out too quickly;
to regulate the output of warm smoke in the chimney It is advisable to provide a damper;
next to the stove it is possible to provide side metal screens at a distance of 5-6 cm from the stove, in which case it will heat the room not only by radiation of heat, but also by convection (circulation of warm air);
a potbelly stove, “clad” in a metal casing, will help retain heat much longer;

Potbelly stove in casing

Round furnace with afterburner and casing with heat gun
To retain heat in the room, bends should be built up in the pipe; however, soot will be retained in them, so it is advisable to create a collapsible structure;
the pipe can also be given a stepped shape: arrange the elbows in stages, making a 30° turn with each step; in this case, each of the elbows must be securely attached to the wall with rods;


Stove with chimney elbows
chimney capacity should be less than the productivity of the furnace itself, in which case hot gases will not go into the pipe immediately; its diameter should be only 2.7 times larger than the volume of the firebox, for example, with a firebox volume of 40 l, the diameter should be 110 mm;
you can increase the efficiency of the furnace using blowing the chimney with a fan– this will turn the stove into a kind of smoke cannon;
to reduce air circulation firewood in the stove should fit as tightly as possible; if it is heated with coal, the resulting ash should be stirred up as little as possible;
To regulate the air flow, the door to the ash pit can be made adjustable by equipping it with vertically located slots and valve, which will cover these gaps;
to increase the heating area, it can be finned, that is, welded to its body perpendicular to the stove metal strips;
if you put steam on the stove buckets or metal box with sand, then they will accumulate heat and store it even after the stove goes out; sand backfill or heat accumulator made of stones can also be sewn inside the metal body of the stove;

Scheme of a potbelly stove with sand backfill, the stove is made of a pipe with a diameter of 500 mm, its length is 650 mm
Bake, lined with 1-2 layers of brick, will retain heat much longer;

Brick screen
The volume of the oven also matters: the larger area of its walls, the more heat they will release into the room;
bricks or metal sheet, on which the stove is installed, will help not only protect the room from fire, but also retain heat.
Before we move on to the process of installing a potbelly stove, let's find out why we need to install this heating equipment. In most cases, a potbelly stove is installed as an additional or backup source of heating. Very rarely, a potbelly stove is used to heat a residential building, mainly in technical rooms and garages.
And so, for those who have decided to install a potbelly stove, I present you with a short photo report on the installation of this equipment in a wooden temporary shed.
Size of the potbelly stove: length - 700 mm, height - 500 mm, width - 400 mm, made of steel 5 mm thick (St3).

As I already said, the building is entirely wooden. An asbestos-cement sheet is laid on the floor, on top of a sheet of galvanized steel and sand-lime brick columns. A stove is installed on the brick.
The walls will be protected as follows: the first layer is a paronite gasket (an insulating material consisting of an asbestos rubber mass that can withstand temperatures up to 450 degrees), a galvanized sheet. The distance from the stove to the wall is only 12 cm. There is no other way. If you have the opportunity, then you need to retreat 80 cm, according to the norms.

Stainless steel chimney, diameter 140 mm. The pipes are joined together using corded asbestos (see diagram of the correct joining of chimney pipes).
To bring the chimney above the roof, the following was done:


A hole is cut in the slate using a grinder, and a galvanized sheet is placed on top. We install a fungus on top of the pipe.
First of all, you need to know the existing requirements for installing potbelly stoves:
- A stove of this type is not allowed to be installed in a garage or house if there are fuel, lubricants, wood and other flammable items in these rooms.
- The room must be equipped with a powerful exhaust hood and fresh ventilation.
- It is necessary to organize the movement of air flow so that heat transfer does not occur too quickly.
- It will be necessary to include special components in the design that protect it from sparks and ensure safety of use.

When installing a potbelly stove, you should remember that the metal heats up quite quickly, so there should be no flammable materials around the stove location.
How to install a potbelly stove in the country
When installing a potbelly stove, remember that the metal body heats up quite quickly. Stainless steel ovens heat up less and cool down faster. Potbelly stoves, which are made of cast iron, will retain heat much longer, so they must be installed in such a way that they are visible during operation and for some time after the flame has died out.
If you install potbelly stoves on metal legs, you must remember that these auxiliary structures will also heat up. The heating temperature will be lower than that of the case, but still not too low. To install potbelly stoves in your dacha, you will need to install them on a fireproof base. In this case you can use:

- tin products;
- concrete structures;
- ceramic tile products;
- brickwork.
Fire hazardous grounds are:
- those made of plastic of any kind;
- plank or parquet floors;
- laminate bases;
- linoleum bases;
- It is not allowed to use carpet or other soft coverings.
If the house has wooden walls or panels, the stove must be installed at a distance of 1 m from them. Chimney pipes in the room are installed from 1 section, without the use of connections. If for some reason this cannot be done, you need to make a tight connection, and one section must necessarily fit into the other. If the pipe passes through the wall, you will need to make a thermal barrier from ceramics or brick. In this case, concrete can also be used, but it will crumble when temperature changes.
The fuel storage container will need to be placed next to the door to prevent sparks from entering it.

Quite often, potbelly stoves in the country are used not only to provide heating. There are a large number of designs that combine several functions. Such designs include a heating stove with a cast iron stove. They can be used for cooking and at the same time for heating a country house. A household cast iron stove with 1 burner can easily replace a gas or electric stove in the country. If there is a need to feed several people at one time, you should make or purchase a stove with a continuous cooking surface or with 2-4 burners.
Ovens that have a water tank are also popular. Their design is similar to a samovar. A water container is mounted around a wood-burning cast iron stove.
Return to contents
Installation of a potbelly stove for a metal garage
The main advantage of this design is that it can be made from any metal blank. In this case you can use:
- metal box;
- 40-liter can;
- metal flask;
- old gas water heater.
In this case, the order of work will be as follows:

- A small slit is punched in the workpiece. This can be done using a chisel. If a milk can is used, a slit is made below the neck.
- A hole is made in the bottom using a grinder.
- The chimney is mounted on the pipe.
- A snake-shaped grate is made from steel wire, installed inside the stove through the neck and the wire is stretched.
- Supports are made from small pipes and fixed on the sides of the stove.
- Metal legs are welded to the bottom of the structure.
In this case, you will need to carry out all the work on installing such a structure in the correct sequence, and also know some of the nuances.
It is necessary to place the potbelly stove far from the window.
Care should be taken to ensure that the pipe is long. This will make heating more efficient. To be able to save fuel and increase the cooling time of the furnace, you will need to line the structure being manufactured with high-quality bricks.
Return to contents
How is a frame potbelly stove installed?
The structure of a frame stove is somewhat different from simple structures. To equip your garage with a heating structure, you must have:
- Metal sheet;
- corner;
- pipe;
- steel reinforcement;
- thick wire.
The tools you will need to find are:

- roulette;
- fasteners;
- welding machine;
- jigsaw
The order of work will be as follows:
- A frame is made from the corner. To do this, the metal is sawn into separate strips. Next, the legs are made. 2 rectangles of the same size are welded, legs are welded to one of them. The second rectangle is installed half a meter above the ground surface and attached using welding or bolts.
- The body is attached. Rectangular parts are cut from steel. For this purpose you need to use a jigsaw. The structure is connected using bolts or welding.
- Next, a door with a handle is attached to the body.
- A grate is made from existing wire or steel reinforcement, after which the structure is placed on the bottom.
- Next you will need to make a chimney pipe. One end of the structure is inserted into the oven, and the other end must be taken outside.
To get a large amount of heat, you need to come up with a long and wavy pipe path through a heated private house. The chimney can be discharged through a window, roof or wall. In this case, care should be taken to ensure that all connections are tight. If this is not taken into account, smoke will enter the room.
Return to contents

It is necessary to first familiarize yourself with some information about the installation of such a structure in order to know what nuances you will have to face.
Possible if you have basic construction skills and learning abilities.
The main problem for heating equipment that runs on wood is installing a chimney system. A potbelly stove has simplified requirements when compared with a fireplace. In this case, it is not necessary to make a vertical chimney.
For fire safety purposes, a potbelly stove requires an insulation layer. To do this, you need to make a brick platform or use a stainless steel sheet. You can also use asbestos-cement sheet, which is galvanized. This design can withstand temperatures up to +400°C.
It is allowed to use metal legs to install the stove. This design can save building materials and your own effort, which can be spent on installing the stove.

It is necessary to retreat 80 cm from the wall or add a thermal insulation layer to the wall. It is also recommended to install a protective coating around the perimeter of the stove, which can prevent fire if sparks hit the floor.
The chimney can be brought out at an angle from the wall. In this case, it is necessary to take care of the tight connection of the sections of the chimney structure. In most cases, a sandwich structure is used, which has a high level of safety due to the fact that the chimney pipe is partially insulated in the structure. It is not allowed to use thin stainless steel for the chimney structure, because it will quickly burn out. The pipe must be led outside through a drilled hole in the wall or roof. At the end, the resulting cracks must be covered with clay.
In order to be able to regulate the draft, it is necessary to purchase a damper, which is installed in the chimney structure and can block it completely or partially, if necessary. The gate will be needed a few mm smaller than the pipe diameter. You need to make 2 holes in the pipe. Next, you should thread a rod into them, to which the gate is attached.
The walls next to the stove must be protected with a steel screen or lined with ceramic tiles. It is preferable to use the latter option.
At the end, cosmetic work is carried out, which consists of filling up the cracks and improving the area on which it is planned to place the potbelly stove.
