What is the best material to make a foundation for a barn from? How to choose a foundation for outbuildings. Preliminary preparation for choosing a shed and the foundation for it
Most people believe that building a foundation for a shed with your own hands is simply simple and does not take much time. For this to be the case, it is necessary to carry out complex construction. After all, it needs to be done in such a way that the building does not collapse in two or three years.
Ready-made monolithic foundation for a barn
Before considering the types of foundations for a barn, you should decide on the type of structure itself. The following are distinguished:
The type of foundation being built directly depends not only on the strength of the future building, but also on the type of soil on which it is built.

Let's look at the types of foundations for a barn that you can build with your own hands.
Poured foundation
Before laying a poured foundation for the shed, it is necessary to make a bedding that will serve as an elevation above the ground by about 100–200 mm.
 Formwork for installation of a poured foundation
 Then a monolithic slab is installed: it will be the floor for the building. Such a floor will ideally cope with any loads and protect the structure from all kinds of rodents.
Columnar foundation
An ideal and simple option for constructing light buildings. On such a foundation, you can make a building from foam blocks, but before you start construction, you need to examine the soil composition: if it is homogeneous and compacted, then it is possible to make a foundation from bricks or foam blocks.
It must be remembered that building a foundation with your own hands is a job that requires patience. It is best to make a columnar foundation using poured foundations or using brick or concrete blocks, simply installing them in the corners and in places where the corner elements of the walls are located.
To build a columnar foundation, you will need to do the following:

Block foundation
A foam block foundation is the best option for outbuildings. It is the most common because it is easy to use, suitable for installing a base for all types of buildings, and can be installed quickly.

The not very high cost of a foam block foundation makes this building material even more popular. Moreover, it is quite lightweight compared to other materials.
To make a foam block base correctly, you first need to mark the area. Next, drive in the stakes and stretch the cord between them. Then start digging a pit approximately 600 mm deep.
When calculating, you should take into account the width of the foam blocks themselves, increasing the width of the trench by 200 mm.
Pour crushed stone and sand bedding onto the bottom of the trench, install formwork, and fill everything with concrete mortar 200 mm high. Then, after waiting for the concrete to dry completely, you can install the required number of foam blocks and continue work.
Strip foundation for a barn
When building sheds, strip foundations are no less popular, as they can withstand different loads, are cheap, stable and allow you to build a basement inside.
 Scheme for building a strip foundation for a barn
 This type of base is used on any soil and for any buildings.

Screw foundation
Although it is a relatively new technology, it has managed to gain popularity in low-rise construction. Such a foundation is affordable and durable on almost any soil.
Rapid construction technology includes:
- Vertical installation of piles at marked points - the vertical is measured with a level. If the pile is deflected even by two degrees, it must be unscrewed and installed correctly in another place, since the density of the soil has already been lost in this area;
- The piles are driven to the calculated depth using a crowbar or pipe in the corners and under the walls of the building. This will not cause many problems: the screw piles are equipped with a sharp end and thread, which make it possible to perfectly cut through any soil except rocky soil;
- All piles need to be measured and brought to the same height using a grinder;
- For strength from the inside, the pile is filled with concrete mixture. The foundation is ready, you can lay the slab.
Cinder block foundation
Cinder block is a cheap material that consists of slag, crushed stone, sand, cement and other components. As a foundation, it is perfect for small-sized buildings.
But a cinder block foundation has its drawbacks:
- Hygroscopic due to the porosity of the structure;
- Has high thermal conductivity;
- Not resistant to frost.
The construction scheme for a cinder block foundation includes the following steps:

Important! To ensure that the foundation lies evenly, reinforcement is installed in the corners and a rope is pulled over it. In the future, masonry is carried out at this level.
Tire foundation
Recently, among summer residents, foundations built from used material have become widespread. Sleepers or tires can be used for this.
 Example of a tire foundation for a barn
 Advantages of a tire foundation:
- Saving on materials;
- Rubber provides excellent waterproofing;
- Tires are a strong and durable material;
- Tires can serve as a “cushion” in areas of seismic activity;
- Easy to manufacture.
An important nuance is that the tires must be located at the same level to avoid misalignment.
The foundation of tires can be erected as either a strip or a columnar type. To build it, you need to clear the area, level the soil, lay the tires in two layers - the best would be to use truck tires. Then soil is poured into the column to the extent of 80% of the tire volume.
Roofing felt should be laid on top to ensure a smooth surface and waterproofing. After which the concrete can be poured. To increase the strength of the structure, you can use concrete instead of backfilled soil.  In addition to this, it is possible to use tire reinforcement for the foundation.
The construction of a barn involves the choice of foundation, material for building walls and soil characteristics. When choosing to build brick walls, you will need to calculate the foundation for heavy loads.
At the same time, a wooden shed is built much faster and there are much fewer requirements for the foundation; the work can easily be done with your own hands. That is why before starting construction it is necessary to determine the purpose of the outbuilding.
Choosing the type of shed for a summer cottage
Before you move on to laying the foundation, you need to decide on the type of the future structure itself. The most popular option is a wooden shed with a small garage. It can be performed in the following variations:
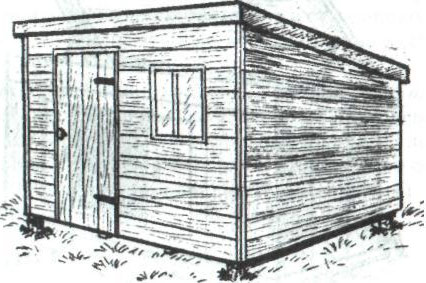
Shed with a pitched roof model
 Shed with pitched roof
 In this case, you will build a flat roof over the entire building area with a slight slope towards the back wall. As a rule, this option is used instead of a woodshed or a workshop.
The workshop will have one entrance door and one window. A small strip foundation is ideal for such a shed.
Barn with equipped gable roof
With such a roof, it is possible to equip an attic for storing tools and personal property. The floor is most often made of tongue and groove boards; there may be 2 or more windows and doors. Slab, strip and pile-screw foundations are suitable.
Chest
It is a light and squat shed in which a set of equipment for digging and cultivating the garden is stored. The area of this room will be minimal; there will be no windows. The foundation can be made with your own hands from scrap materials.
Temporary
A temporary structure for any garden tools and other necessary equipment at the dacha. Often made in the form of a change house for the possibility of living in the summer. That is why electricity and a small shower stall with a barrel of water on the roof are installed here. This type of structure is rarely used as a barn, and more as temporary housing on a summer cottage. The foundation for the temporary structure is being made in the form of a strip with concrete pillars.
When choosing the type of construction, carefully calculate the snow and wind load on the premises. If the real values do not correspond to the theoretical calculation, your barn will fall apart in a few years.
The most common type of barn is considered to be a building with a gable roof. We will choose it for the example of building a foundation on screw piles with our own hands.
Features in the construction of a shed on a summer cottage

An outbuilding is a separate building, which has a list of specific differences in comparison with a bathhouse and a house. The main differences are as follows:
- Light weight supporting structure. Due to the absence of insulation and heavy load-bearing structures, the load on the foundation is minimal.
- No heating. The barn does not warm up in winter, so the soil underneath will not freeze
- Low construction cost. Simple materials are used (timber, tongue and groove board, galvanized iron sheet, nails and screws)
- Simple and even building forms.
The barn does not require complex architectural forms and aesthetic beauty, so it becomes possible to use recycled materials from lumber processing and carry out all the work yourself without hiring specialists and equipment.
A pile foundation is ideal for arranging a gable shed with a garage and a small utility block.
What are the benefits of using a pile foundation?
 Pile foundation for a barn
 Any type of foundation is suitable for a gable shed with a shed and a garage. However, piles have a number of advantages that make it possible to turn to this technology. Among them:
- Reliability and durability of screw bases. Screw piles allow you to withstand the heavy weight of a building made of any material, so if installed correctly, the shed will serve you for many years. And thanks to the anti-corrosion coating (used for processing galvanized screw pile samples), foundations on piles tolerate any contact with moisture in the ground well.
- It becomes possible to construct buildings and structures on unstable soil. When constructing piles, their length is selected based on immersion to the maximum depth to dense layers of soil. As a result, you will never have to deal with the problem of your shed skewing.
- Quick installation of the base. Since the barn is a non-residential building, minimal time should be spent on its construction. But this should not affect the reliability of the structure.
- Low price of piles (on average, for a pile of 2.5 m and a diameter of 60 mm, the price varies from 1250 to 1500 rubles). Pile-screw foundations for a shed can be made with your own hands, without fear of disrupting the construction technology. Have you chosen an uneven place for the device? Thanks to the sufficient height of the pile structures, the future base of the shed can be easily leveled using a level. Also, do not forget that for piles you do not need to dig holes with your own hands and spoil the landscape of the site.
When purchasing piles, pay attention to the condition of the metal, the angle of the spiral and the head. The pile must be manufactured in accordance with GOST 977-89. Only then will its durability be more than 100 years.
Stages of constructing a pile foundation for a barn
Both when installing a strip base or slab, and when building a screw foundation, it is necessary to carry out preparatory work to clear the space for the shed. Watch the video on how to clear an area for a shed.
After this, the work steps are as follows:
- The top fertile layers of the soil are removed.
- If the drilling is done with your own hands, then a long lever is installed in a specially made hole in the pile in the upper part.
- 2-3 people screw the pile clockwise using the corkscrew principle. In this case, it is necessary to constantly monitor the vertical level so that in the end your pillar stands up straight and the structure does not tilt. Most often, workers split up - 2 do the work of screwing in the pile, and the 3rd ensures that the level is maintained.
When the pillar deviates by just 2°, there is a critical danger to the stability of the future structure. If the pile “goes unevenly,” you need to unscrew the product again and start screwing it in 30-40 cm from the previous hole.
- When the required depth is reached, the heads are checked again for level. After which the upper part along with the hole must be cut off with a grinder.
- Inside the pile we pour concrete, prepared here on the site with our own hands. After it hardens, all that remains is to weld a few channels to the finished pillars. The ceilings and walls of the barn will be installed on the channels. To improve the resistance of the metal to moisture and acids, it is necessary to treat the piles along with the channel on top with a solution of bitumen mastic.
Stages of constructing a barn with a gable roof

As soon as the pile-screw foundation is ready, you can immediately begin construction of the structure. All work consists of 4 stages:
- The foundation is lathed with a 100*50 mm board. After that, ROCKWOOL brand insulation is laid (or without it), and ordinary OSB boards 8 mm wide are attached below. We paint the entire structure with NC paint, and lay tongue-and-groove moisture-resistant chipboard, 15 mm thick, on the floor.
- We make the walls using frame-panel technology. In this case, you will need a board 100*50 mm and OSB boards 12 mm wide. By using OSB boards, we will be able to save on slopes, crossbars and connecting boards to each other.
- We nail wooden partitions into the vertical compartment of the wall. They serve to hold the insulation in the structure, as it will settle over time. We make sure to reinforce the ridge stand. We cover the walls with OSB boards without using a vapor barrier film.
- All that remains is to build a second pitched roof and cover it with gables. The distance between them must be at least 3 meters. For the roof we use flat galvanized sheets of metal or roofing felt.
As you can see, the work is simple and can be easily done with your own hands without the involvement of specialists.
A barn is the most common outbuilding. And this is not surprising, work tools, firewood for heating the stove, and various equipment are stored there. It’s convenient to arrange a workplace in the barn by attaching a workbench or machine. Taking this into account, we can assume that a barn must be built of no less quality than a house. A properly made foundation is the key to a building’s long service life for its owners. Let's look at how to lay a foundation for a shed with your own hands.
Types of soils
Let's figure out which soil is most suitable for laying a foundation. The following types of soil exist:
- Rocky,
- Sandy,
- gravel,
- Sandy loam and loam.
The most desirable option is the first one. Rocky soil does not freeze and does not form quicksand, does not sag or shrink. The only disadvantage we can highlight is that it is difficult to process - it is difficult to dig. However, this compensates for the fact that it is not possible to lay a very deep foundation on such soil.

The worst option is soil consisting of sandy loam and loam. It freezes too deeply, which is why the foundation will have to be dug very deep. In addition, this type of soil, like sandy soil, forms quicksand. Clay soil is also unsuitable for construction, as it is highly susceptible to compression and swelling.
Some people wonder how deep to dig a recess under the foundation. Since the barn is a lightweight structure, a shallow foundation is often ideal for it. It is ideal for buildings made of logs or wooden beams, and is usually laid on clay or sand. The depth of the foundation for a shed depends mainly on the type of soil and the depth of its freezing in winter, but on average it is 60 cm.
Soil properties
It is clear that a barn is a much lighter structure than a house, however, its construction also has its own characteristics. When laying the foundation for a shed, you need to take into account the properties of the soil. Depending on them, it is necessary to select the type of foundation. So, before you start digging a trench, consider the following factors:
- Soil compressibility,
- Groundwater rise level,
- Presence of quicksand, freezing depth in winter,
- Soil type,
- Features of the area.
Mortar for pouring the foundation
Before making a foundation for a shed, you need to prepare a solution consisting of cement, sand, gravel and water. A good tenacious solution is prepared in compliance with the following rules:

- When buying cement, you need to check the date of its manufacture and prefer the one that is manufactured recently. For the mortar, ordinary Portland cement is suitable.
- For greater efficiency and reduction of cement costs, it is best to take gravel of various diameters, both large and small. Small grains will serve as a layer between larger pebbles, and less cement will be needed.
- Crushed stone should not contain debris or impurities.
- The water should also be clean, preferably potable.
- There should be no clay or silt mixed with the sand.
Below is a recipe for a classic masonry mortar. Mix sand and crushed stone in a ratio of 3:5, add 1 part of cement and fill everything with water to obtain a thick, homogeneous mass.
Now it’s clear to you how to fill the foundation for the shed.
Strip foundation
For building sheds, strip foundations are the most popular. For it, it is necessary to dig a trench around the perimeter of the future building. The tape type is used in almost any soil and for any building. It will perfectly withstand both light buildings and multi-story brick buildings with heavy concrete floors. This type also allows you to equip a basement.
To begin building a strip foundation for a barn, like most others, you need to dig a trench. The depth of the ditch should be equal to the depth to which the soil freezes in winter plus another 15 cm, and the width should be about 70 cm. In this case, the width of the foundation base itself will be equal to 40 cm. A two-layer cushion is poured onto the bottom of the ditch, consisting of a layer of compacted crushed stone about 10 cm and 5 -th centimeter layer of sand.
Then they make formwork, the height of which should be approximately 20 to 30 cm above ground level. This way you will raise the base of the building, and this will protect it from getting wet. A mesh is made from reinforcement, which serves to strengthen the foundation. The diameter of the reinforcement should be 1.2 cm, and the width of the mesh cells should be 30 cm.
Next, the foundation is poured with concrete, and after it hardens, you can remove the wooden frame and seal the gaps formed with earth. The base should be separated from the foundation by a layer of waterproofing.
Columnar foundation
Simple to implement and relatively cheap compared to the strip foundation described above.
A columnar foundation for a barn is made by installing concrete or brick pillars in the corners and at the junctions of walls. They are simply dug into the soil to the depth of its freezing. Unfortunately, this type of foundation cannot be used on moving soils.
First you need to dig holes in the places where the pillars will be located. The depth of the holes should be 15 cm greater than the soil freezing depth for this type of terrain. The bottom of the holes is filled with a mixture of sand and gravel and compacted so that the final result is a 15-centimeter layer.
Now you can mount the pillars, which can be made of concrete blocks, asbestos pipes filled with concrete mortar, or represent ordinary brickwork. An iron rod must be installed inside the pillar; this increases the bearing capacity of the pillars.

If you use the last option - masonry, then it is important to treat it with waterproofing mastic. Insulation from moisture is also necessary for the wooden base of the shed. To do this, the foundation is covered with moisture-proof material and only then the base of the building is placed on top.
Foam block foundation
For this option of making a foundation for an outbuilding, foam blocks are used. This type of foundation is quite common, since its use increases the service life of the entire building. Foam block is a universal material; it can be used to make a foundation for any structure, even a house.
Low cost also contributes to the popularity of this material in construction. In addition, foam blocks are a fairly light material compared to others, so the base does not experience much stress. Based on this, it can be argued that a foam block foundation for a shed is an ideal option. Some people use foam blocks not only for laying the foundation, but also for erecting the walls of the building.
The practical part of performing this type of foundation is very similar to working on a strip foundation. Start by marking the area. Mark and dig in pegs and stretch the cord between them. Now you can dig a pit, the depth of which should be about 60 cm. The width is calculated taking into account the width of the foam blocks themselves plus another 15-20 cm.
A cushion of a mixture of crushed stone and sand is poured into the bottom of the pit, formwork and frame are installed, and everything is filled with concrete. The height of such a base should be about 20 cm. Now you need to wait until the concrete is completely dry and install the blocks.
Block foundation
Block foundations have a number of advantages over other types, including:
- Low temperature resistance.
- Resistance to acidic soil masses.
- Versatility and variety. From the blocks you can build any type of foundation for any building. This is due to their wide range and variety of standard sizes. Small blocks are suitable for a shed.
- Excellent strength properties and long service life.
- Ease of installation and reduction of the time required to lay the foundation.
The foundation for the block shed begins to be built from the corners, where the first blocks are installed. The blocks are placed on concrete mortar. If the soil is loose, then for the reliability of the future structure it is necessary to manufacture and install a metal mesh. The laying of the base is controlled using a level, this helps to avoid the occurrence of curvature.
After this, the external seams are expanded and filled with a composition with additives containing moisture protection. Waterproofing is also necessary for the entire outer contour of the base. After this, the trench is buried.
Thus, now you know the methods of building a foundation and its types that are most suitable for making a foundation for a barn with your own hands.
It is much easier to build a foundation for a barn than for a house, because its weight and area are much smaller, and it is often not heated. However, even here you need to know some points so that the outbuilding does not collapse and rot in a few years. What kind of foundation can you put a barn on and in what cases can you do without a foundation?
Barn without foundation
You can do without a foundation if the building is very light, made of wood or OSB, or is a metal container. For a small shed, the construction of a powerful foundation is not justified either economically or in terms of strength.
You can make a barn without a foundation with your own hands from a metal container. This option is attractive for many reasons. Such a shed can simply be placed on sleepers, wooden beams or concrete blocks, between which crushed stone is poured.
You can make a frame barn without a foundation. Before construction, the land at the site of the future utility block is cleared and covered with gravel. Then the racks, pre-treated to prevent rotting, are buried 60-80 cm into the ground and concreted. In this way, you can build a barn from boards with a pitched or gable roof. To do this, four wooden pillars 3 m long are dug into the ground. For a lean-to barn, two of the pillars are made 10-20 cm lower.
Types of foundation for a barn

The shed can be placed on the same type of foundation as the house. But due to the small weight and size of the building, you can also find more exotic options, for example, from tires or sleepers, they also have their advantages.
The type of foundation should be selected based on the type of soil, as well as the design and purpose of the building. A barn in which animals or poultry are kept requires a different foundation than a woodshed. The cost of materials also matters: there is no point in making a foundation for a shed, which is several times more expensive than the outbuilding itself.

Strip foundation
It is suitable for solid structures such as brick and foam block sheds, for example, in which livestock are kept. Wood is not suitable for the construction of such sheds: it rots, is destroyed during cleaning, and such a structure cannot be called durable. For frame and plank sheds, such a foundation is not economically justified; it will be much more expensive than the building itself and will have excessive strength, which is not necessary in these cases.
The trench is dug no deeper than half a meter. It can be either prefabricated from blocks or monolithic. The second option is suitable for more powerful designs. The advantage of this type is its versatility. A shallow strip foundation can be made on sand, clay, or rocky soil. How to make such a foundation for a shed with your own hands?

- Dig a trench about 50 cm deep, 30 cm wide than the width of the future tape.
- A layer of crushed stone (10 cm) and sand (5 cm) is poured onto the bottom. Each layer is compacted well.
- A formwork made of boards 30 cm high above ground level is installed in the trench.
- Reinforcement is placed inside - mesh or rods.
- Concrete is poured into the formwork. After it hardens, the formwork is removed, the tape is coated with waterproofing and the gaps between the tape and the walls of the trench are filled with earth.
Monolithic belt belt
This is a cheaper option for a strip foundation, suitable for a poultry house or barn. It allows you to make a floor on the ground, suitable for non-heaving or clayey soils. In the first case, only with high groundwater will it be necessary to do waterproofing and drainage. On clay soils, concrete waterproofing, insulation of blind areas and the perimeter of the building, and wall drainage are needed.
After marking the site, the fertile layer of soil is removed, then a gravel, sand or mixed cushion is poured 0.2 m larger than the foundation on each side. Drainage pipes are placed in trenches dug around the perimeter in the form of a closed loop with a slope of 4 degrees.
If the soil is clayey, then the perimeter must be lined with polystyrene foam, and the blind area must also be insulated at a depth of 40 cm.
Next, formwork is made from boards, and reinforcement from rods 6-10 mm thick is placed in it. Then the concrete is poured and compacted with a vibrator. After removing the formwork, the concrete is coated with bitumen, mastic or waterproofed with rolled materials.

The floor is poured into the finished base along the ground, it is separated from the foundation using a damper tape.
Block foundation
Such a foundation for a shed is made by laying blocks in a trench. They are placed on a concrete mortar, the external seams are made with a mortar with moisture-proof additives. The laid foundation is waterproofed on all sides. After this, the trench is buried.
You can use cinder blocks. Their disadvantage is their porous structure, due to which they are quickly destroyed by moisture. Therefore, such a base must be carefully waterproofed.

Foam block foundation
The foundation for the shed can be made from foam blocks. They are placed in a trench or pit, but a concrete pad is first made. To do this, a cushion of crushed stone and sand is poured onto the bottom of the trench. Formwork is installed on top, into which reinforcement is placed, and a concrete pad 20 cm thick is poured. Foam concrete blocks are laid on the hardened concrete.
The width of the trench is the width of the block plus 15-20 cm, the depth is equal to the depth of soil freezing plus 15 cm.

Columnar
A simple foundation for a barn is made from concrete, brick or wooden posts. It does not require equalization of small differences in height; it requires less material than tape. It should not be installed on moving soils - over time, the posts may tilt or move apart, which will lead to the collapse of the entire structure.

For a columnar foundation, it is necessary to dig holes in which the columns will be placed. The holes need to be dug 15 cm deeper than the freezing level of the soil. A cushion of crushed stone and sand is poured onto the bottom and compacted well. A metal rod is placed in the middle. The foundation columns for the barn are laid out from concrete blocks, bricks, you can use asbestos-cement pipes, into which concrete is poured. On loose soils, a reinforced concrete foundation is poured into the bottom of the holes so that the building does not sag over time. For brick columns, a thickness of one and a half bricks is sufficient. The internal cavity is filled with concrete. Brick pillars must be waterproofed - coated with bitumen or mastic. The joints of the foundation and the barn itself must also be waterproofed, especially if the outbuilding is wooden.
If pipes are used as formwork for the posts, they should be reinforced from the inside with reinforcement. You need to add small crushed stone or pebbles to the concrete. After the concrete has hardened, the columns are coated with waterproofing materials.

If concrete blocks are used, their laying directly depends on the size. A large block can act as a whole pillar.
If the soil is rocky or is coarse, gravelly sand, then you don’t have to deepen the posts too much - deepening them by 2 rows of bricks or 1 row of blocks will be enough. Then the first beam of the structure will play the role of a grillage.
From wall blocks 20*40*40 you can make a type of columnar base on non-heaving soil. On clay soil, you will have to insulate the entire perimeter of the building and make wall drainage or bury the pillars below the freezing level. In this case, the cost of the foundation will increase significantly, so it is better to do it on rocky or gravelly soil.

- The fertile layer (about 40 cm) is removed under each column.
- A pillow is poured, sandy (for dry soils) or crushed stone (for wet soils), its thickness should be 20-40 cm. After pouring every 10 cm, the pillow is compacted.
- Drainage is made from perforated pipes along the perimeter of the base.
- Next, lay out the columns of blocks.

Pile
A foundation made of screw piles has proven itself well on heaving, loose and other difficult soils. It is quite easy to do it yourself, you just need to buy piles and screw them into the ground using a crowbar or a pipe inserted into a special hole at the top of the pile. Two people are enough to drive the pile; no equipment is required. It is advisable that the third participant monitor the verticality of the support.
Another option is bored piles. Such a foundation can be built by drilling the required number of wells in the ground and inserting asbestos-cement or polyethylene pipes into them. Also, formwork for pipes can be made from roofing felt rolled into a tube, and the seam is glued with bitumen mastic. The pipes are filled one-third with concrete solution, the reinforcement is lowered and filled to the end. Reinforcement for bored piles is knitted from 4 corrugated rods connected by round or rectangular clamps, as in the figure. This foundation is good on clay or sandy loam soil.

Tire foundation
A foundation based on used tires (preferably large ones from trucks) can be quite reliable. Tire columns are filled with soil or poured with concrete.
On heaving soil, tires are placed in holes dug below the freezing level at corners and along walls in increments of 1.5-2 m, filled with crushed stone, which is compacted, then covered with sand.

The disadvantage of a base made of tires is the large size of the wheels, which makes it difficult to make a fence to protect against moisture and rodents, so an imitation base is usually made for a barn. The advantage of tires is their elasticity, which decreases after the concrete hardens, so the first method (with crushed stone) is more preferable. The video shows the process of building a frame shed on a base made of tires.
Sleeper foundation
Concrete or wooden railway sleepers act as a grillage during the construction of the foundation. The disadvantage of this type of base is that sleepers are not always available, so we can recommend it to those who already have this material. You can also build a strip foundation from reinforced concrete sleepers by placing them in a trench prepared, as for a conventional strip foundation. The sleepers are laid in several layers with bandaging (the joint of each next row should be above the whole sleeper in the previous one).

Conclusion
The light weight of outbuildings makes it possible to make different types of foundations for them, including using unusual materials. However, to obtain a high-quality foundation, it is necessary to follow the same construction technology as when building a foundation for a house.
Foundations are needed not only for houses and cottages, but also for outbuildings, which include sheds. Such structures are often built on a strong foundation. With this addition, buildings become taller and stronger. It’s worth figuring out which foundation is more suitable for a shed and how to install it yourself.


Features of choosing a base
Today there are several types of foundations. Each of them has its positive and negative sides. For a shed, you need to select the foundation as carefully as for the main structures on the site.
To settle on one option, you should rely on the characteristics of the soil.
- Loose, sandy soil is characterized by one serious problem: after snow melts or heavy precipitation, such soil becomes saturated with moisture. This may cause him to simply “float”. Under these conditions, professionals advise constructing a monolithic or strip foundation.
- As for clayey soil, it must be taken into account that it is subject to freezing at a considerable depth. In such conditions, quicksand also form. For such soil, a pile foundation is more suitable.
- The negative aspects of frozen soil and quicksand are unfamiliar to the gravel type of soil. In such conditions, it is possible to safely install a columnar foundation.
- There is also a special rocky type of soil. Any type of foundation can be built on it. The only exception is screw bases.


To choose the optimal type of foundation, it is important to take into account the topography of the soil, as well as the groundwater level. To find out all the necessary information about the site, you should contact a specialist. However, it is worth considering that such geological surveys can be quite expensive, so most homeowners rely on the experience and advice of neighbors. There is a way to independently study the soil to choose the optimal foundation. To do this, a test screwing of the screw pile is done. In this case, this part is deepened into the ground manually so that the groundwater level can be determined, as well as the depth of the load-bearing layer based on the moment of screeding.


Preparatory work
Before proceeding with the construction of the foundation for the shed, it is necessary to carefully prepare the area in the place where the outbuilding will be located.
At this stage the following work should be carried out:
- you need to thoroughly level the place where the foundation with the shed will stand;
- remove all unnecessary things from the ground: stumps, twigs, dirt, trees, bushes and other similar objects.


After clearing the land, different work is carried out for each type of foundation. For example, for a monolithic foundation a large hole is dug, but for a linear foundation it is necessary to prepare a trench. If the site has very uneven ground or soil with a large slope, then leveling it will not be so easy. In this case, experts recommend installing foundation structures on piles.
Subtleties of manufacturing
You can make the foundation for a shed with your own hands. It is worth considering in more detail several simple instructions with a step-by-step description of the installation of the foundations for this outbuilding.
Screw
Screw bases are erected as follows:
- first, along the perimeter of the walls you need to set markings for screw piles;
- then you need to dig small holes, leaving about 1.5–2 m between them; it is necessary to place piles in the prepared holes, which should be located in the corners; if the structure has internal partitions, then the piles must be fixed along the line of their construction.
- if you plan to lay a floor made of boards in the barn, then the piles need to be placed under the beams;
- you need to screw in large piles that have a diameter of more than 100 mm and a length of more than 150 mm, it should be taken into account that such installation work is carried out with special equipment;


- piles that are more modest in size are screwed into the soil manually using levers, while care must be taken to ensure that the foundation structures are in an even vertical position;
- fixed piles need to be trimmed to height; for this it is recommended to use a bubble or laser level;
- Cement composition must be poured into the pipes;
- caps must be attached to the top of the piles; The foundation base is assembled into one structure using a channel or I-beam welded around the perimeter.
Columnar
To build a similar foundation for an outbuilding, The following materials may be needed:
- concrete solution, which will need to be poured into the formwork;
- metal or asbestos pipes with reinforcement, filled with concrete mortar;
- brickwork;
- concrete blocks.

A foundation with pillar supports for a barn is built in a different way than a screw one, and includes the following steps:
- to install supports, you need to dig recesses of suitable depth, based on the markings drawn up earlier;
- the gap between the supporting parts should be left in the range from 1.5 to 2 m;
- the depth of the foundation structure for an outbuilding must be at least 150 mm below the freezing point of the soil;
- it is necessary to sprinkle coarse crushed stone (about 100 mm) at the bottom of the holes, in addition, pour out the same amount of sand; these materials should be compacted, and then roofing material should be laid on top;
- the supports should be placed at the same level, they should be located approximately 150–200 mm above the ground;
- You need to put several layers of waterproofing on top of the supports;
- The pillars must be surrounded by a blind area to prevent the soil from being washed away.


Tape
Strip foundation types are the most popular because they are inexpensive, can easily withstand impressive loads and are universal.
To prepare such a base for a shed, you should perform the following steps:
- a trench is dug along the perimeter of the outbuilding, having a depth of 200–300 mm below the soil freezing level;
- the trench width indicator depends on the size of the base; free space should be allocated for installation of the formwork;
- it is necessary to arrange a cushion of crushed stone with a thickness of 100 mm, and then compact it thoroughly;
- sand must be poured onto the bottom of the trench and compacted too;
- now it is necessary to prepare the formwork with the top edge rising 200–300 mm above the ground;
- the formwork needs to be strengthened with struts, while the upper outermost part is knocked down with transverse bars in increments of 1.5–2 m;


- inside the formwork on the walls you need to put roofing felt or polyethylene;
- you need to carry out reinforcement, for which steel rods with a diameter of 8–12 mm are useful; the reinforcement must be laid and tied so that a lattice with cells of 40–50 mm is obtained;
- it is necessary to pour concrete; to get rid of air bubbles, reinforcement must be inserted into the concrete several times over the entire surface of the pour;
- You should cover the setting concrete with plastic film and wet it from time to time so that the material does not crack;
- after 28 days, when the concrete has completely hardened, the formwork must be removed and the trench backfilled with earth;
- Two layers of waterproofing should be applied to the concrete pour.


According to home craftsmen, this foundation is quite simple. Its construction is not difficult.
From foam blocks
A foundation made of blocks (foam or cinder blocks) is strong and reliable.
It is installed in several stages, namely:
- first you need to mark the area and dig trenches of the required depth;
- the bottom of the trench must be leveled and compacted;
- the next step is to arrange a bed of gravel and sand;
- after this, the blocks can be laid out in the trench; To do this, you should turn to the services of special lifting equipment;
- a cement-sand mixture should be applied to the side walls;


- each subsequent block row must be laid with a slight offset of half the length compared to the previous one;
- in the space separating the rows, you need to apply a solution of sand and cement;
- at least 1 row of foam blocks must be laid above the ground;
- At the top and sides you need to apply bitumen mastic using rags and kvach;
- Finally, you need to backfill the trench with earth.

Monolithic
The monolithic base is reliable and strong. It can be used on almost any soil. On such a basis, a shed of any size, from very small to large (for example, with dimensions of 6x4 m) will stand for many years.
The technology for constructing this type of foundation includes the following steps:
- under the entire pouring area you need to dig a hole, and its depth should be only 0.5 m; after compacting, you need to pour sand (200 mm) onto the bottom, in addition, the sand needs to be slightly moistened and compacted;
- crushed stone is laid on the sand layer (200 mm layer) and also compacted;


- floor slabs are laid out on the resulting sand-gravel cushion and prepared for pouring; for this, formwork is assembled and reinforcement is made; in this case, the cells in the grid should be 20x20 m, then the formwork is filled with concrete;
- you need to expel air bubbles from the solution, which should be done using a special vibropress;
- you need to put a polyethylene layer on the frozen solution;
- the formwork can only be removed after 28 days.


- A large outbuilding will require a sectional layout. In this case, the foundation is poured not only along the edges of the building, but also under it, so that the bottom of the barn does not sag over time, but simply lies on the concrete.
- The cement dries completely on average in 24–28 days, however, the construction of the outbuilding can be started earlier - after a few weeks, when the strength of the pouring has been achieved by more than half.
- If a columnar structure is mounted on heaving ground, then it should be taken into account that it must lie deeper than the freezing point of the ground.
- If you want to save money, then instead of asbestos pipes and roofing felt, you can use simple car tires. In conditions of non-heaving soil, they do not need to be deepened much. The cavity of these objects should be filled with sand and then filled with cement.


- Do not forget that the columnar foundation under the barn must be waterproofed and drained without fail.
- Experts recommend making the required calculations and measurements in advance, as well as preparing all the necessary recesses on the site. You also need to decide on the number of foundation pillars. Otherwise, you may encounter serious problems. For example, in the midst of work, it may turn out that there are rubble nodes in the ground that cannot be dug out.
- Screw piles can be made a little longer if necessary. To do this, the ends located at the top are supplemented with threads and grooves.
- It must be remembered that the piles are not affected by heaving in any way, since their outer surfaces are treated with an anti-corrosion agent. However, the building then receives an underground space, the perimeter of which must be covered with decorative material, for example, siding, tiles or corrugated sheeting. In order for the underground to be ventilated, the shelter is equipped with ventilation ducts.
- The barn must be built immediately after the completion of the foundation work. Otherwise, the heaving of the soil, which occurs in the spring, may move the pillars slightly from their original point.

