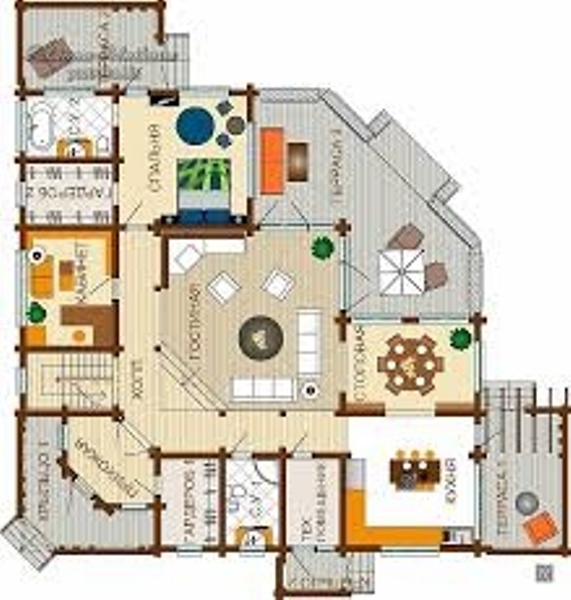
Layout of a 2-storey wooden house. Layout of a wooden house
Layout wooden house provides ease of use interior design. The fundamental ones are general principles building structures and personal preferences of owners. Functional characteristics depend on the careful selection of the project. Optimal planning parameters will reduce unnecessary costs during the construction and use of the building.
Internal placement of a wooden structure
The layout of a one-story wooden house is created based on the frequency of use of a particular room. This requires a more scrupulous attitude in the arrangement, be it an office, living room or children's room. Based on your needs and capabilities, you should take into account the number of residents. Caring for each of them consists of taking into account their age category, type of activity and established habits. All these parameters are observed immediately to exclude further extensions and redevelopments.
Proper structuring of the room
Internal layout wooden houses is created according to generally accepted principles regarding the location of residential buildings and utilities. It is obvious that the living room and kitchen are located as close as possible. Here, an important aspect is the communicative outcome. For a compact sewerage and water supply system, the bathroom is located in the same functional area as the kitchen.
The layout of the 2nd floor of a wooden house provides for the placement of a bathroom and a bath along one vertical line. This promotes the use of a common riser.
Comfort in everyday life is ensured when removing given quantity free space. That is, each family member must have a separate room. Ideally, the building is equipped with guest rooms: a small bedroom, a library or an office.
The layout of a 10x10 wooden house, created taking into account the placement of general purpose premises (fireplace room, living room, kitchen), is developed based on the needs of the owners. If it is necessary to zone the space, this will be served by furniture, a fireplace and the design of individual areas.

There are many ways to build low-cost, space-saving projects. These include the arrangement of the attic.
Attention! The layout of wooden houses with an attic provides for the construction of the first floor for multifunctional rooms, and the second floor for a bedroom, office, etc.
Developing a plan step by step
Any building begins with a porch. This does not exclude the creation of a regular entrance group, but diversity modern projects make up structures with various canopies at the entrance. The presence of a porch is a necessity rather than a whim. There is a convenient access line to it. This allows you to park the car sideways, with the door facing the entrance.

The layout of wooden houses made of timber includes an entrance block consisting of a vestibule, where a dressing room and an entrance hall are located. Its installation is necessary to open the door not into the living space, but into a fenced area, considered to be a vestibule. This is how you can prevent air from entering at an uncomfortable temperature. For rational use area, you can store different things here. Behind the vestibule there is a hallway where you can successfully fit mirrors, cabinets and hangers. The next emphasis is the climb up the steps to the living and utility rooms.
The layout of the 8x10 wooden house on the ground floor is conducive to a daytime stay for family members, where you can place a living room, a kitchen with a dining room, a guest bedroom, a bathroom and a winter garden. The dining room and living room are equipped with an entrance from the hallway. The kitchen and dining room can be equipped together or separately. The latter is often adjacent to the living room. Not worth spending large area to corridors and walk-through areas.
Second floor
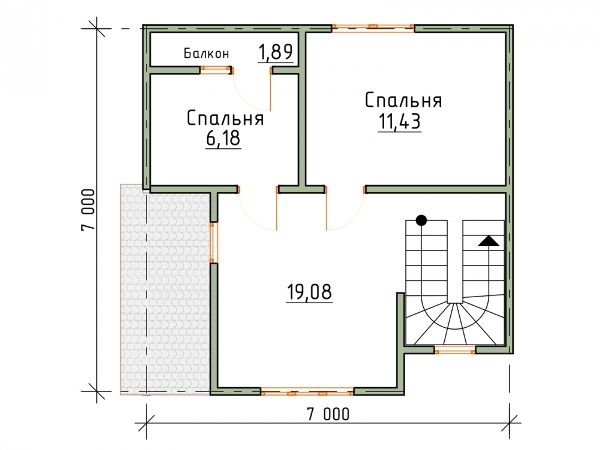
The top floor is an excellent place to create a recreation area. It accommodates bedrooms, bathrooms, a balcony and access to the terrace. The number of bedrooms is calculated for a given number of inhabitants. Spacious rooms for adults differ greatly from multifunctional rooms for children. Guests are allocated small areas with a minimum amount of furniture.
Additional spaces are provided for personal offices and a library. They are placed away from the entrance, which does not interfere with concentration. If this is not possible, the office is located near the guest bedroom, and a library is created between the rooms for parents and children. A gym is located downstairs.
The upper floors have a balcony. Utility rooms (laundry or workshop) or entertainment areas (sauna, billiard room) are equipped with ground floor. The boiler room is located there. Separate arrangement is possible. It is not advisable to integrate a garage into the overall concept. A separate room is usually built for it.
Carrying out calculations
According to sanitary standards, to create optimal conditions of comfort per resident there is from 30 square meters. m, however, taking into account the psychological component, this parameter gains 40-50 sq. m. The optimal number of residential premises is calculated by the formula: n+1, where n determines the number of inhabitants, and 1 indicates the presence of a common room.
The minimum areas (8*10, 10*10) are designed for a family of 3-4 people. The height of residential buildings is 270 cm, other rooms meet the parameters - 250 cm, the attic is built at 230 cm, the corridor is built at 210 cm.
- Tambour, hallway and hall. The smallest parameters of the hallway are 140 cm, area 6-7 sq. m., comfortable dimensions - 10 sq. m. Arrangement of the entrance using a vestibule with a depth of 1200 cm corresponds to an area of 1.3 square meters.
- Living room. According to regulatory requirements, the living room area is 18 square meters. Acceptable parameters for a family of 3-5 people are 25 sq. m.

- Kitchen and dining room. The smallest kitchen occupies 1700 cm, width - 240 cm, area - 8 square meters. The kitchen, combined with the living room, has smaller parameters. The arrangement of elements is provided taking into account the length of the front (up to 700 cm) and the method of its installation (single-row, double-row, L- or U-shaped). When constructing a kitchen combined with a dining area, you can refer to the size of 12 square meters. The optimal area is 15 square meters. A separate dining room is equipped as a room of 8 square meters. Accommodation for 10 people is made on 10-12 square meters.
- Bedroom. The room designed to accommodate single beds, a table and a closet will be 8 square meters. The regulated parameter reaches up to 10 square meters. The installation of a double bed and a wardrobe will be successfully carried out in an area with dimensions of 12 square meters. If you plan to install a dressing table or desk, you can refer to the generally accepted parameter of 14 square meters.
- Wardrobe. The minimum size of a two-row dressing room is 200 cm, area 8-10 sq. m.
- Bathroom. The room where the toilet and washbasin are installed has a size of 90 cm or 1.3 square meters. The shower stall will take up another 2.7 square meters, and the bathroom will take up 4.25 square meters. If the project has a bidet - 5 sq. m. Space of 7 sq. m. - An ideal solution for washbasins and washing equipment.
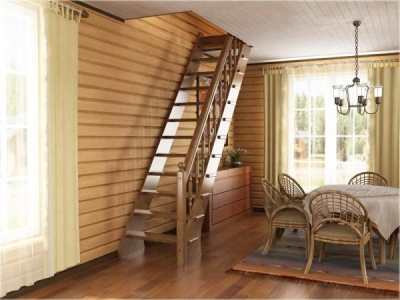
- Storage room and utility rooms. Building of 100 sq. m. equipped with a storage room of 2 sq. m. This is quite enough to ensure the safety of tools and equipment. Ladder. A structure up to 90 cm wide takes up 6 square meters of space in the project. (flights - 4.4 sq. m., intermediate platforms - 1-1.6 sq. m.). To save space, you can build straight devices with winder steps or screw ones.

Based on the above description, you can develop an approximate plan for a future building with careful study by architects and designers. At the same time, we must not forget about the presence of communication lines and the requirements for them. The style of the house, purpose and heating level are also taken into account.
The layout of the house must be developed in accordance with the requirements and wishes of all family members.
The functionality of your future home largely depends on how carefully you approach the choice of project. A properly selected layout of a wooden house will minimize unnecessary costs during the construction and subsequent operation of the home. Properly located structures will minimize certain costs that accompany the maintenance of any home.
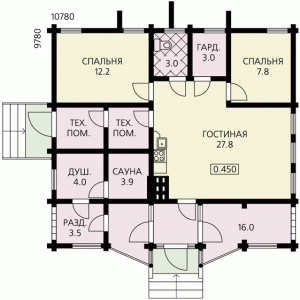 An example of the layout of a one-story wooden house with a sauna
 How to properly plan your own
Before starting construction, you should carefully consider all issues relating to the location of not only residential buildings, but also nearby utilities. For example, the bathroom and kitchen should be as close to each other as possible, since the sewerage and water supply systems should be located compactly.
If you are in construction multi-storey building, then it is recommended to place bathrooms and bathrooms on top of each other. The convenience of this type of system lies in the possibility of using the same water riser.
Comfort in living is largely determined by the availability of free space, so each family member should have a place to relax. Ideally, it should include rooms designated specifically for guests: bedrooms, libraries or offices.
Room layout common use(lounge room, living room, kitchen) is designed in accordance with the needs of the owners. To divide one large room into several zones, various pieces of furniture, a fireplace, etc. are used.
Today, they are very common, the top floor of which is arranged in the form. The first floor, in most cases, is occupied by common areas, and on the second floor there is a bedroom, office, etc.
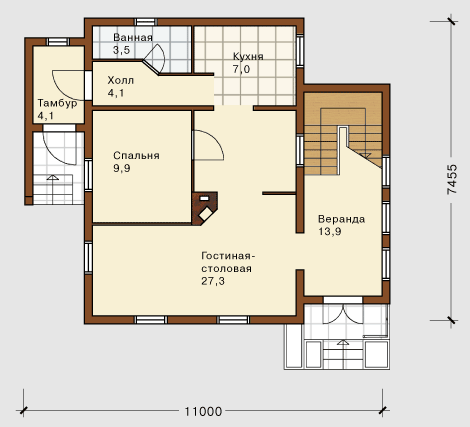 Plan of the 1st floor of a wooden house with a veranda measuring 11x8
 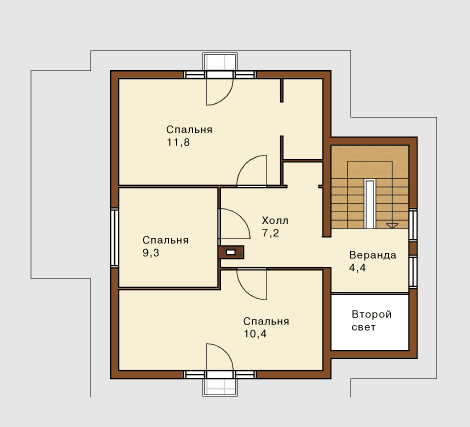 Attic plan
 House layout step by step
First of all, any home begins with a porch. Naturally, if you wish, you can choose a simple one front door, but almost any plan for a one-story or two-story wooden house implies some special way. Therefore, it is more of a necessity than a whim. A convenient driveway should approach the porch, located in such a way that the car can be parked sideways, with the door facing the entrance.
Read also
Designing stairs in a house
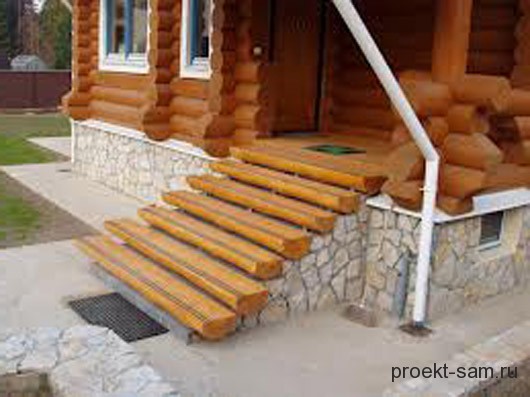 An example of the layout of the porch of a wooden house
 Entry group, as a rule, includes a vestibule consisting of a dressing room and an entrance hall. The vestibule is necessary to ensure that the door from the street does not open directly into the living space, to prevent cold or hot outside air from entering. Good interior layout of a wooden house in mandatory implies its presence.
In addition, the vestibule can act as a place to store various things. Behind the vestibule there is a hallway in which there are mirrors, cabinets and hangers. From the hallway a staircase leads to the upper floor of the house, where there are living and utility rooms.
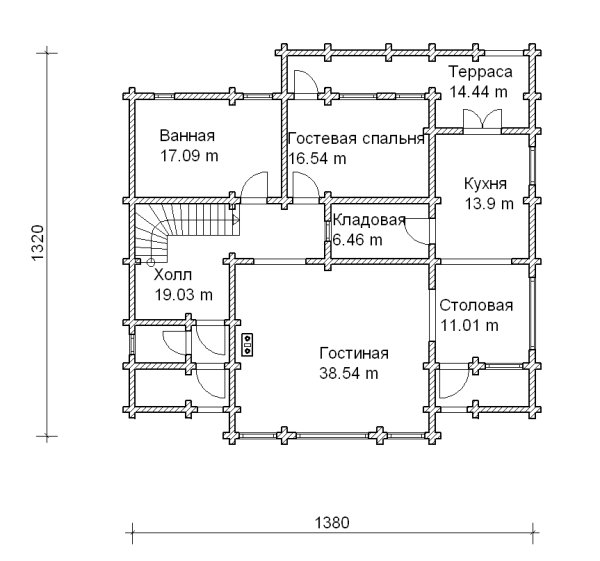
The first floor is an area for daytime stay of family members, where there is a maximum of functional premises. There should be a living room, kitchen and adjacent dining room, guest bedroom, bathroom and, if desired,. The entrance to the dining room and living room should ideally lead directly from the hallway. If the area allows, then it is better to separate the kitchen and dining room, connecting the latter to the living room. Corridors and passage areas should be made as small as possible.
 An example of the layout of the first floor of a wooden house
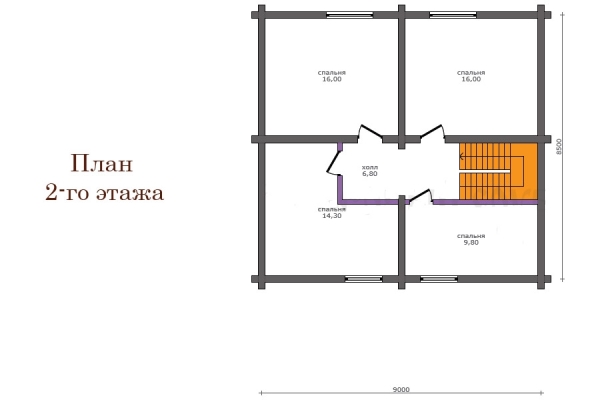
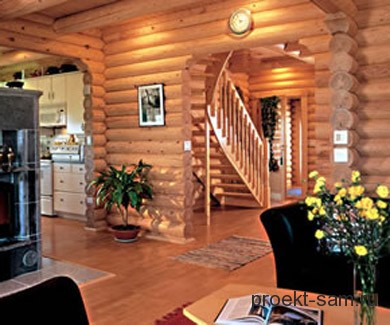
 The layout of a two-story wooden house involves the arrangement of a recreation area on the top floor, where there are several bedrooms, a bathroom, balconies and access to the terrace.
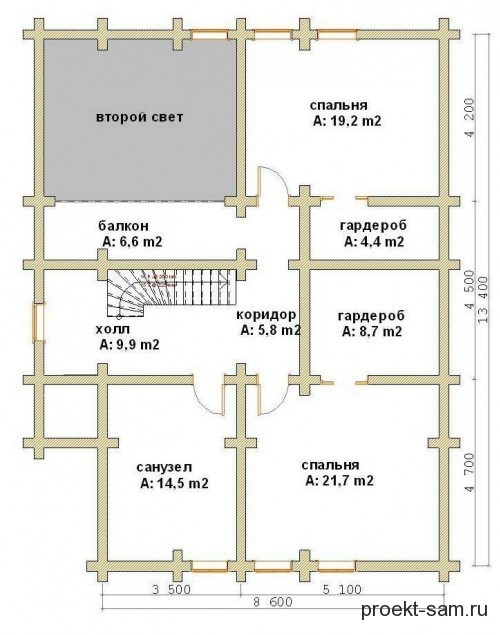 An example of the layout of a two-story wooden house
 Additional premises include personal accounts and a library, which are quite common in large houses. In these rooms you can always concentrate and perform necessary work. For this reason, it is best to place them on the second floor, where it is much quieter than on the first floor. If this is not possible, then it is advisable to place the office next to the bedroom, and place the library on the second floor, between the parents’ and children’s rooms.
If the plan for building a wooden house involves the presence gym, then it is advisable to place it on the ground floor, where there is a lot of noise and turmoil. If the area of the house allows, then on the second floor you can make a small balcony where you can enjoy the sunny morning and fresh air.