Cornflower flower made of corrugated paper. How to make cornflowers from paper with your own hands. We will prepare all the necessary materials
The simplest and most affordable element for original interior decoration is flowers. Especially popular in Lately decoration with wildflowers. They are perfect for creating light and airy compositions that can later be used to decorate the interior of almost any direction. But, unfortunately, not all wildflowers can retain their original appearance for a long time, so it is better to immediately replace some plants with artificial ones.
In today's master class you will see detailed instructions on how to create a field cornflower from paper.
Let's prepare everything necessary materials:
- corrugated paper in rich blue and light green tones;
- heat gun;
- black threads;
- scissors;
- semolina;
- thin wire.
First, let's create a blank for the base of the flower. For this we need black threads. We wind them around three fingers and make 50-60 turns. Next, remove the turns from the fingers and tie them with a piece of thread approximately in the center.
We cut the whole side parts.
The base of the stamens is ready!
Now we wrap the green ribbon on the wire corrugated paper. Pre-smooth the corrugated surface of the tape.
The cornflower stalk is ready!
Apply a drop of glue to the center of the stamen blank, and then attach it to the peduncle.
If the pile is too long, cut off the excess length with scissors. Next, secure the bottom of the threads with a strip of green corrugated paper.
To create pollen on the stamens, apply a little glue to the ends of the threads and lower their rump.
We create the inner thin petals from blue paper. We cut the ribbon 25-30 cm long. Fold it four times, after smoothing out all the folds.
Now you need to create the large outer petals of the cornflower. Just like the previous ribbon, stretch it so that the folds disappear, fold it six times and cut out miniature petals.
We begin to attach the blanks to the base of the flower. First glue the inner petals, and then the outer ones.
To make large petals more fluffy, fold them like an accordion before gluing.
We wrap the lower part of the blue petals with thread.
Then we glue a green stripe to the receptacle using glue to hide the inside of the flower.
This is the bud we got.
Next we create the leaves. They can be cut from corrugated, crepe or regular colored paper, choose the material that suits you. Cornflower leaves are oblong in shape, and their tip has a rounded shape.
The leaves can be given a natural curved shape by stretching their middle.
We attach them to the stem using hot glue.
Development fine motor skills- a task of paramount importance. The projection of the hand, located near the speech zone, accounts for about a third of the area of the motor projection of the cerebral cortex. The development of speech is directly dependent on the development of fine motor skills. Paper crafts are great training. We offer a master class on creating cornflowers - quite difficult to make. Make them together with your child - the exciting creative process and the result will cause children's delight.
To make cornflowers with your own hands you will need tools and materials:
- corrugated paper in rich blue and green colors
- small scissors
- semolina
- PVA glue
- hot glue
- cardboard
- tape
- pencil
- wire
If there is no tape, replace it with glue and paper. If there is no thermal glue, replace it with another that is durable and glues metal (PVA will not stick reliably to the wire, but Moment will).

1. On a piece of cardboard, draw a template of large cornflower petals.

2. Cut out the template.

3. Prepare a strip of blue corrugated paper. Cut it into pieces 3-4 cm wide.

4. Attach the template to the leaves and cut out the petal blanks.

5. Create small stamens - they will be in the middle of the flower. We make many cuts on strips of blue paper.


Paper cornflowers
Paper cornflowers
6. Twist the ends of the created fringe with your fingers.

7. Wrap the prepared piece of wire with tape or a strip of green corrugated paper.


Paper cornflowers
Paper cornflowers
8. Glue a strip with thin stamens to the tip of the stem.

9. Apply to the tips of the sticks a small amount of PVA glue.

10. Sprinkle the stamens with artificial pollen or semolina.

11. While the glue dries, add large petals the required form. To do this, stretch the petals to the sides to form a convex shape.

12. Curl the base of the petals.

13. Glue the cone-shaped petals to the bottom of the stamens. We straighten them carefully.

Many people associate summer with a variety of flowers, especially wild ones. One of these plants is cornflowers. However, what if you want to give such a flower, but there is no way to pick or buy it? We invite you to make a cornflower out of paper with your own hands. The article will offer options using different materials.
Easy to manufacture
It is perfect for joint creativity with children. For the master class we will need:
- colored paper blue, green shades;
- compass;
- scissors;
- glue.
We take blue paper and cut out three circles with a diameter of 8 cm, and seven - Ø 6 cm. You choose the combination of colors for large and small circles yourself. Fold each circle in half three times and use the template below to cut out a petal, but do not cut all the way at the base.

Naturally, we make our own templates for each circle size. Unfold the resulting flowers. Using scissors, slightly curl the petals inward. Glue the big one to the small one by the middle.

Make different options for assembling flowers. Also cut out a stem 10-12 cm long and leaves 5-6 cm long from green paper. Glue all the blanks onto the base.
This could be a painting or a postcard, for example.
Second way

Prepare corrugated paper of blue, dark blue and green colors, 0.3 mm and about 1 mm wire, PVA glue, semolina and scissors.

We cut out a strip of dark blue paper, the width of which is 1.5-2 cm. We cut teeth on one edge of it, which we twist with our fingers. Now we drip glue onto one end and attach a thick wire, it will act as a stem.

For now, let's put the workpiece aside. From blue corrugated paper, cut out a strip 6-7 cm wide and fold it in half lengthwise; to make it more natural, you can fold it so that one edge is slightly higher than the other. We also cut out the edges in the form of triangles.

You can wrap the entire strip around the finished base. Or you can cut into sections and attach one by one.

We cut out long leaves from green paper, glue a thinner wire to their base and attach it to the stem. We cover the stem itself with a strip of green corrugated paper.


As a finishing touch, dip the tips of the core into glue and semolina.


Third option


To begin with, take black threads and wind them around four folded fingers in 50-60 turns. Then we remove it from the hand and bandage it in the middle.

We cut the side folds, making a tassel. This will be our middle ground.

Preparing the peduncle. To do this, cut out a strip of approximately one centimeter wide from green corrugated paper and wrap it around a piece of wire.

Apply glue to the center of the center piece and attach it to the top of the stem. It's better to use a hot glue gun.

Dip the ends of the stamens first in PVA glue, then in semolina.

Let's start making the petals. For the first row, cut out a strip of blue corrugated paper 25-30 cm long and fold it three to four times, after smoothing out the folds of the paper with your fingers. We cut the top edge, making a fringe.

Having unfolded the strip, we twist the ends of the fringe into flagella.

Now we begin preparing the outer row of petals. For it, we cut out a strip of blue paper 35-40 cm long and wider than the previous one. Smooth out and fold six times.

We cut the edge into small triangles.

We begin directly assembling the flower. To do this, we wrap the bases of the stamens first with a strip of the inner row, then the outer one. For greater splendor, the strip of outer petals can be folded into an accordion. We use glue, maybe PVA. For greater reliability, we wrap the finished flower with thread.


Now you need to refine the base of the flower. Simply use a strip of green corrugated paper and glue to wrap the bottom of the flower, smoothly moving onto the stem. We cut out long leaves from the same paper and attach them just below the bud.


We make another such flower and one with only inner petals. We make a bouquet.

Cornflower with candy

We will need:
- blue corrugated paper;
- candy;
- foil;
- scissors.
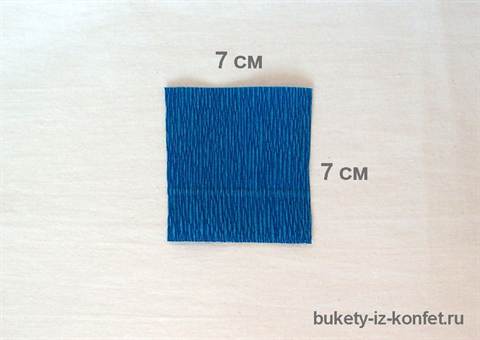
Cut out a square with sides 7 cm. Cut out small triangles along the top edge.

We make three such blanks. Then on each one, from the jagged edge inwards, but not all the way, we make cuts.

We make another 0.8 cm cuts in the middle of each resulting petal. We give each petal a rounded shape, stretching it from the middle with our thumbs.

Now let's get to the candy. To do this, cut a piece of wire and wrap a loop at one end. Then we wrap the candy in a square of foil with sides of 10 cm. At the same time, we attach the wire.


We attach the first row of three petal blanks to the base of the candy using a thread. In the second row we attach the same number of blanks, but we fasten them in a checkerboard pattern in relation to the previous ones. And one more row.


The stem can be covered with a green thread. We make as many flowers as you need.
It will make a beautiful and sweet gift.
Below is a selection of videos on making cornflower flowers from paper.
Video on the topic of the article
Cornflowers bloom profusely and beautifully in summer.
How to make cornflowers from paper with your own hands
DIY paper cornflowers
Materials and tools
■ Colored paper
■ Compasses and Scissors
■ Glue stick
Making an applique
1. For the background, take a sheet of A4 lilac paper.
2. From blue and dark blue paper, cut out 3 circles with a diameter of 8 cm and 7 circles with a diameter of 6 cm. Choose an arbitrary color ratio.
3. Take 1 circle, fold it in half, then in half again, and in half again.
4. Cut out a cornflower flower using a stencil (Fig. 1).
.jpg)
5. Make the same flowers from other circles.
6. Using scissors, carefully shape all cut pieces into a convex shape.
7. Glue the large and small flower together as shown in the picture (Fig. 2).
.jpg)
8. Glue 3 more of these flowers (2 large and 1 small). Fold one large flower in half.
9. Cut thin stems 10-12 cm long and elongated leaves 5-9 cm long.
10. Cut out an oval from yellow paper and paste it onto the background.
11. Lay out and then glue the heads of the cornflowers.
12. Glue the stems and leaves. It is better to glue the leaves not completely, but only at the base, so that they look voluminous.
Cornflowers are a rather complex paper applique for children aged 7 years and older. The main difficulty for the guys is to carefully cut the sides of the flowers without touching the middle. But all the work will pay off in that the result will be a delicate and airy work. For children 7 years old, it is better to simplify the application somewhat - make not five, but three cornflowers. In this case, the squares from which the flowers will be cut must be enlarged. Then it will be much easier for the guys to cut.
To make the “Cornflowers” applique from paper we will need:
A sheet of colored cardboard;
Blue or light blue paper in two shades;
Green and orange colored paper
Glue
Scissors
Pencil
How to make an applique from paper “Cornflower”
Step 1
Let's cut squares of blue paper in two shades and two sizes. Large square – 6x6 cm; small square– 5x5 cm. For each cornflower we need one large and one small square.
Step 2
Fold the square in half diagonally, then in half again, and in half again.

Step 3
Now take the scissors and start cutting. First, round off the wide part of our triangle. If you immediately take circles rather than squares, then this operation will not be necessary. Then we cut out the teeth on the edge of the flower. And lastly, we need to cut out the sides. Look carefully at how the line goes.

We unfold the paper - there is a cornflower flower! Let's cut out such flowers from all the prepared squares.
Glue together small and large flowers in pairs.


Step 4
Take a sheet of yellow cardboard. Cut out an oval of any size from orange paper and glue the applique onto a cardboard base.
Step 5
Let's attach the finished cornflowers to the base of the applique. Then, removing the flowers one by one, mark their location with a pencil.

Step 6
Cut thin (about 0.5 cm) strips of stems. Let's glue them to the applique. You only need to glue in two places - at the intended point where the flower will later be, and below. We cut off the excess length of the stems after gluing.

Step 7
Glue the cornflowers onto the base of the applique.

Step 8
Let's make leaves. Take a rectangle measuring 12x4 cm and fold it in half. Let's draw an outline of the future leaf with a pencil.

Cut out the leaf along the marked line. Let's unfold the leaflet. Let's make 4-5 such leaves.
