How to decorate a wall with family photos. How to decorate a room with your own hands: the best ideas with step by step photos
When placing photos on the walls, you need to pay attention to three basic rules: firstly, what to choose and how to arrange it, secondly, how to print a photo, and, finally, thirdly, how to hang a photo.
Naturally, the choice of photographs will depend entirely on the taste and opinion of the owner of the house, but it is worth remembering one simple rule that will make a photo on the wall pleasant and eye-catching. It is necessary to mentally divide the image with two lines both horizontally and vertically so that nine identical parts are obtained. At the same time, important objects, to which the attention of each visitor to the house will be drawn, should be located either at the intersection of these lines, or on them. It is worth remembering that you need to pay attention to the horizon: if it is littered (that is, the horizon line is not parallel to the upper and lower boundaries of the image), then this significantly spoils even a very interesting frame.
Next, you should pay attention to printing photos. Don't strive for perfect resolution. For a photo on the wall in the house, a resolution of 300 dpi is not necessary. Surprisingly, a large photo can be taken at a much lower resolution. The same applies to those photographs that will be viewed from a distance. First you need to make a thumbnail of the photo and a fragment. A thumbnail is required to select the final image size. Taking it in your hands, you need to stand in front of the wall on which you are going to hang the photo, and zoom in or out from your eyes, mentally selecting the required size. A fragment of the image is necessary to get acquainted with the quality of the image. In order to print a fragment, you need to choose the most complex option, where the colors diverge as much as possible. It is also worth printing a fragment on which something in blue tones is located, since this is the most vulnerable place when printing.
How to hang a photo on the wall
Before you hang a photo on the wall, you need to remember that for each photo there is a suitable distance from the viewer who will view it. Smaller shots are best viewed up close, while larger shots need to be viewed from a distance. Of course, before finally hanging a photo, it is better to make sure that it will really fit into the surrounding interior, there will be an opportunity to examine it in detail. If there is a desire to place a bright and black and white photo on the wall, then they should be separated by some kind of interior item so that the photos are located in different spaces, as it is worth remembering one more rule. Photos that are placed together must be in the same style, and also have a common composition.
If you want to hang a photo in a row, you should pay attention to the extreme shots, the movement in which should be directed inside the composition. For example, for the placement of portrait shots, there is the following rule: it is desirable that the faces of people in the extreme portraits face the inside of the composition, that is, they should not be turned outward, but “look” at the rest of the photographs. The strongest shot should be placed in the center.
In the case of a small photo on the wall, it would be preferable to place it in a large mat. It is desirable that there is a significant object in the photo so that an eye-catching spot is formed.
If you want to hang a large photo, then it is desirable that the picture shows one large object that will draw general attention to the photo, and many small ones so that the photo can be looked at for a long time and with interest. 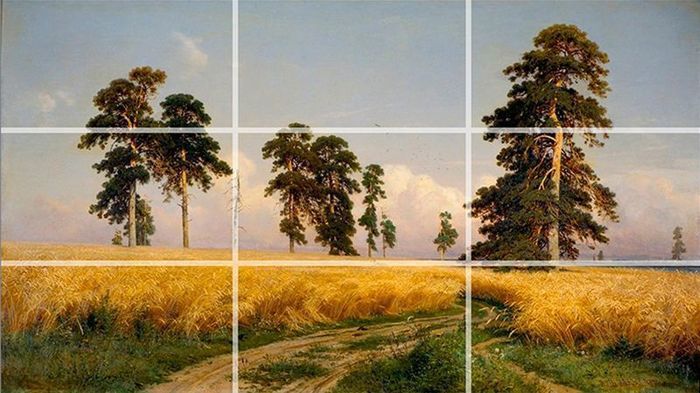
It is best to place photos on the walls in frames to give solidity to photographs, to visually delimit these pictures from other spaces in the room.
Many people use the following technique for photographs: cut one large photograph into equal smaller parts, put them in frames and place them on the wall in the right order. This is also a good example for decorating the interior, you just have to remember that you can’t accidentally “cut” the people who are shown in the picture.
We decorate our room with the help of simple alterations and crafts.
“My house is my fortress”, and indeed in the Middle Ages people had impregnable castles in which one could hide from many misfortunes. But modernity has slightly reduced our living space, leaving at our disposal only bedrooms in which we feel like real queens. In this room, everything is done according to our desire, desire, and of course, with our hands. Therefore, we have selected videos for you in which you will see how easy and cheap it is to decorate your room without resorting to the help of professionals. In addition, it's nice to feel like real interior designers!
Photo, with your own hands.
DIY room decor
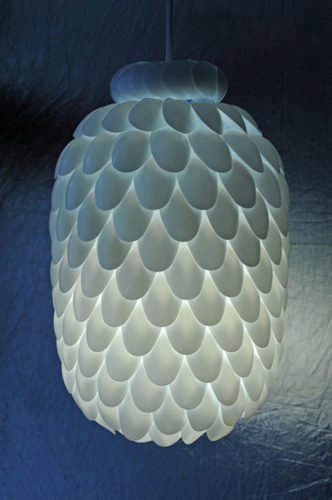
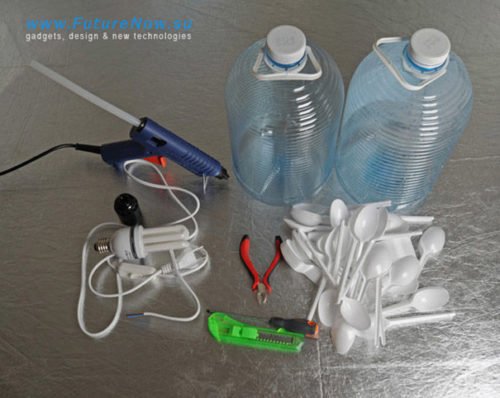
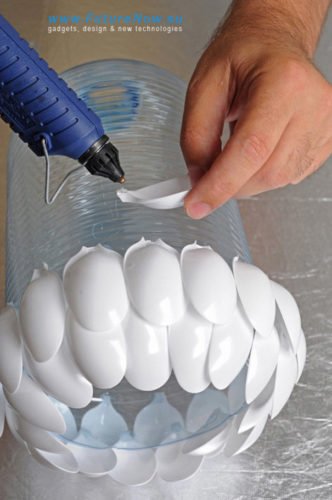
So, we make the decor of the room with our own hands. Following simple and uncomplicated tips, you can not only bring perfect order to our chaos of cosmetics, but also decorate the room, giving sophistication and elegance of style. For example, to make such an original ceiling using plastic disposable tableware.
DIY room decor video
To your attention 7 ways to spice up your room, while giving it order and organization. To neatly stack all your vials and bottles on the shelf, just buy a few short bright plastic boxes. They won't fall off when you take something out and will look very neat. For random small things, transparent pot-bellied jars are suitable. For makeup brushes, any jar or mug filled with Styrofoam balls or other filler will do, where your brushes will stand without falling. A collage of photos in the shape of a heart will perfectly decorate the room. Decorate a window to give a room a sparkle New Year's garlands. Hand-made candlesticks made of transparent jars filled with sparkles and crystals will be a great addition to the interior, and the aroma of candles will allow you to relax after a hard day.
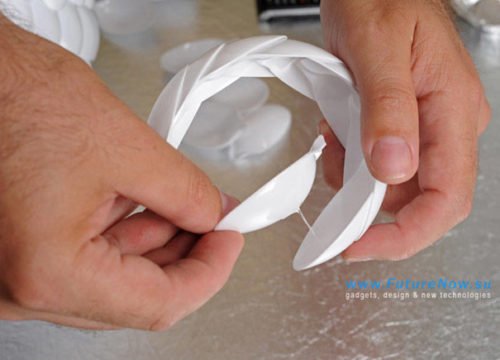
In this video, you will see how to make nice little things to decorate a room: a garland of photos and pictures, and cute plafonds from disposable cups.
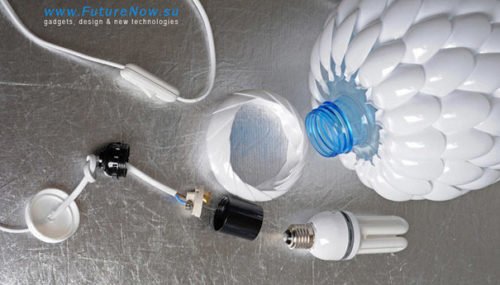
From this video you can get the idea of a vase for varnishes and other little things from a large plastic bottle and decorative fillers for transparent vases from paper ribbons.
To give the room coziness and comfort in the autumn days, follow the advice of this blogger. First, add warm color accents (pillows, for example). Transparent jars decorated with autumn leaves (artificial) and cones (natural) will look just great. A wooden board with inspirational quotes will also come in handy. Bright pumpkins and a lot of aromatic candles will warm you up in damp autumn weather.
DIY room decoration
In this video, you'll see some ideas for organizing your makeup brushes, nail polishes, glosses, and lipsticks. You will also see where to put the leftover scented candles for interior decor, some ideas for storing jewelry, scarves, and very beautifully decorated boxes for storing a bunch of things.
This video is great for those who still go to school or university: perfectly organized pens and pencils, a reminder board and a calendar to remember all the important events.
Photographs provide exceptional opportunities not only for decorating an apartment, but also for its design. In the sense that photographs can optically influence the perception of space, visually expand walls, emphasize style, make the interior more dynamic and individual. Everything is important in photographs: the plot, the color scheme, the design, and the location on the wall. Of course, it's best to decorate the house with your favorite photos first. But even ordinary posters will look no worse.
There is a paradox that you are most likely unfamiliar with, but professional designers know it well. It is amateur, non-professional photos that are best suited for decorating the interior, the ones that can be taken with an ordinary camera. But with professional photos in the interior is much more difficult. A professional photo requires the perfect interior style. A professional photo should be the main focus of the interior, in fact, the interior should be built “around” this photo. In a room with such a photo there should not be unnecessary things and objects that do not correspond to this photo, the photo must be highlighted in a special way and positioned so that it does not “glare” in any way.
But back to amateur shots. Here they are - for the interior, not the interior - for them.
Photo 1 of 2
Photo 2 of 2
Full screen Back to gallery
How to decorate the interior with photos: 7 rules of decorators
Deleting an image!
Delete Cancel
What are the photos. In general, photographs are decorative, poster and photos from a personal archive. Decorative photos - medium size, with some kind of plot. Poster - these are greatly enlarged photos, there are not too many details in such a photo. Poster photo printing can be ordered from the relevant companies, according to your picture. Well, pictures from a personal archive, or family photos are photos of relatives and friends that create comfort and positive in the house.
Photo 1 of 2
Full screen Back to gallery
How to decorate the interior with photos: 7 rules of decorators
Photo 2 of 2
Full screen Back to gallery
How to decorate the interior with photos: 7 rules of decorators
Deleting an image!
Do you want to remove an image from this gallery?
Delete Cancel
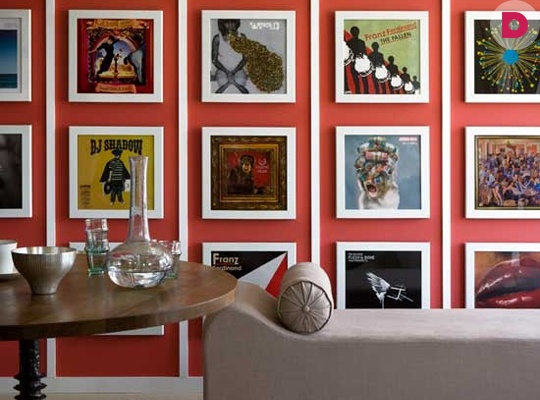
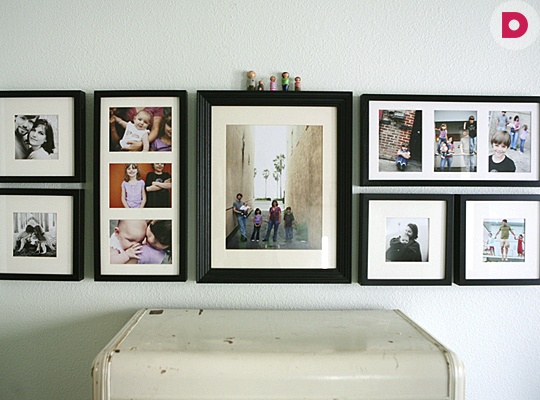
Frame selection. As a rule, photographs are hung in frames, which can be made from different materials. The frame is selected not for wallpaper or furniture, but only for the image. The most versatile frames are steel or golden, as well as wooden. In principle, any picture can be inserted into such a frame. General principle: Color pictures look better with light frames, black and white pictures look better with black or white frames. If the wall is finished "like a brick", then black frames are required. If the frames are colored, then they must be in the same range (either only warm colors, or only cold ones). Any photo can be slightly illuminated with low-voltage halogen bulbs.
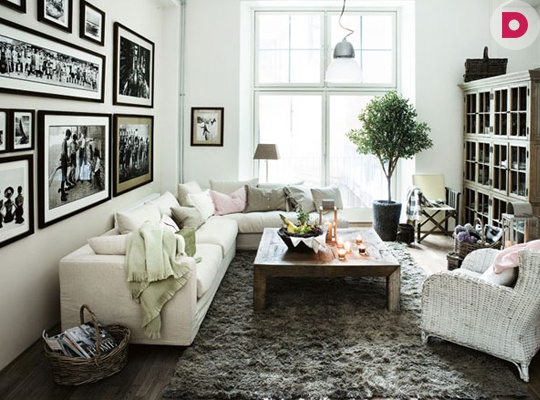
Where to hang. The theme of the picture should be in line with the functional purpose of the interior and its style. Therefore, landscapes or genre scenes will look better in the living room, flowers and still lifes in the kitchen or dining room, photo portraits in the office, macro photography in the hallway. Naturally, if the room is decorated in country style, you should not hang photos of city buildings, etc.
How to hang. You can group pictures on the wall. The best way- hang the largest picture in the center of the proposed composition, and place smaller ones around it. In this case, the hanging level of the largest image is determined by a special rule. You need to draw an imaginary line on the wall at the level of your eyes, then the hanging point (the center of the hanging photo) will be slightly below this line, since most often in the interior photos are viewed while sitting. For a person of average height, the hanging height is approximately 150 cm. In addition, all images can be grouped and enclosed in one large frame. Then the whole composition should be considered as one big picture.
If you ordered a large-format poster photo, then you need to choose the freest wall for it. Please note that the space near this wall, any detail that is nearby, must strictly match the style of the photo.
How to decorate the interior with photos: 7 rules of decorators

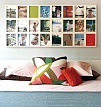
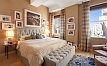
Photo 1 of 12
Full screen Back to gallery
01
Photo 2 of 12
Full screen Back to gallery
02
Photo 3 of 12
Full screen Back to gallery
03
Photo 4 of 12
Full screen Back to gallery
04
Photo 5 of 12
Full screen Back to gallery
05
Photo 6 of 12
Full screen Back to gallery
06
Photo 7 of 12
Full screen Back to gallery
09
Photo 8 of 12
Full screen Back to gallery
10
Photo 9 of 12
Full screen Back to gallery
11
Photo 10 of 12
Full screen Back to gallery
12
Photo 11 of 12
Full screen Back to gallery
13
Photo 12 of 12
Full screen Back to gallery
14
Deleting an image!
Do you want to remove an image from this gallery?
Delete Cancel
Another trendy option is the dissected photo. A large photograph is taken, which is cut into several equal-sized parts, and all parts are hung next to small gaps between them. Another option is to replicate the same photo.
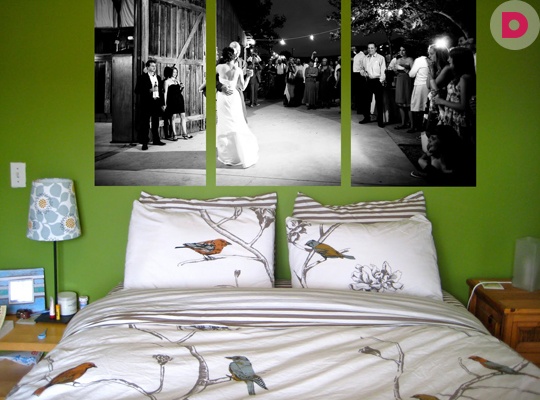
How to draw up. It is best to make your shots, especially small ones, wide passe-partout. The wider the passe-partout, the more spectacular the shots. Wide mats will help to even out the color of the pictures if they are very different in color. And they are indispensable for small photos. "Dissected" pictures are taken without a passe-partout and are not framed, in extreme cases only the narrowest frames are possible.
How the photo will affect the interior. If the color scheme of the picture is close to the color scheme of the room, then the photo will make the interior more stylish, balanced and harmonious. If the color scheme of the photo contrasts with the room, then such a photo will bring dynamics to the interior. One large photo (but only one), or a group of small ones with space between them will increase the space. But “dissected” photographs will especially increase the space.
Unusual use of photographs in the interior. Your pictures can be printed not only on photo paper, but also on any objects. You can choose these items yourself, based on the style of your apartment. For example, you can order photo printing on white ceramic tiles (for the kitchen, bathroom), on a stretch ceiling. If you have a high-tech or minimalist style, you can order a photo print on any metal object, for example, on a metal plate or strip, which can then be curved in an interesting way and hung on the wall as a panel, or on glass, to which you can make the appropriate " footboard”, and you will get a glass “photo table”.
Visitors living in hostels are offered some DIY designs to consider. Dorm rooms are small by nature. The limited space makes it almost impossible to bring big ideas to life, so use small designer touches that will add personality to your home. Below we will present some of them.
Decorating with paintings and photographs
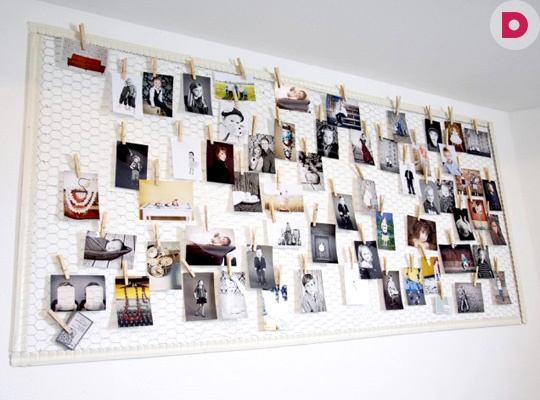
How unusual to decorate the walls with photographs? Take, for example, a lace used in jewelry and make a holder of a geometrically irregular shape. Use stationery clips to hang photos.
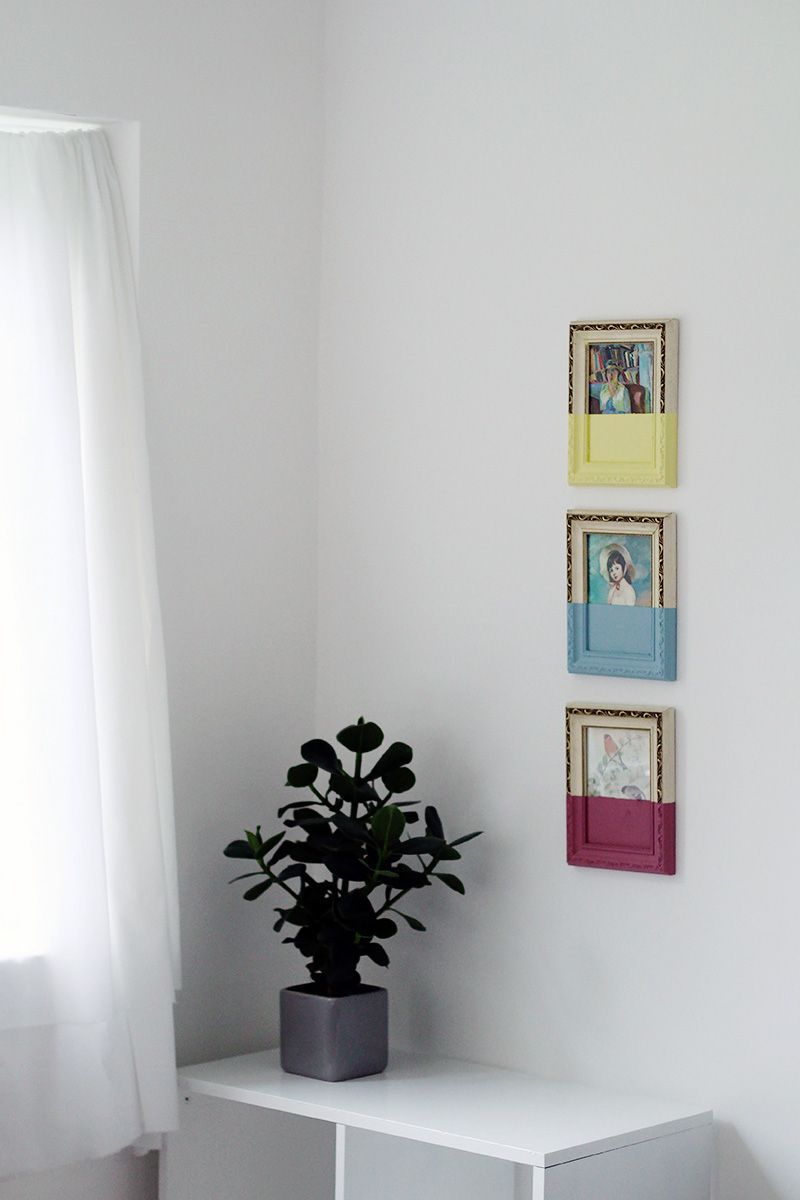
If you want to create something a little unconventional, try immersive picture frames. Usually several such pictures are collected. Peel off the top half with painter's tape, and dip the bottom half in paint of the desired color.
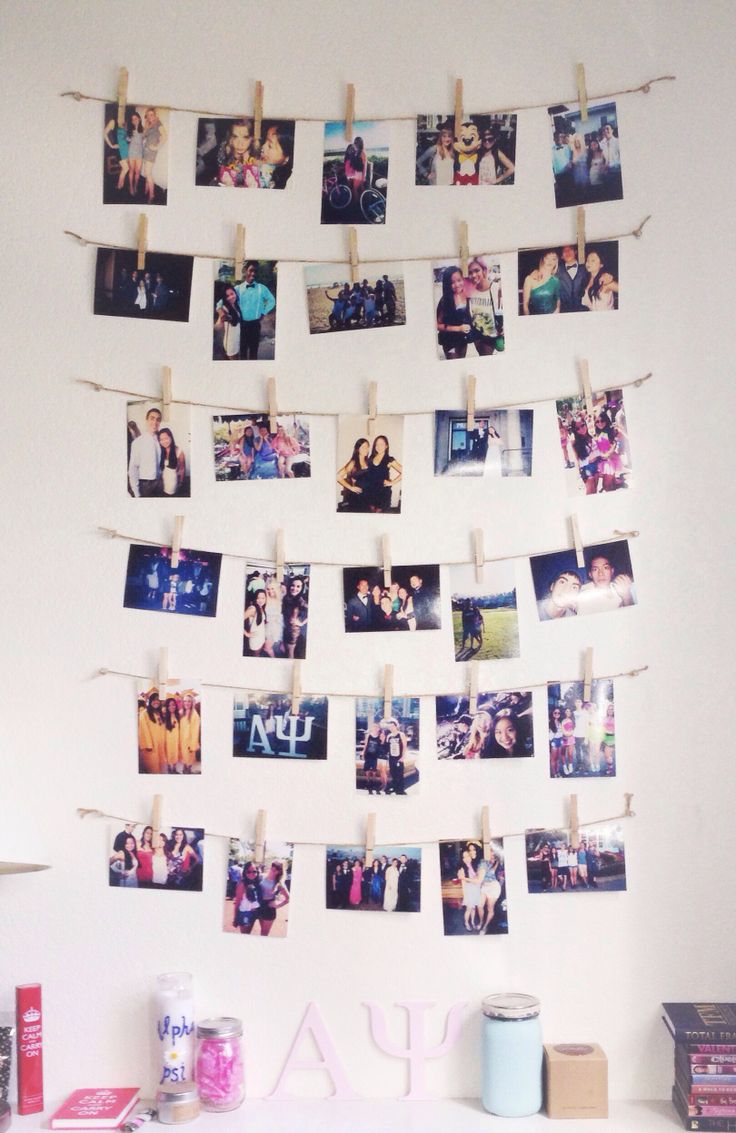
Or you can take twine, clothesline, yarn to hang your favorite photos over the table. For fastening, use clothespins.
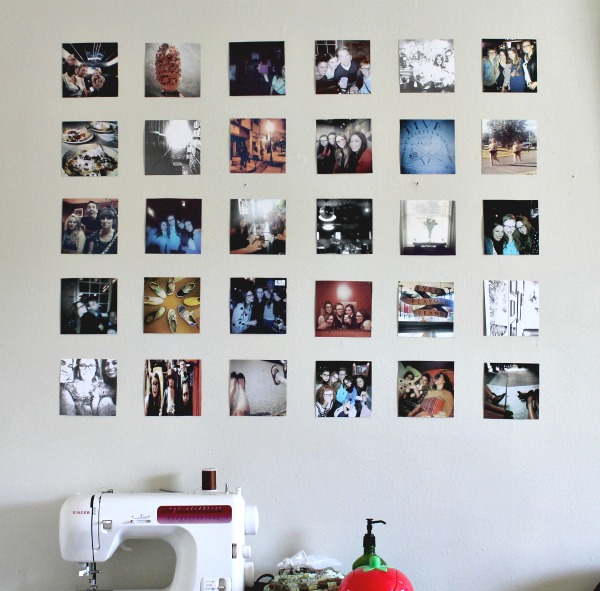
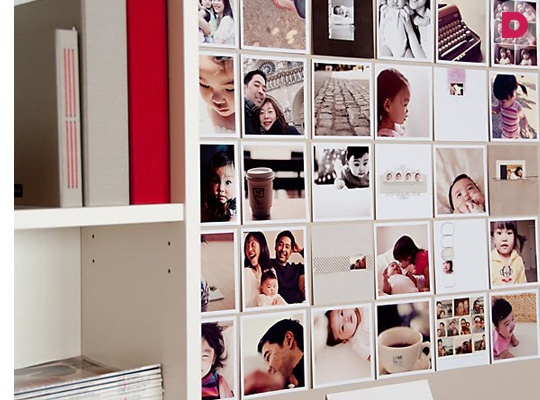
Instagram display. Make a grid with sticky tape and attach photos. To do this, use double-sided tape or strips of masking tape. Glue them to the corners of each photo so they stick tightly to the wall.
Other wall decoration options
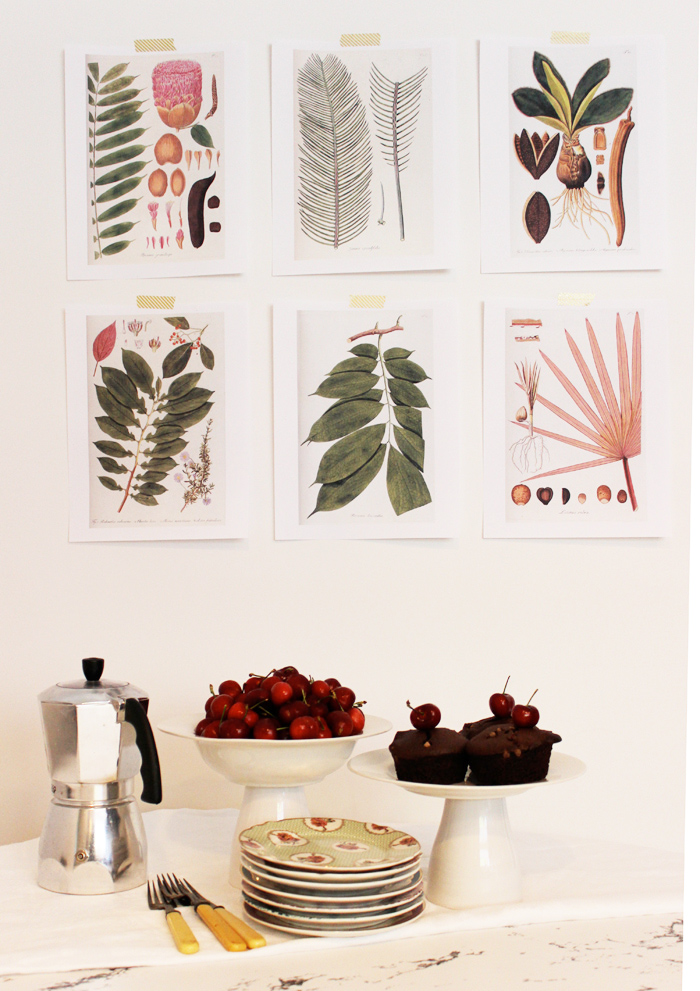
Instead of pictures or photographs, use a herbarium or drawing of plants. Make a frame for them and hang them on the wall. Take this idea as inspiration, if you want to completely change the theme.
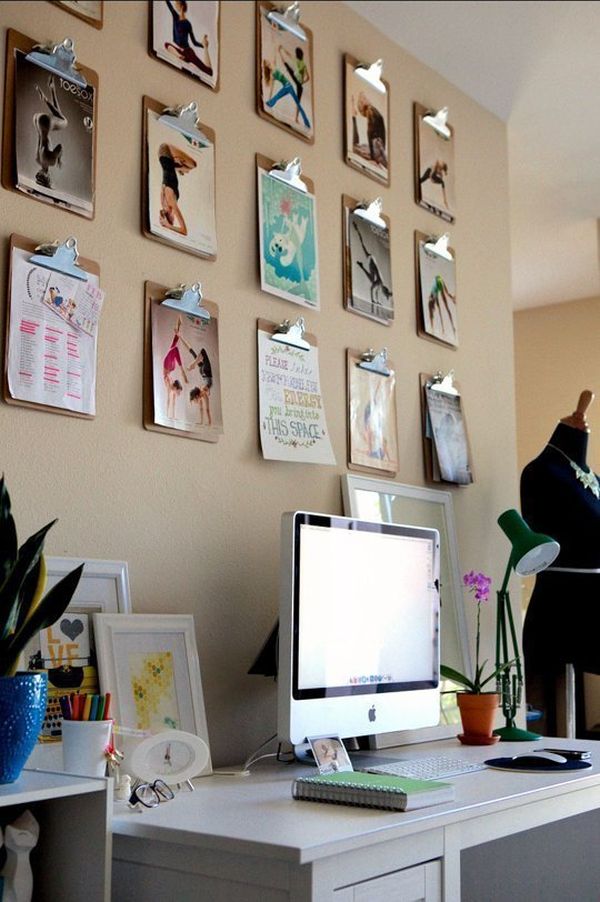
Another simple idea is to use clipboard folders. This is a neat trick that comes in handy for attaching calendars, schedules, and other things, including as a display for photos and images.
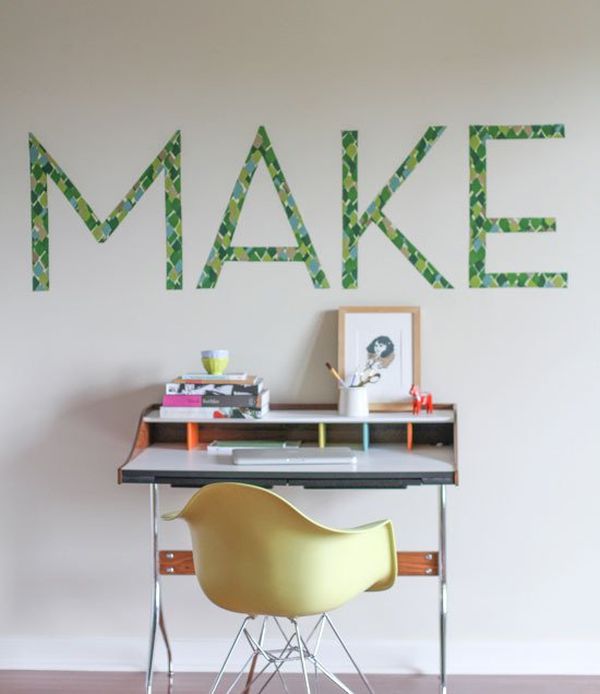
Make a typographic wall. You will need a cloth, cornstarch, water, masking tape and brushes. Choose the font you like, smooth out the fabric, cut out the letters. Use masking tape to create a straight line on the wall. Apply cornstarch to the back of the first letter. Position the letter on the wall and press firmly. Repeat these steps for the rest of the letters.
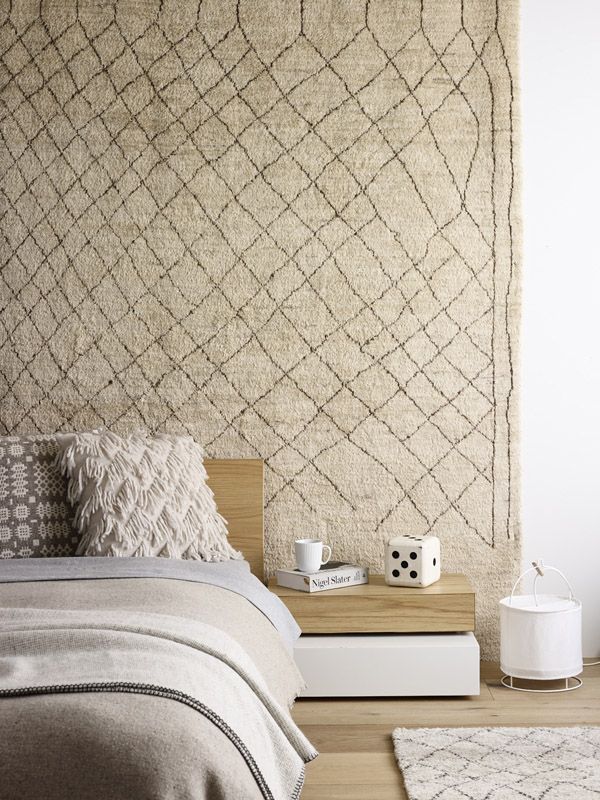
Hang the rug on the wall. It can look really good above the bed, going behind an unsightly headboard. Carpet will also give the room a cozy and comfortable feel. This good way add texture to the decor and give the bedroom a unique look.
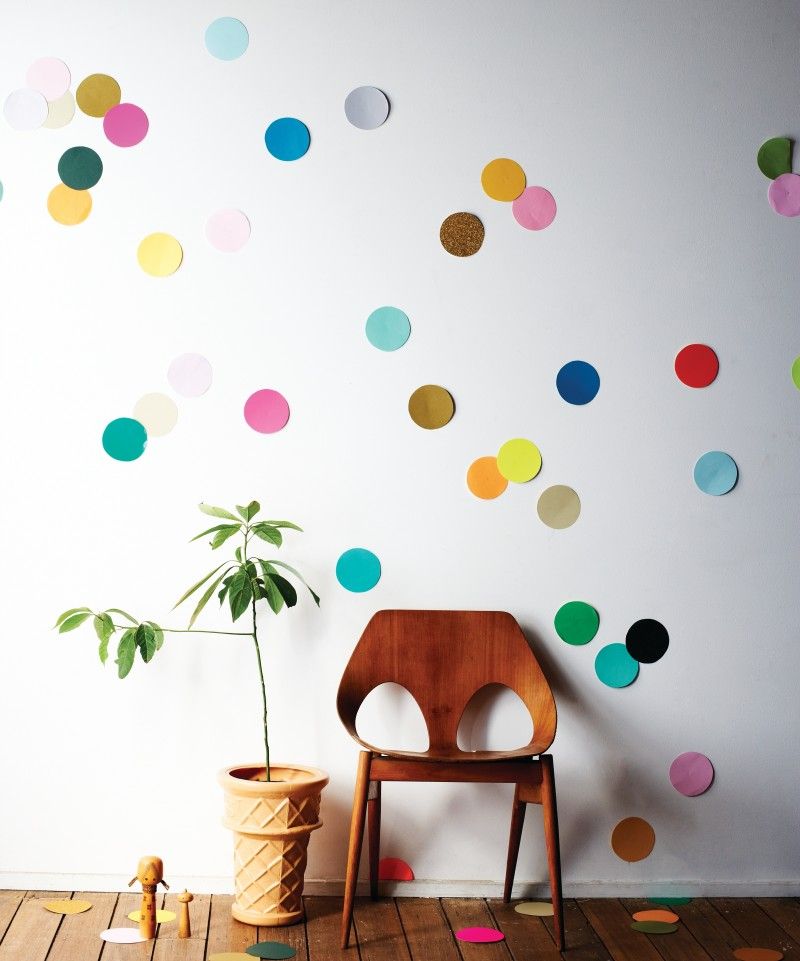
From colored paper, felt or cardboard, make giant confetti, colorful polka dots. Use them to decorate one of the walls in your dorm room. Don't be afraid to mix materials and colors, pair them however you want, they look chic and cute. Look at weebirdy for use cases.
Room decor with flowers and plants
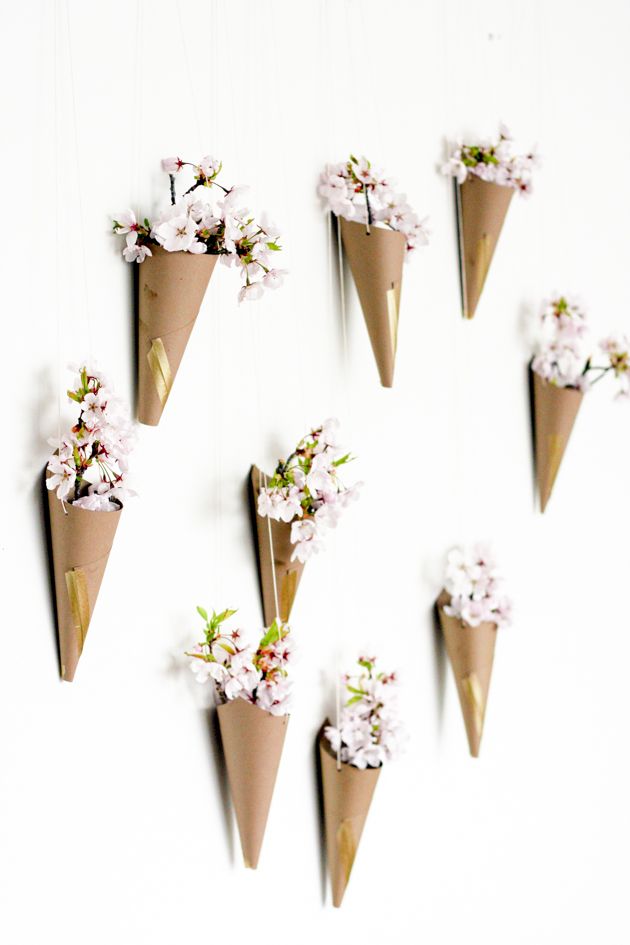
Take a lot of cardboard cones. Make holes each on the left and right sides, thread a rubber band through them, and hang the cone on the wall anywhere you like. It will make a great place for small flowers.
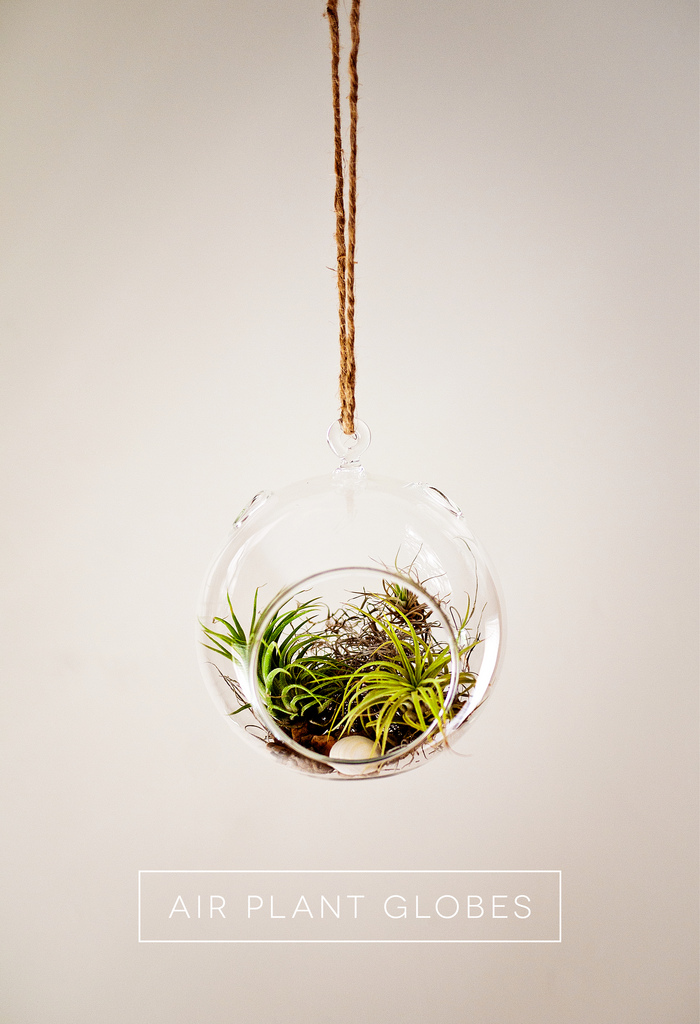
Make a beautiful air terrarium with plants. You will need a container, which should be in the form of a glass ball, moss, gravel, pebbles and plants.

Decorate flower pots, make them more attractive. For decor, take a ribbon and acrylic paint. Choose bright and bold colors to make the containers stand out in the overall design.
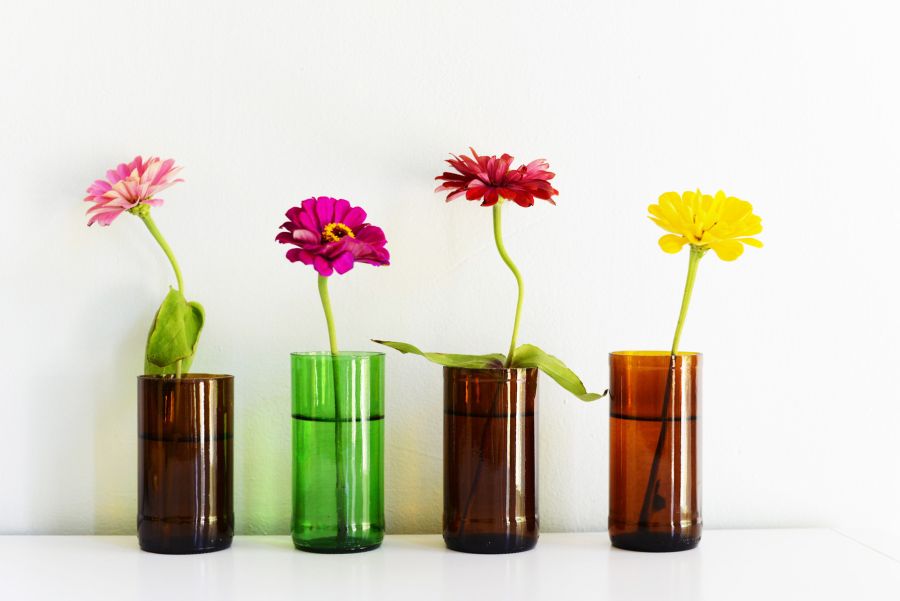
Vases for flowers. For them, glass beer bottles or any cans that are suitable in shape and color are suitable. When making, use a glass knife to make a clean cut, sand the edges with sandpaper so as not to cut yourself.
Create a memo board

The memo will come in handy in the dorm room if you put the schedule of exams, tasks to complete, etc. on it. This is actually a type of geometric art that includes memo boards. You will need Velcro for mini fasteners, bright tape, small gold nails and a hammer.
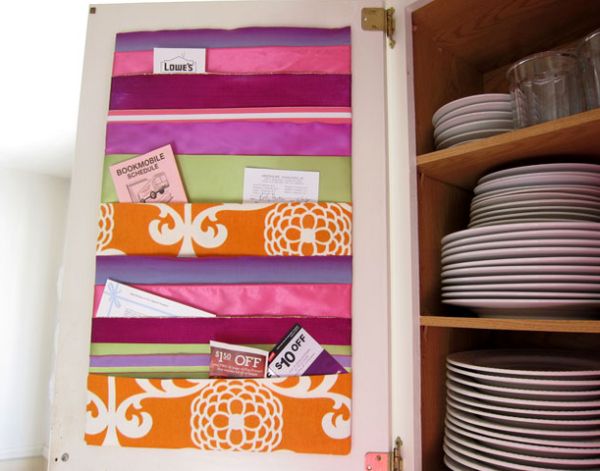
Or arrange a tape board for notes. You will need polystyrene foam, fabric ribbons, regular and double-sided tape, Velcro dots on the back. Cut the board to size and decide how you want the ribbons to be. Wrap the ends around the back of the board and secure with tape. Add Velcro dots to the corners and hang the memo board.
Make the lighting
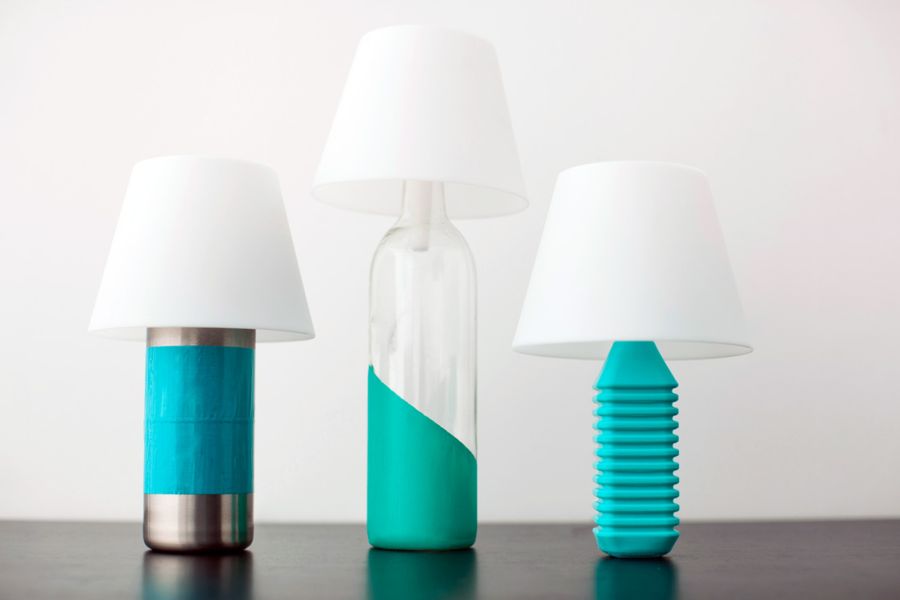
Create a USB powered lamp with a glass, metal or even 3D printed bottle. Decorate it a bit with art tape or acrylic paint. And, of course, you need a USB LED cable for touch lamps. Decorate the bottle, keep it as a base, and then add a lampshade.
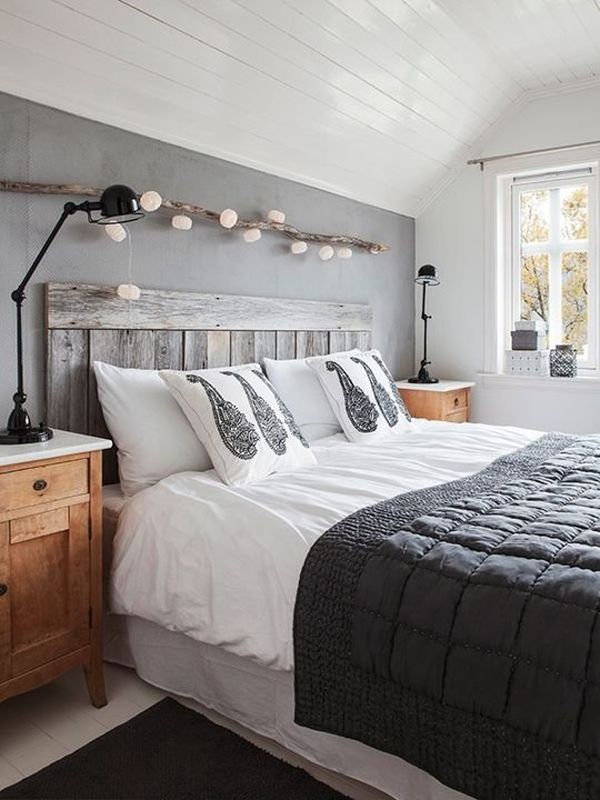
Add elastic band lights to the interior. They are perfect not only for Christmas and New Year. Use string lights to create a really beautiful view on the wall behind the bed. They also serve as nightlights. You don't have to worry about a table lamp.
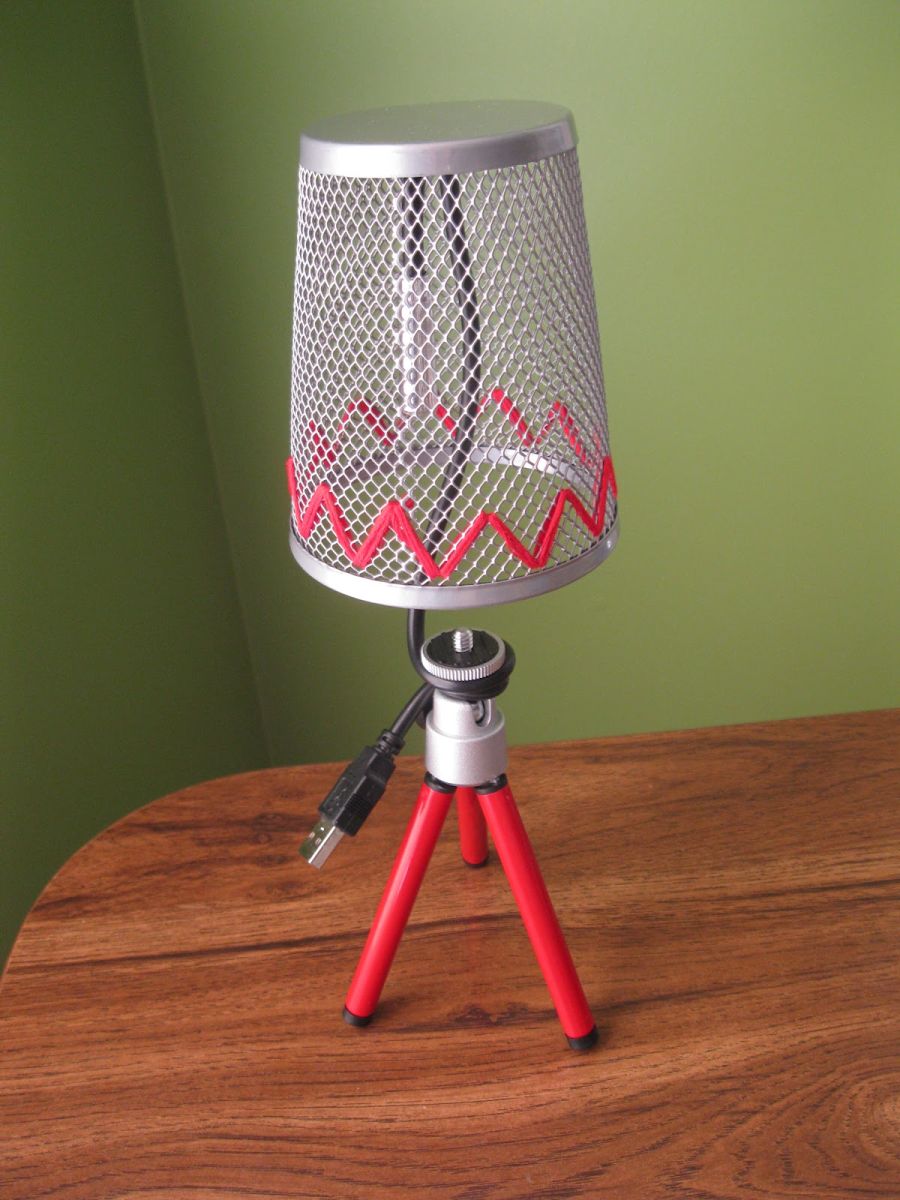
Make a small table lamp with a miniature camera tripod, a USB computer light, a USB extension cord, and a mesh pencil holder. You will get a beautiful lamp, made in an industrial style, but at the same time evoking affection.
Think of accessories for the table
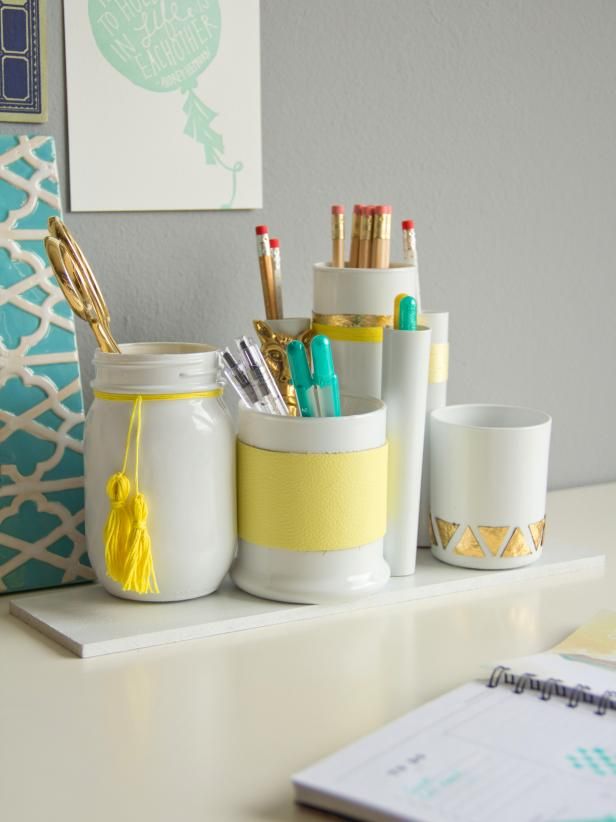
Personalize your table in the room. You can draw some accessories yourself using containers of various sizes. Will need paint to change them appearance, threads for decorating, trimming fabric, leather, twine and other things.
Decorate the walls and floor with colorful ribbon
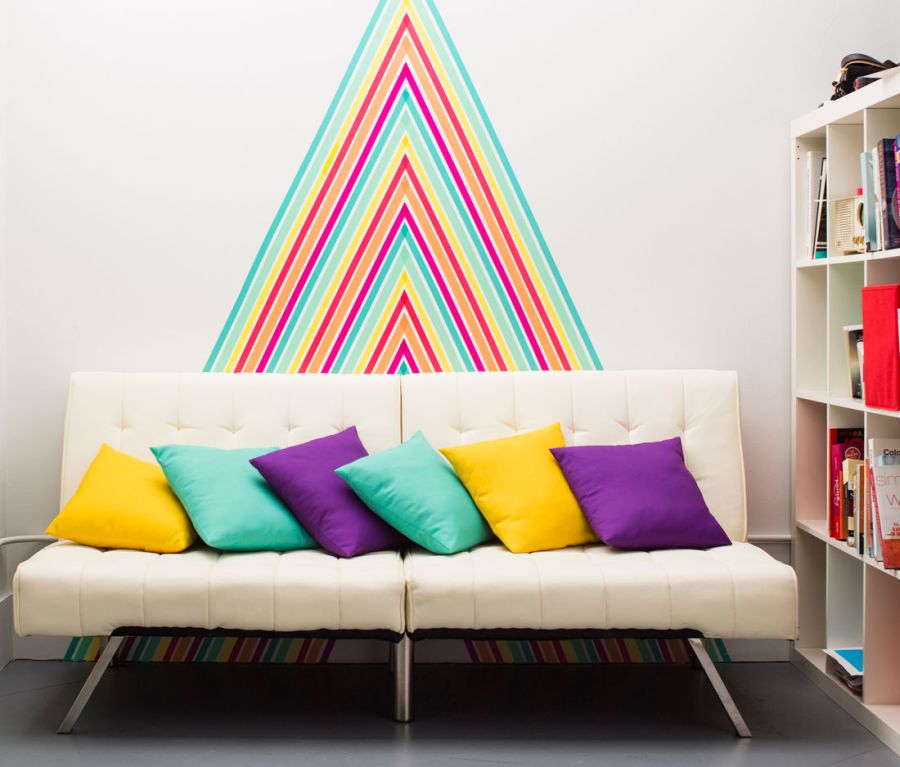
Most likely, you will not be allowed to repaint the walls in the room. But that doesn't mean you can't change the look of your walls or floor. Use colorful tape to make temporary wallpaper. Create a variety of geometric patterns using bold colors.
Knit your own pom-pom rug
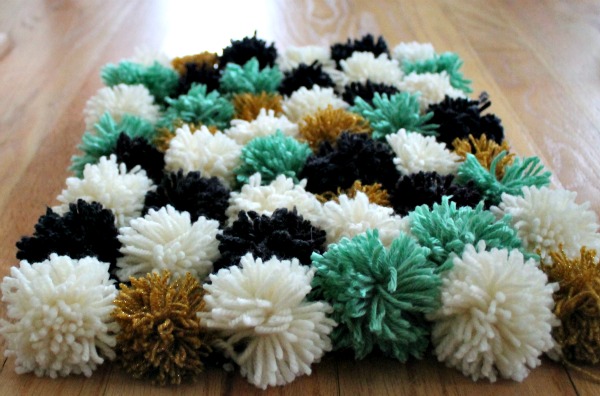
A pom pom rug will add some color, texture and wit to your room. It is relatively easy to build. You will need a lot of colorful yarn and patience. Tie the pom-poms one by one, leaving a long thread on each to join them together to create an unusual rug.
Design a jewelry holder
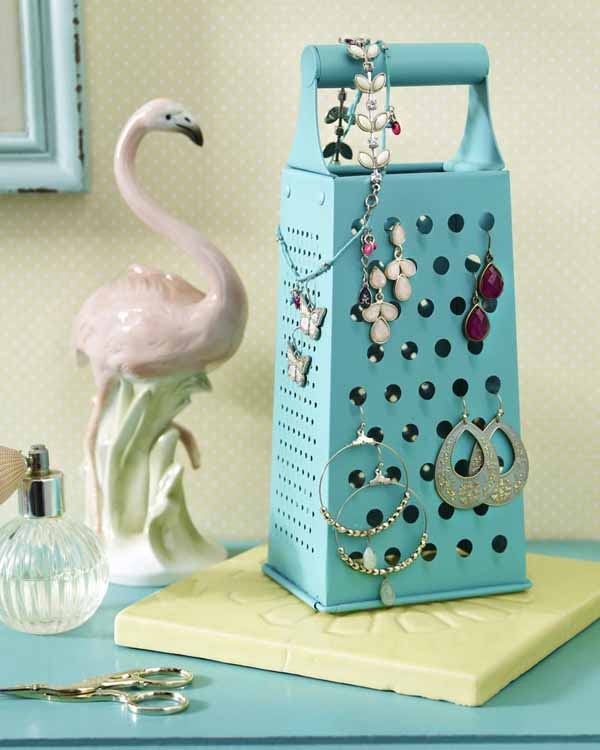
To store jewelry, take an old grater. It's designed for grinding, but will hold a bracelet or two. If you decorate it, then it will take on a vintage or just a more interesting look.
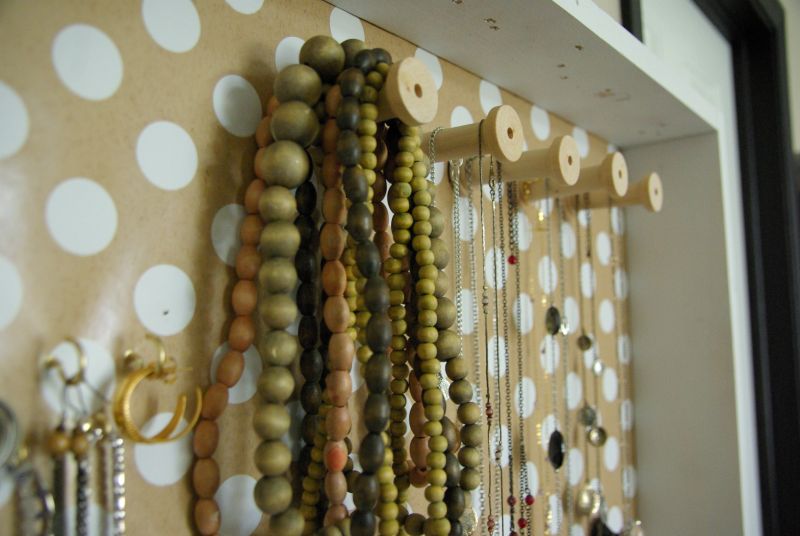
Or build a jewelry stand out of wood and decorative paper or a gift bag. Small boxes will look good on a large one. wooden frame. Old sewing spools and door handles can be used as hangers for beads and bracelets.
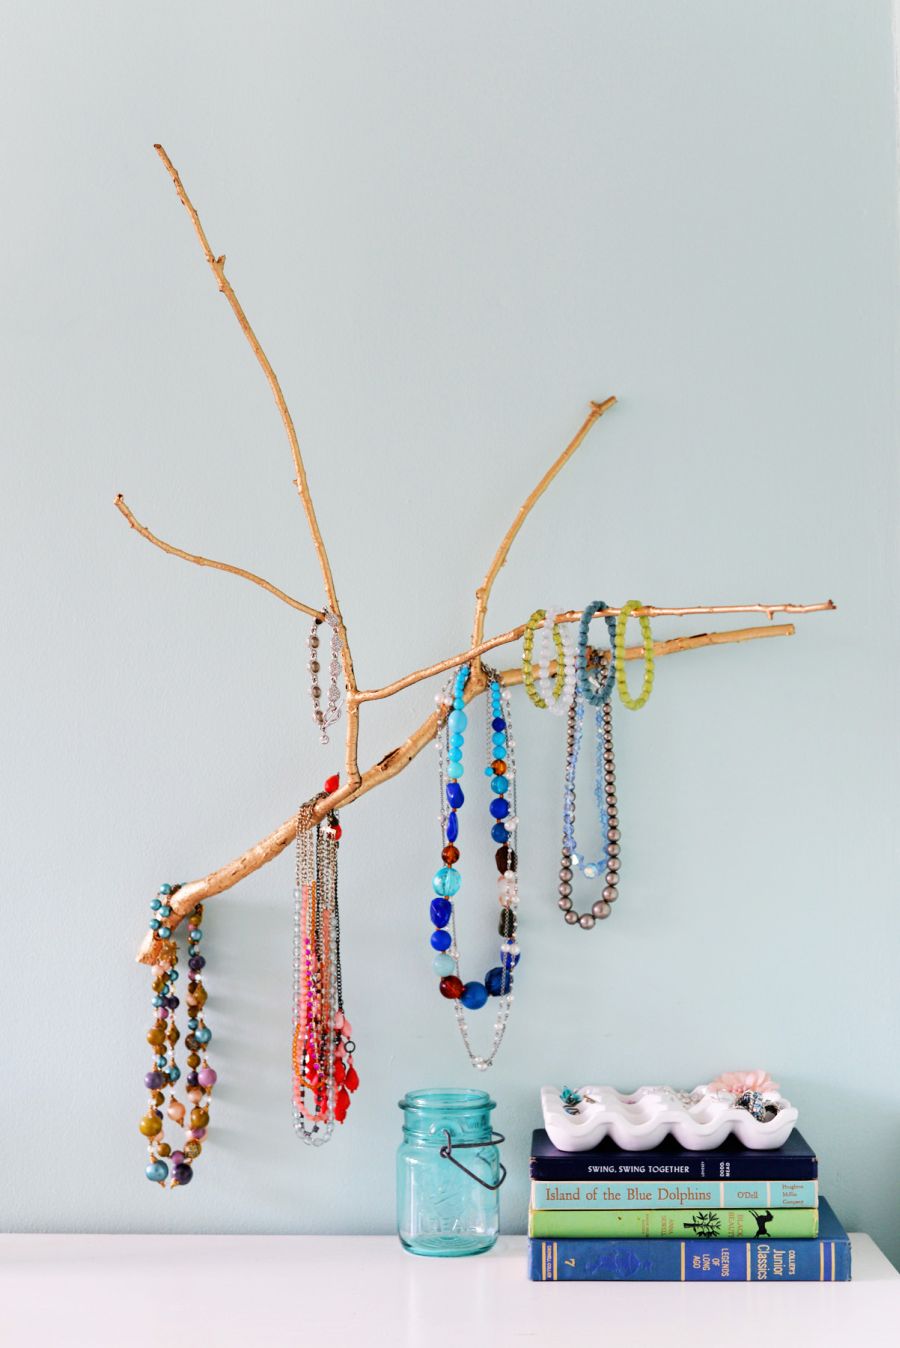
Stand for jewelry from a bush. The whole project is extremely simple. Find a branch you like, clean it up, and paint it to make it colorful. Then attach the branch to the wall with a screw.
Comfortable chairs for you and your guests
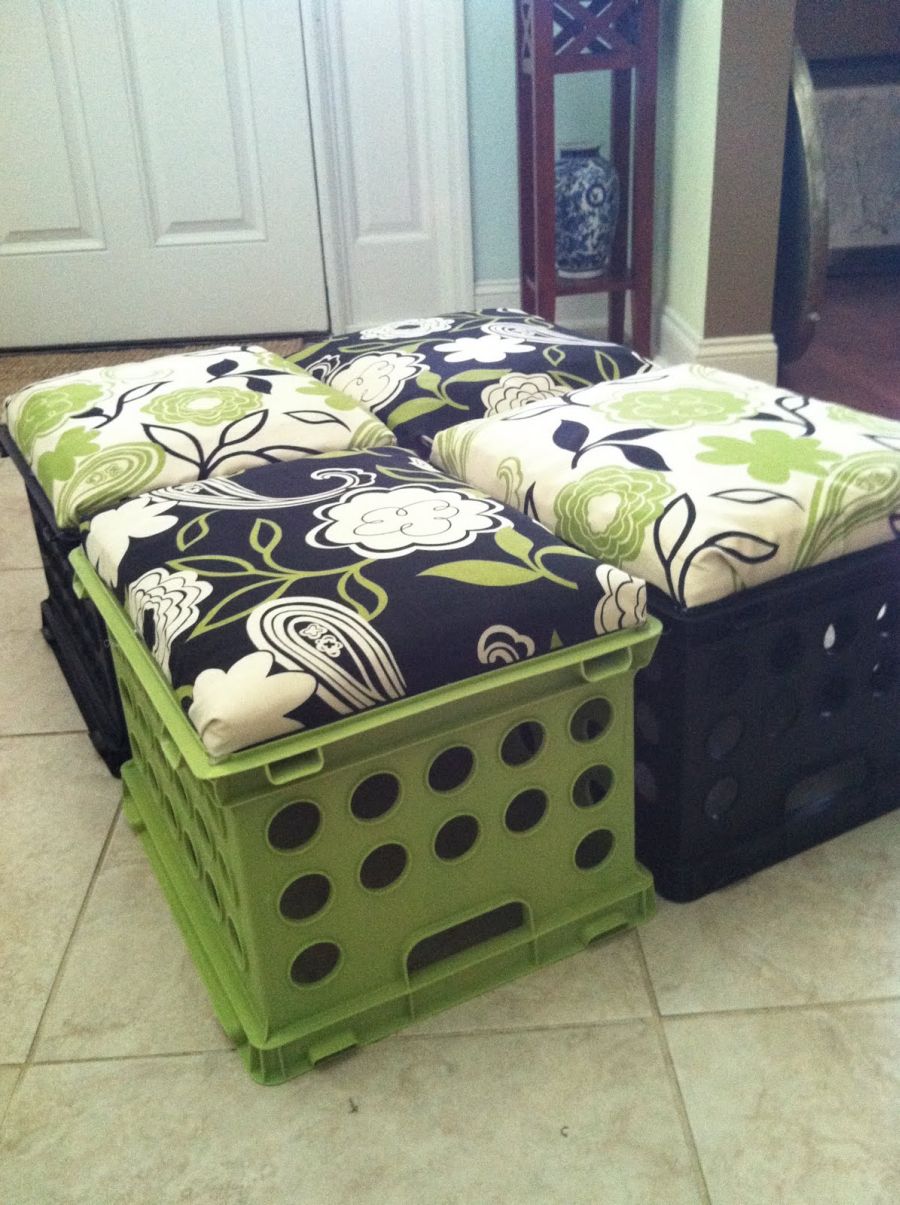
Not enough chairs in a narrow dorm room? Don't worry, make good stools using drawers, fabric and a pillow top mattress. You will also need some plywood. Take a glue gun to attach the fabric to the plywood - the chair cushion is ready! It remains only to place it on upper part box.
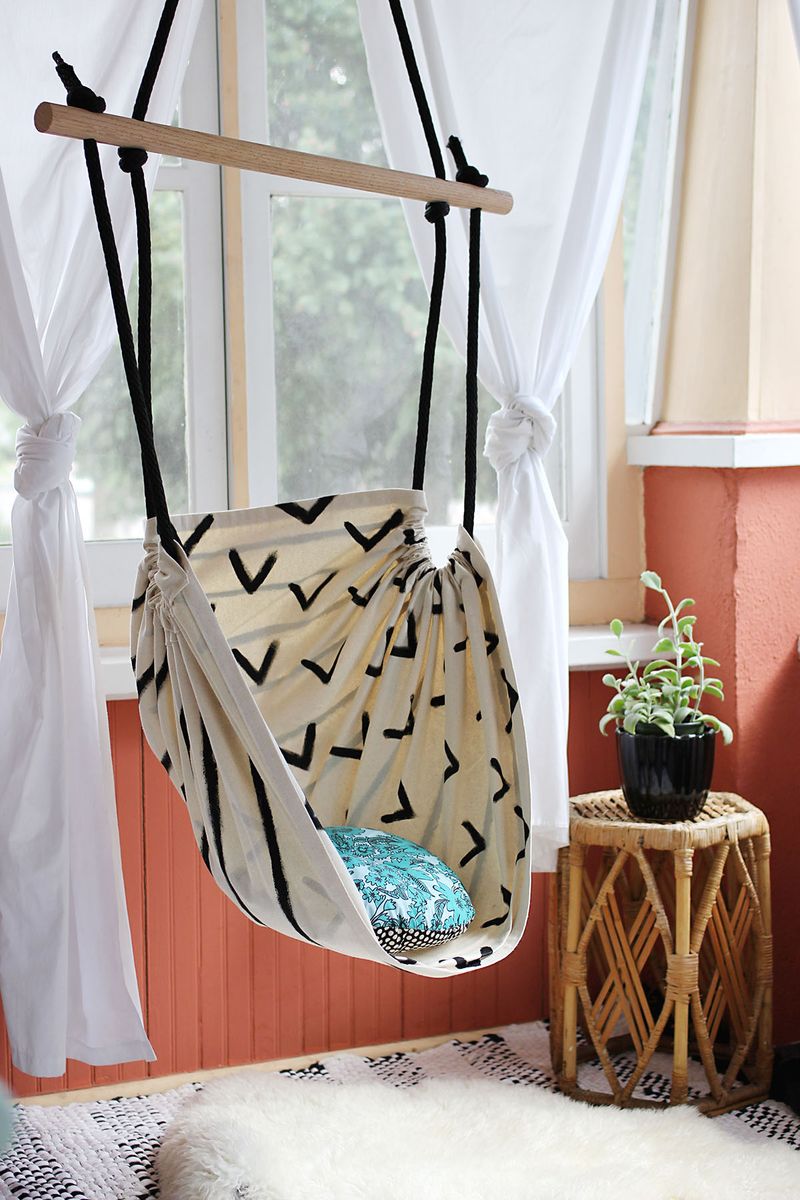
Wouldn't a hammock chair look great in your room? Cozy and comfortable and you will never want to sit in any other chair again. Make your own hammock chair using oak dowels, woven polypropylene, canvas, and stiff elastic.
Decorate the door

The dorm room door is inconspicuous, but you can change it with colored tape. Use the tape to give the drawing a geometrically correct shape, draw an inscription.
Knock down the bedside table
![]()
Attach wheels to the bedside table so that you can easily move it around the room. Cute and practical trolleys are sold at IKEA. They are usually used in the kitchen, but will be useful here as well, as now you will have a three-tiered shelf for storage.
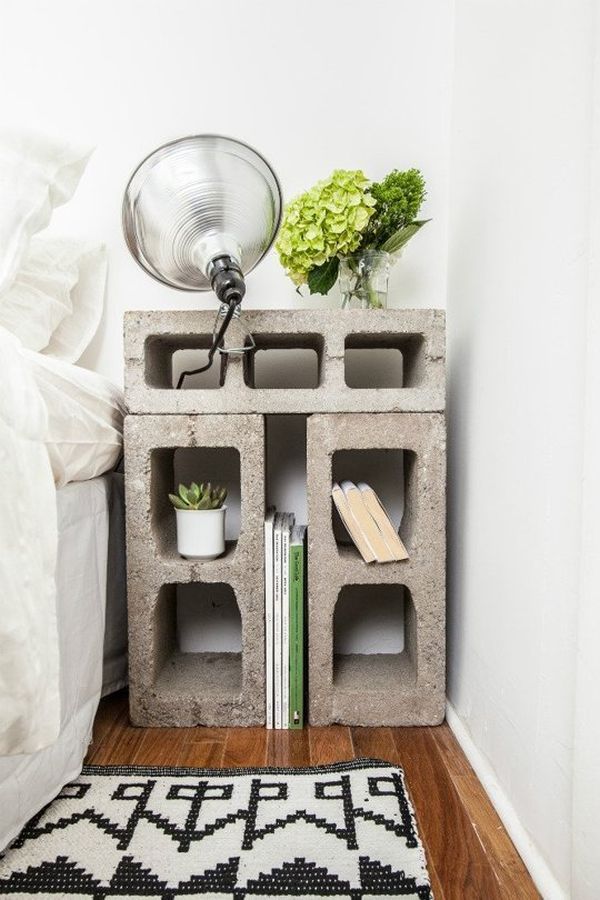
Do you want to build a nightstand yourself? They will come to the rescue foam concrete blocks. It will be like playing with building blocks. Concrete products will give you more room to store a variety of things - a small plant, books, a glass of water, a phone, etc.
Tie yourself or decorate curtains
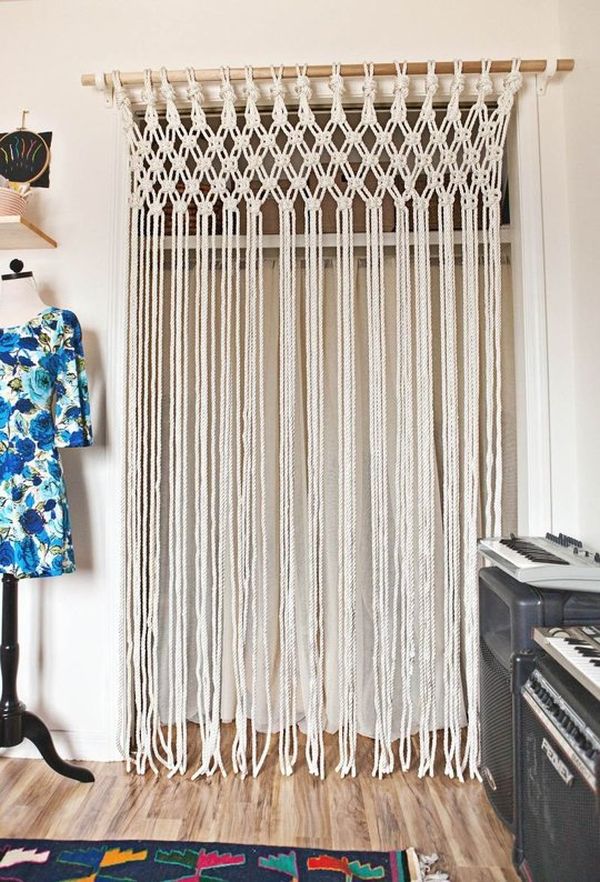
If you want to set aside a place for a relaxing holiday, weave a curtain. In the macrame technique, they usually take a rope and a wooden crossbar. This is a simple project, you just need to understand how to place the curtain, what type of knot to take and choose a weaving pattern.
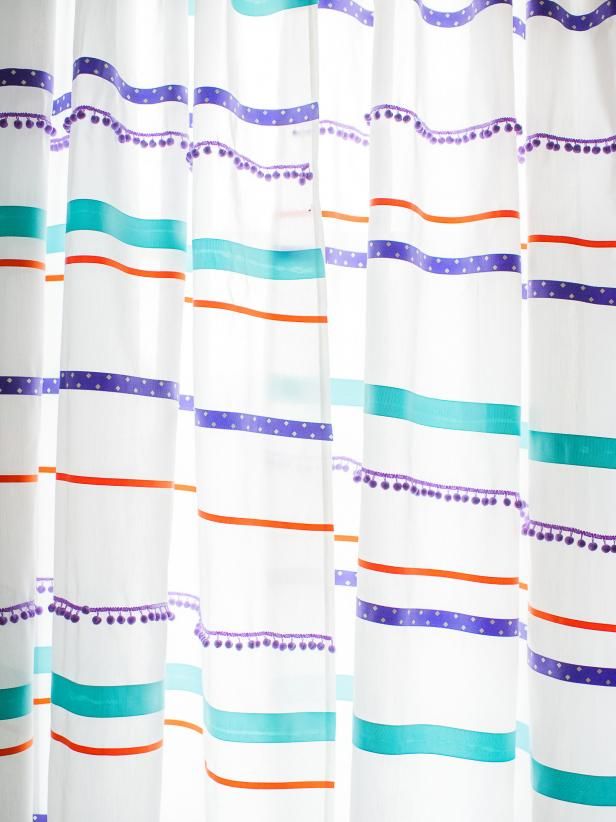
If something goes wrong, buy a ready-made curtain and decorate it. You will need fabric, glue, tape and scissors. Attach a thin tape, stick a wide one, so continue until you achieve the desired image.
Decorate your mirror frame
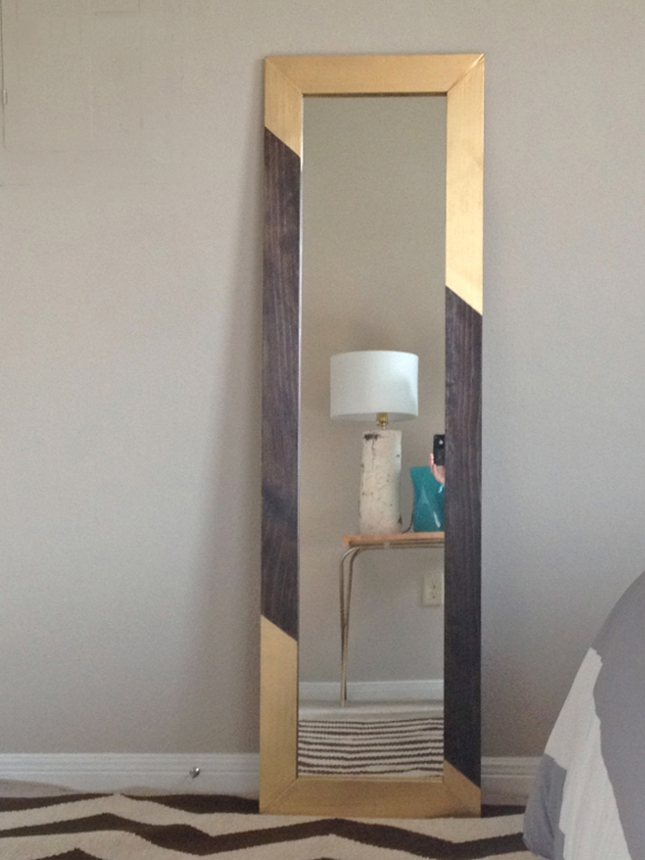
If you have a mirror, we'll show you how to turn it into a glamorous one. Take a simple design consisting of a two-color geometric pattern. Stick the tape around the areas, then paint the desired areas with gold.
Decorate pillows
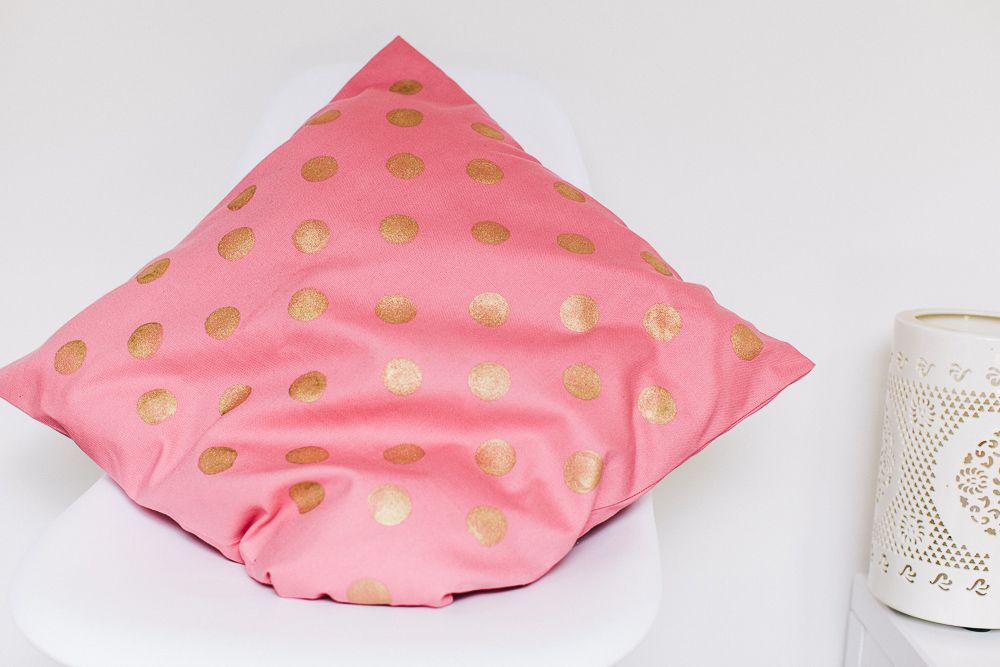
Do you take good care of your pillows? Do they look like they need a makeover urgently? If yes, then try to implement this idea. Wash, dry and iron your pillows. Take some gold paint, a champagne cork and paint polka dots on the pillowcase. Leave to dry.
Add a shoe rack
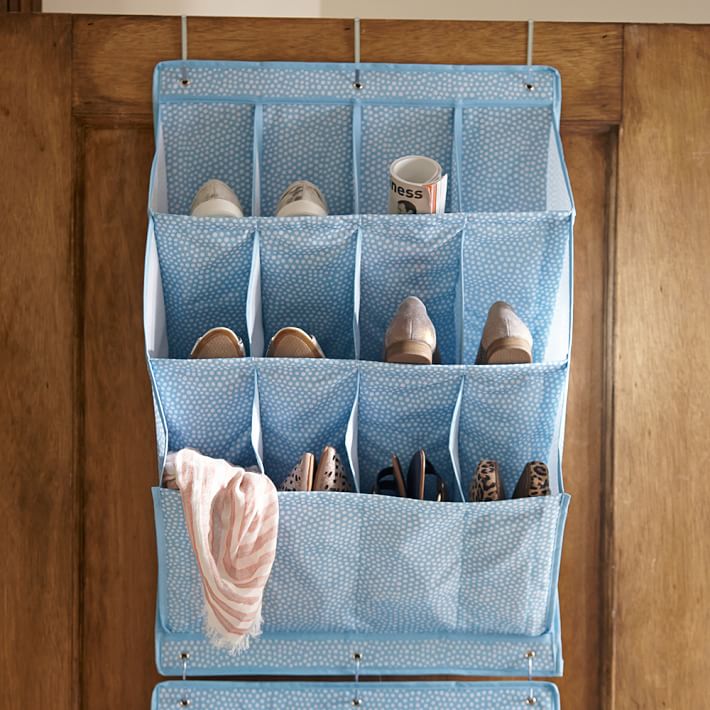
In a tiny dorm room, there is always a problem with free space. The door will be a great option for storing shoes, just hang an organizer on it.
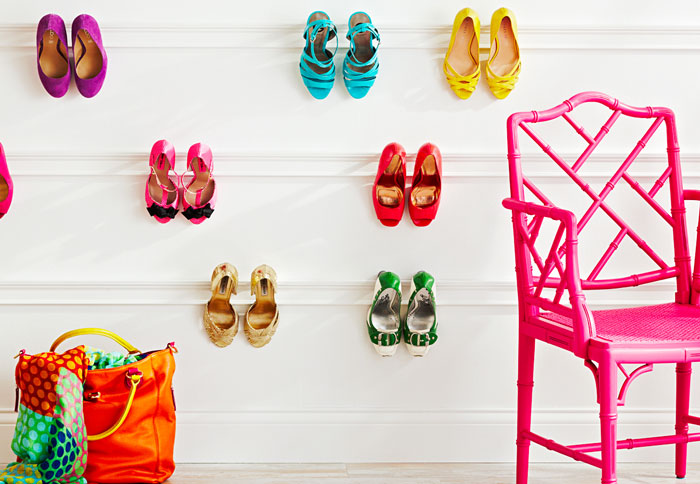
Another interesting solution for keeping shoes in order is to simply hang the moldings on the wall or in the closet. You can create a simple display that shows all of your shoes.
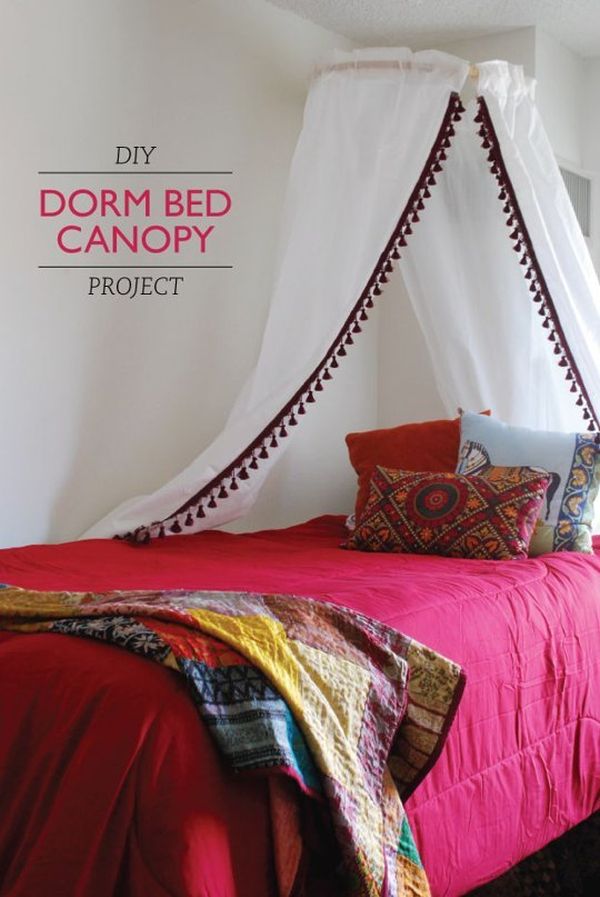
Of course, four-poster beds really look great, but what if there is no room to move around the bed? You already have the item below to create a canopy over a bed.
Sew a hanging basket
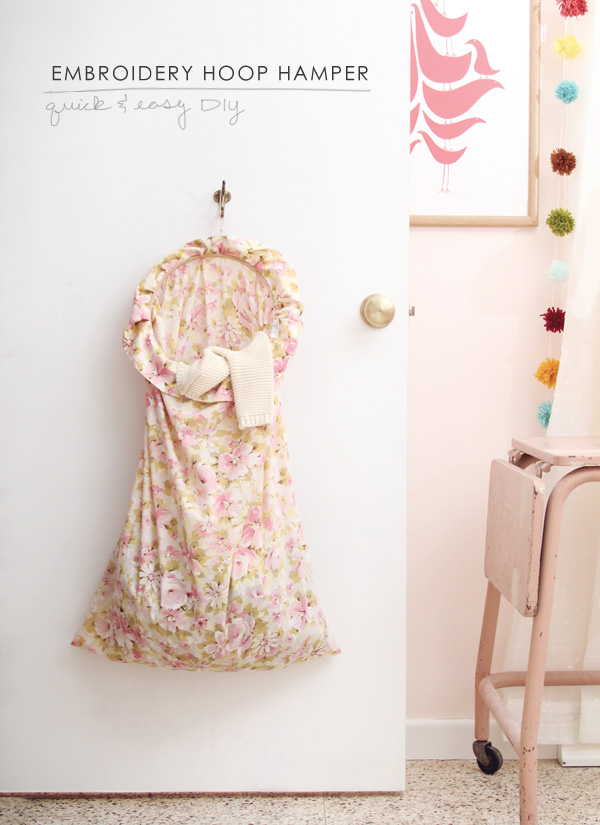
Instead of throwing dirty things in an ugly trash bag, make a chic hanging basket instead. Take an embroidery hoop, fabric, twine or ribbon. The type of fabric you choose should reflect the style of the room.
Make a base for recharging
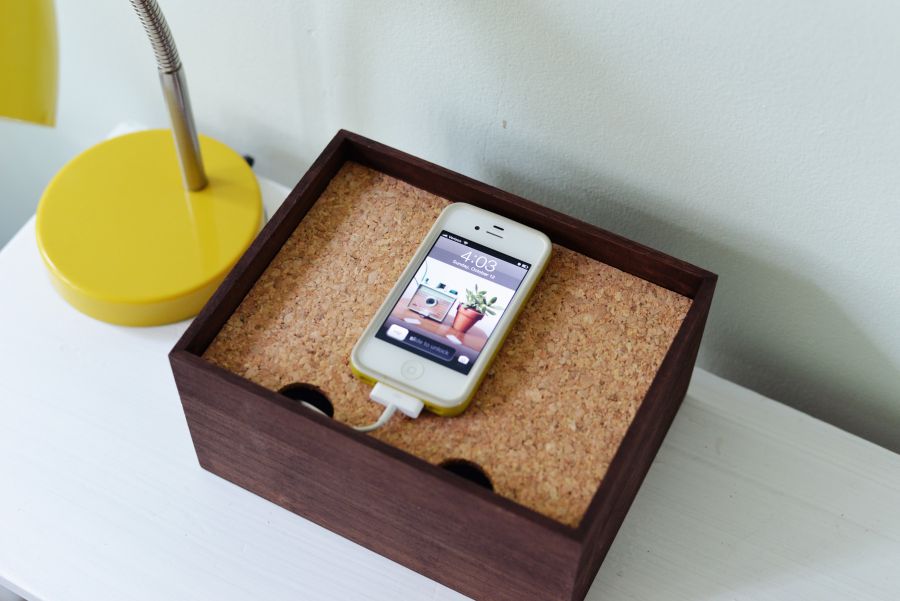
For the stand you need a wooden box, a piece of chipboard, a knife, paints and wood glue. Leave a ledge for the possibility of placing a chipboard sheet. Then drill a hole in the back of the box, make holes for the cable, then paint the box the color you want.
Increase storage space in your first aid kit
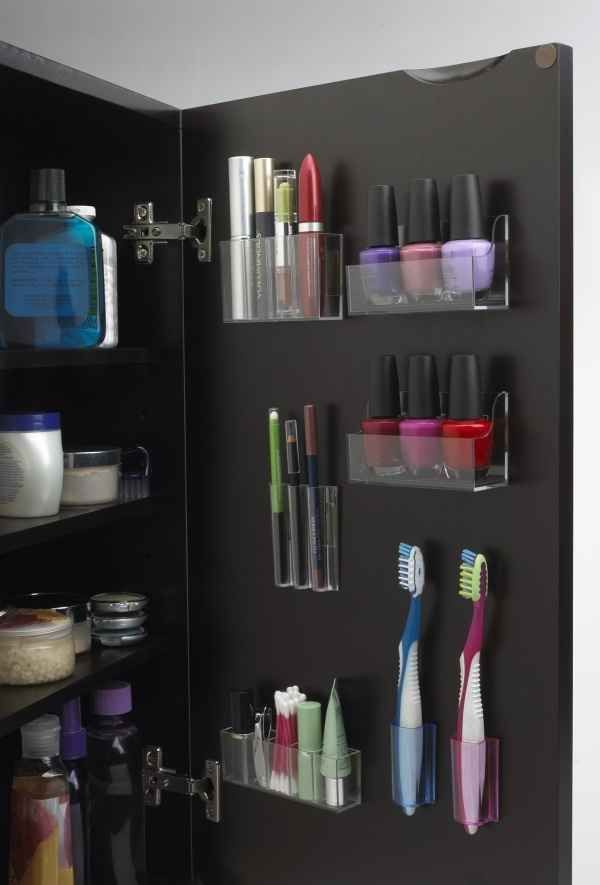
Everyone has the opportunity to create additional space. Add a hanging shelf on the inside of the medical cabinet door and you have room to store your toothbrush, nail polish, etc.
Decorate open shelves
![]()
Use multi-colored tape to trim the edges of open shelves. They will look much prettier, besides this inexpensive project. In addition, the repair will be reduced to a simple replacement of ribbons.
Make hanging shelves

Add something unusual to the interior. For example, make hanging shelves using thick rope, clips, paint, and two rectangular pieces of plywood. Take a piece of wood, clamp it with two sheets of plywood. Drill in four places at equal distances. Cut the ropes of the required size, fasten the shelves, hang them from the ceiling.
Create interesting book holders
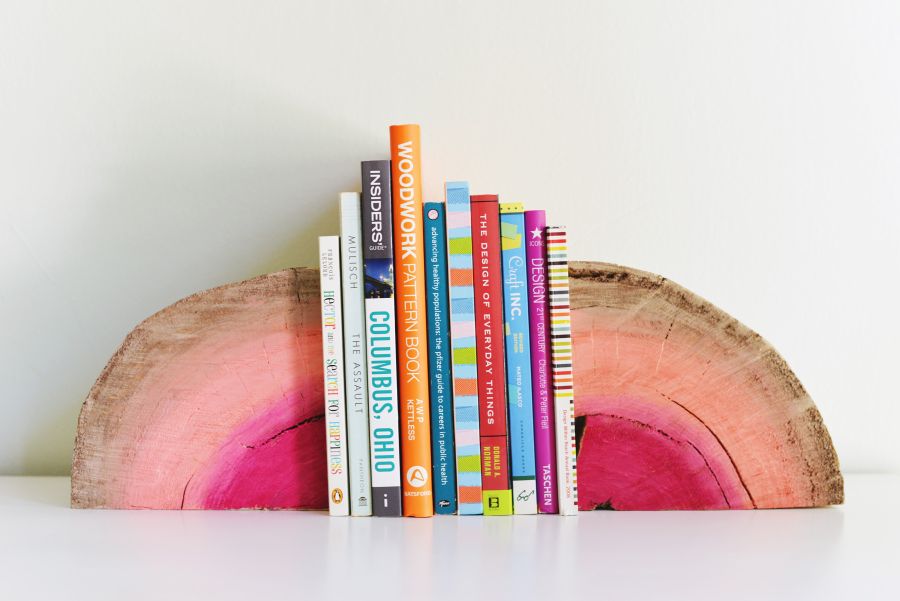
They will be able to store at least a few books from the collection. To make the books stand straight, you need to make limiters. You will need half a log, a brush, multi-colored paints, a sanding block, a saw and some varnish.
Choose multifunctional furniture
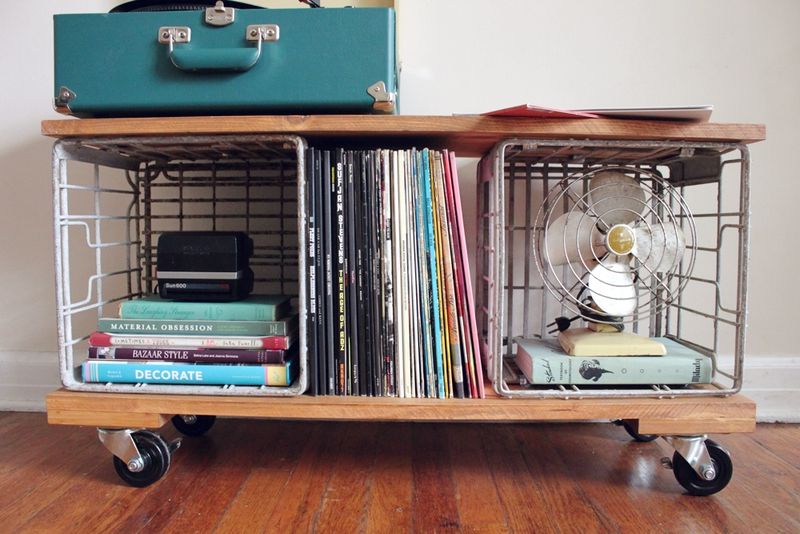
Such furniture is important to have in order to combine many functions in a limited space. For example, this cabinet can be used as a bookcase or for storing gadgets, also as a bench. And the one in the photo has wheels, so it will be easy to move around the room.
DIY headboard
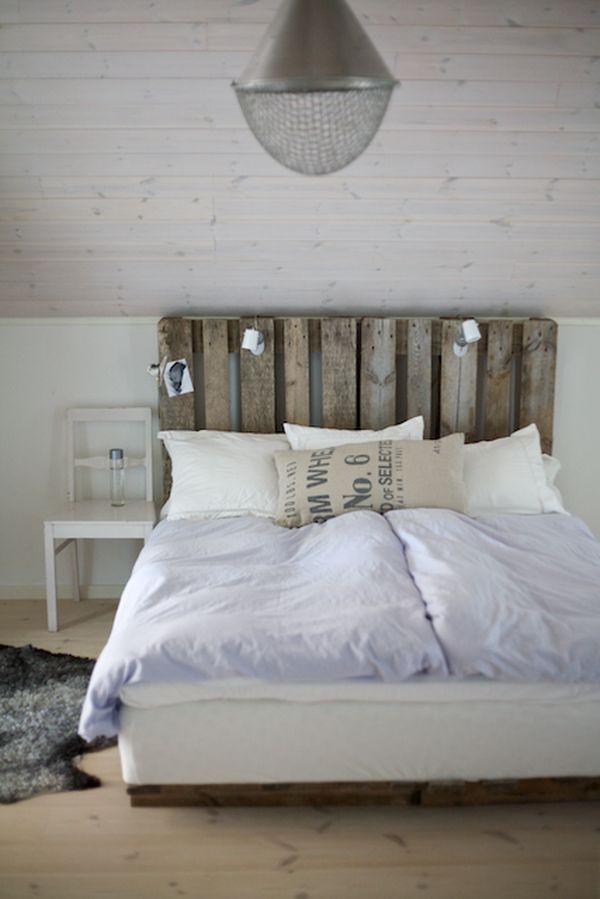
To do this, you need old wooden pallets. Turn them over and nail them to the bed. If you want to keep the worn look, just leave it as is, if the headboard doesn't seem to fit in with the design, use paint.
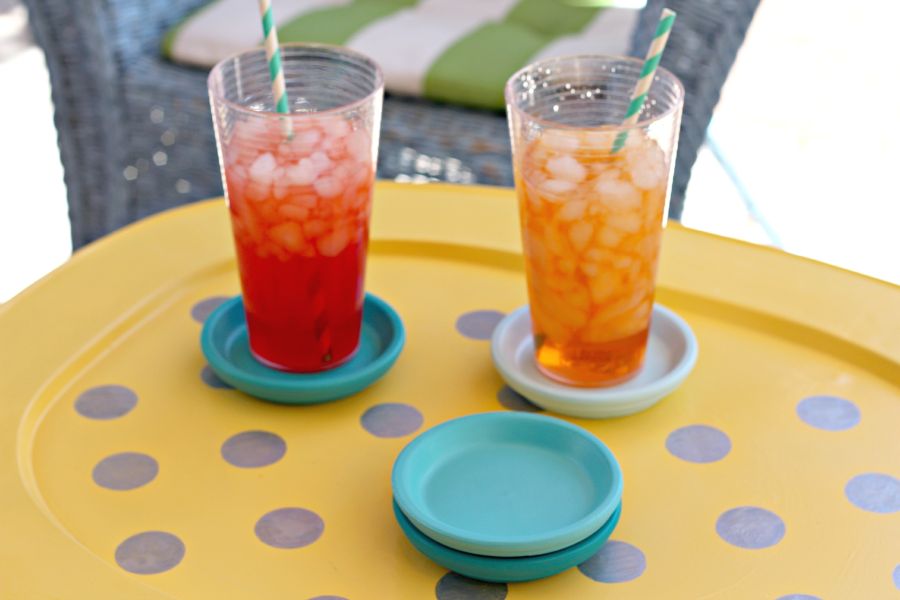
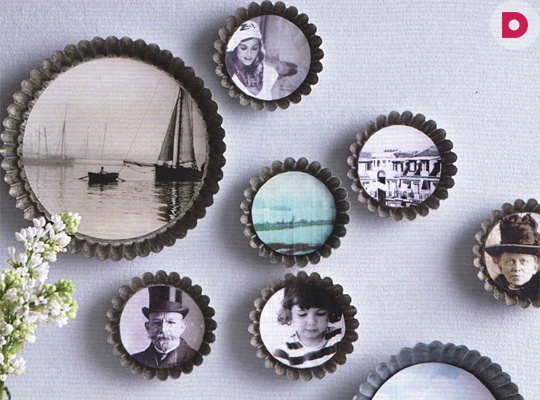
To make these cute little coasters, you will need the following materials: clay plates, colorful paints, and a blank board. First, the darkest color is applied to one of the plates. Then white paint is gradually added so that in the end all shades of the same color are obtained. Apply two layers of a special coating to the center of each saucer and you can write and draw on them.
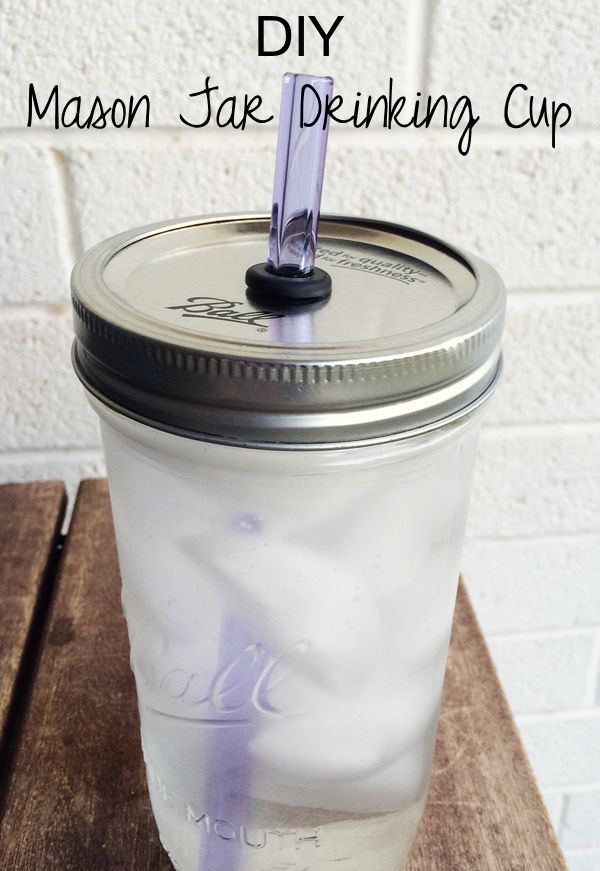
A beautiful mug will turn out from a glass with a lid and a straw. All you need is a wide-mouth jar with a tight-fitting lid. Drill a hole in the center for the straw. And everything is ready.
Apply labels to cables
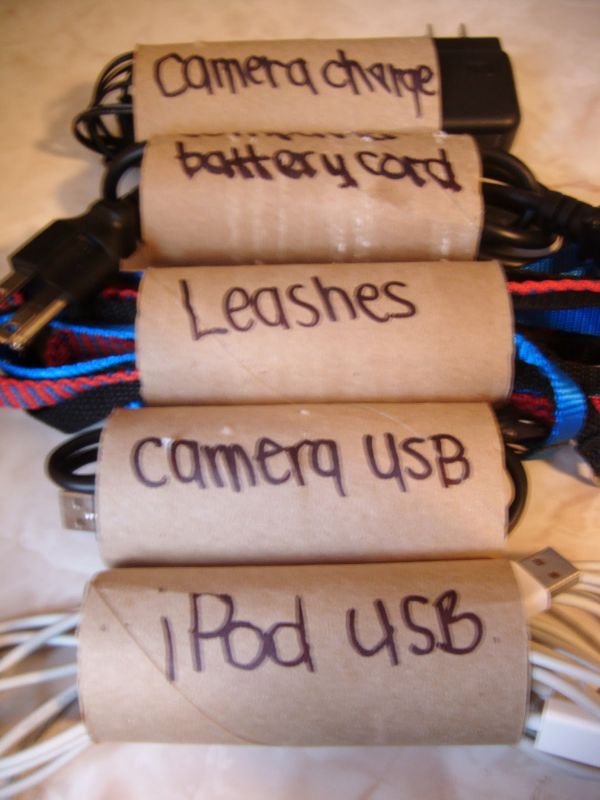
This is a great idea for keeping the room clean and tidy without cords and cables. A simple idea is to use a toilet paper roll to twist the wires and put them in a drawer. This keeps them from getting tangled and makes it easier for you to find the right wire.
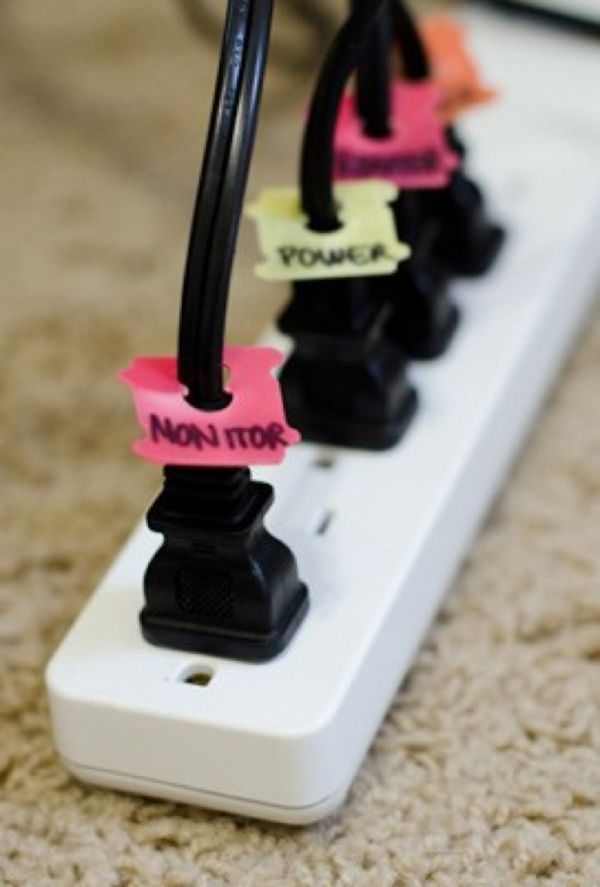
Or hang tags on the resulting coils. You will immediately see which one can be disabled, which one can not. Write the letters with a black marker, it does not fade for a long time.
designer thread
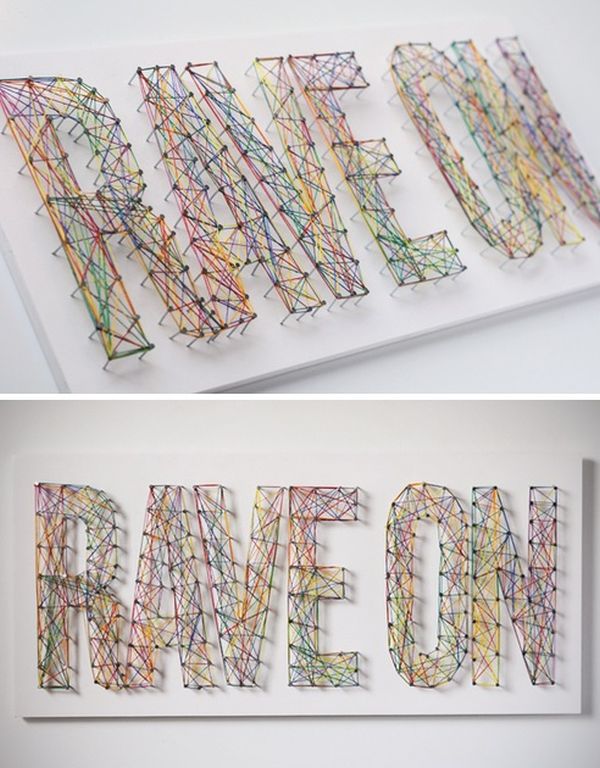
Designs using multi-colored threads are quite popular these days. The whole idea is to create any drawing you want. Nails are driven into a board or wall. Then everything is wrapped with colored thread to give the desired look.

How long does it take you to find the keys? To speed up the process, make a key holder from an old photo frame by painting it and stuffing small hooks. Install on the wall next to the door.
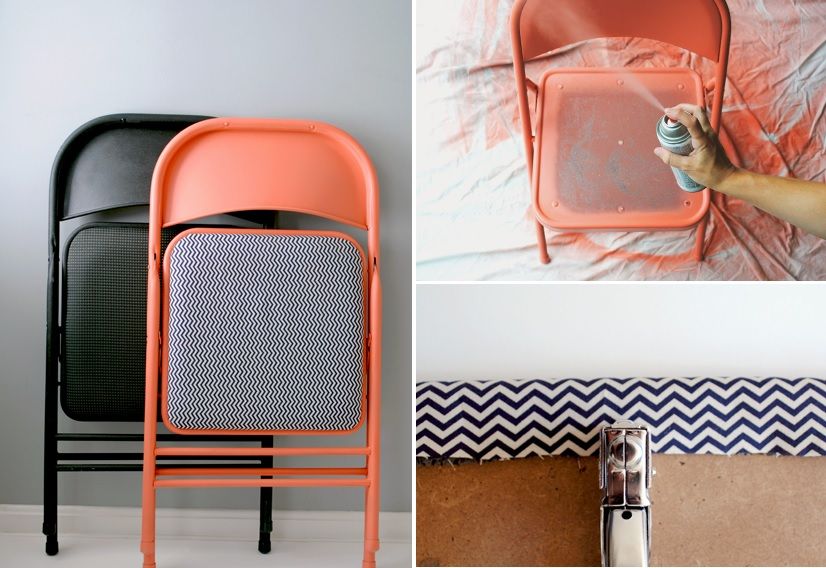
Change the look of folding chairs
Choose a section
Tag selection Hand made (89) Street Art (86) Famous names (252) Life hacks (7) Autumn in the interior (41) Festive interior (98) Interior items (66) Storage systems (70) Interior design dictionary (89) Styles Interior design (141) Textile design (33) Terms (137) Colored interiors (75)Everyone tries to make their home beautiful and cozy. Here he spends time with his family, rests, relaxes.
The same situation is boring, and it is not always possible to completely redo everything. But after all, it is always possible to supplement the interior with small details, unusual hand-made items. This will create novelty and freshness, change the general background, and maybe the whole interior of the house.
How to decorate a room with your own hands: many options
From early childhood, at art lessons, we were given certain knowledge in fine arts and needlework - drawing, modeling, appliqué, sewing, knitting. It never goes unnoticed. When you already have your own home and family, all the knowledge once acquired begins to remind you of yourself. Then you start looking for tips on how to decorate the room with your own hands. The topic, of course, is very broad, and one article will not cover much. Let's dwell on some details that will decorate the interior of the house.
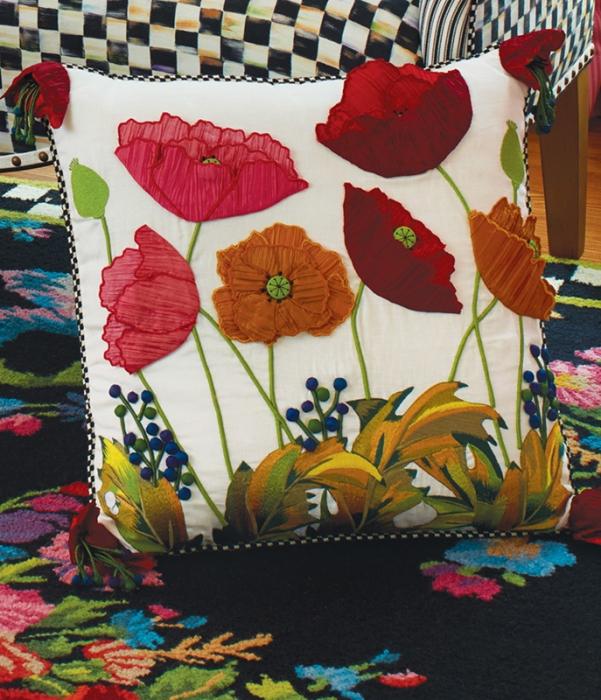
Pillows
Lovely, cozy, soft pillows on which our head, back, hands bask ... They decorate rooms, complement the background, color scheme. They can be laid out on sofas, armchairs, beds. They are indispensable helpers of man. Without them, it is uncomfortable and uncomfortable. Sewing pillows is a good idea for decorating a room with your own hands. But to do this is very simple.
For those who sew, it will not be difficult to measure the desired length, width and tailor the covers, sew a square, rectangle, heart or circle shape with a straight seam. One side of the cover should remain open. A clasp or buttonholes are sewn into this place. It remains to decorate the pillow - tie or cut and sew them to the cover. If the flowers are made of thin fabric, then the edges must be carefully processed together with the cover, as with satin stitch embroidery. Currently, stores sell a large assortment of yarn, designed for both summer and winter.
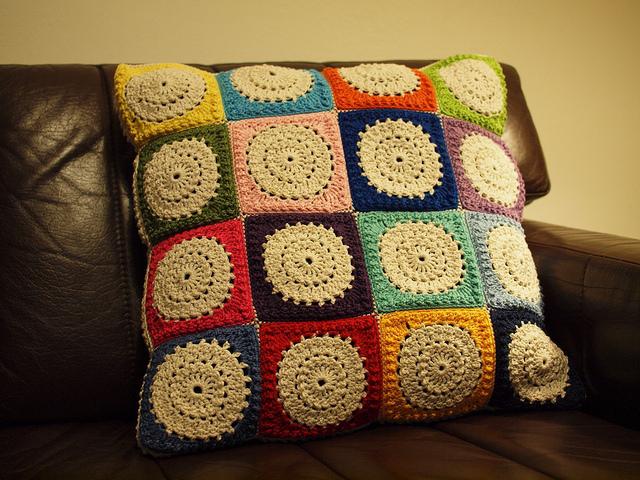
Elegant and fashionable look in the interior of the room. Each motif is knitted separately. They are crocheted, with a simple column, and then the edges are connected and a fun pattern is obtained from the squares, as in the photo. You can also crochet motifs - flowers, sheets, stripes. The edges of the fabric cover tied with lace knitting look beautiful. How can you decorate a room with your own hands?
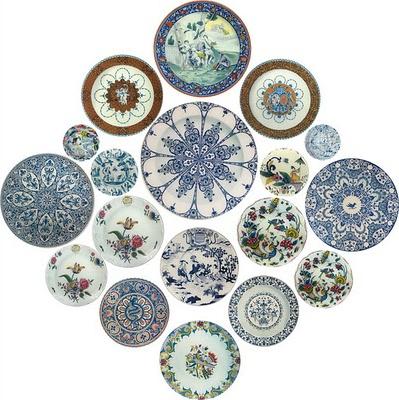
Plates
A fashionable solution in changing the interior of rooms is artistically painted plates. They also come in different sizes, shapes and styles. Plates like paintings complement the general background, pleasing to the eye. This is another way to decorate your home with your own hands. It is better to choose a calm theme - flowers, abstract motifs. Professionally painted plates are expensive. There are, for example, oriental plates with amazingly elegant fine ornaments drawn with a needle. The smallest ones cost $20, so not everyone can buy them.
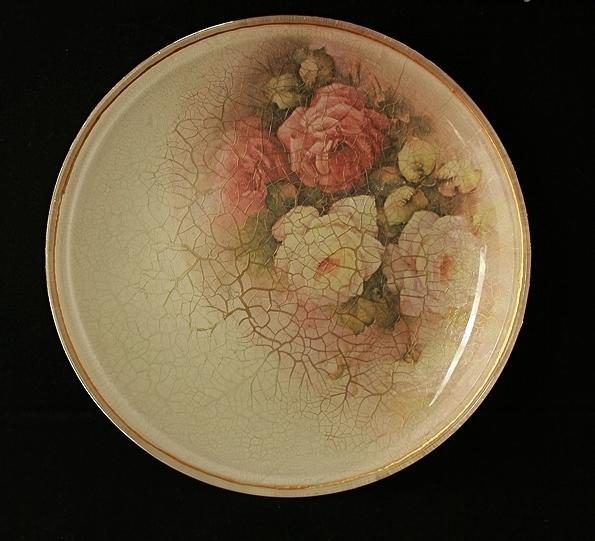
Look at this plate picture. You probably thought that it was painted by an artist? No, this plate is made using the decoupage technique - applications with napkins, drawings. The surface is degreased, the cut out pattern is applied and smeared on top with decoupage glue or PVA. The drawing should be well saturated and not wrinkle. After drying, several layers of special craquelure varnish are applied on top with a brush. It contains acrylic, it dries quickly and cracks, creating the effect of antiquity. It turns out here is such a beauty.
Several of these plates on the wall or on table stands will give the room a new and fresh look. This technique is good because it is applicable to wood, porcelain, glass, plastic, metal. So kitchen boards, dishes, bottles, various boxes, furniture and much more can be decorated in this way.
Fairy lights
The fashion for garlands came to us from abroad. We used to make them New Year when decorating the Christmas tree and the room for the holiday. Most often we saw them in Indian films. And today in Europe and in our country they have become just a decoration of the house, not only on holidays. And also it is a good idea of how to decorate your room with your own hands. If you know how to make flowers from fabric, paper, leather, plastic, then this will be easy for you to do. But you can buy ready-made flowers and weave garlands yourself. They are wound one by one onto a flexible thick wire using floral tape or green electrical tape.
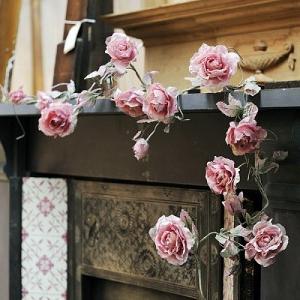
Making a garland does not take much time if you have ready-made flowers and leaves. Despite the simplicity of the work, the result is simply amazing. The corner in which you place it will immediately become individual, beautiful, unusual. Take time to think about how to decorate your house with your own hands, try it, experiment! You will get great pleasure.
