Exterior finishing of an aerated concrete house. How to properly finish the exterior of a house made of aerated concrete
It is a solution to aesthetic and design problems and contributes to the formation of a comfortable indoor climate. Therefore, when choosing a material, one takes into account its operational properties and requirements for vapor permeability. On the one hand, when finishing walls, high air circulation is important, and on the other hand, interior finishing made of aerated concrete needs to be as insulated from steam as possible. After all, vapor barrier increases the service life of finishing materials. So before construction work, it is important to correctly prioritize when choosing decorative bases.
Experienced builders often prefer vapor-permeable materials for interior decoration in homes. From the wide variety of construction assortments, it can be difficult to find required material. The most commonly used plaster is plaster, which consists of building gypsum, sand and slaked lime. This building material is easy to use; before applying it, you don’t even need to treat the walls of the room. The putty is vapor permeable due to its natural ventilation features.
If there is no vapor permeability
If there is no vapor permeability, there is no possibility of air transfer from the walls into the room. Because of this, cracks and joints form on the surface of the walls, air stops circulating and dampness is felt in the buildings, and mold is also observed in the corners.
Decorating a house from vapor-proof materials
 Preparation for vapor barrier of walls.
 Vinyl wallpaper and polyethylene film are ideal for finishing walls made of vapor-proof materials, which will perfectly reduce surface porosity. However, when choosing this type of finishing, there is a risk of condensation, which destroys the structure of buildings. When working with vapor-tight materials, preliminary work is done to treat the walls before gluing. A primer in several layers and plaster made of sand and cement are suitable for this. With its help, the permeability of the walls will be significantly reduced, but this method does not last long; after a while, the walls need to be plastered again. After completing the preparatory work, they begin the decorating stage.
Maintaining the characteristics of aerated concrete
To avoid problems with air circulation, you need to carefully approach the issue of selecting the material for working with aerated concrete wall finishing. After the choice building material has been made, you need to correctly combine the ingredients for the solution and follow the technological processes.
Requirements for building materials
When choosing materials for construction, you need to remember that the service life of internal polishing is influenced by the quality of the selected product. Therefore, when making a purchase, you should not skimp on the choice of building materials; this will preserve the serviceability of the surface of the room for many years. It is better to purchase goods in large retail outlets, where you can request a certificate for the product. When choosing building materials, you need to pay attention to their packaging, which must be in proper condition. All materials used must be environmentally friendly and do not contain additives that could be harmful to human health.
Why is it important to carefully choose finishing materials?
When choosing aerated concrete, take into account its high ability to absorb water vapor from the air. To do this, before laying it, apply a layer of plaster and cover the internal surfaces with wallpaper. Thanks to this method, uniform vapor tightness and vapor permeability of the material is ensured, which helps create an optimal microclimate in the house. Also, the finishing material should not only be durable and of high quality, but also beautiful in appearance, because repairs are often done for more than one year.
Types of wall finishing made of aerated concrete
Interior decoration is carried out with the following materials:
- plastic panels;
- plaster;
- wallpaper;
- drywall;
- ceramic tile;
- wood panels;
- dye.
 When the surface is clear of debris, coat the walls with primer.
 When starting to work with plaster, you need to prepare the work surface. Several layers of primer are applied to the walls to prevent the appearance of fungi and mold. It is necessary to ensure the evenness of the applied solution, this will ensure the accuracy of subsequent stages. Next, if desired, use wallpaper or drywall. It is attached to special profiles using a hammer drill and screws. To attach the profile evenly, use a building level. The advantage of plasterboard is its heat and sound insulation. A significant advantage of plasterboard is the absence of pre-treatment of walls, which do not need to be puttied and plastered. But at the same time, the surface will be perfectly smooth and even, which means that you can immediately begin subsequent decoration. The only drawback in working with drywall will be the loss of the internal area of the house, for fastening the profiles and the thickness of the material used.
Another way of interior wall decoration is finishing with plastic and wood panels. This is a very simple method, even a novice builder can do it, does not require preliminary leveling of the walls and is easy to install and does not take long. And most importantly, the end result is attractive.
One of the popular options for decorating vertical surfaces is wallpapering. To save money, you can glue the wallpaper yourself, but before you start working, you need to take care of a smooth and clean base. To do this, the walls are plastered and then primed. For wallpapering, a special glue with high adhesive properties is used, which is resistant to moisture, mold or mildew. Once you have decided on the choice of adhesive base, you need to dilute it correctly, based on the instructions, and then let it sit for about half an hour. For better adhesion of wallpaper to the wall, it is primed with a solution of glue, previously diluted with a little water. You can apply glue to the wallpaper with a roller or a wide brush with reverse side canvas, then let it stand for a while and start gluing it to the wall. To do this, when gluing the wallpaper, they are gradually smoothed with a rag or your hands. After the walls are glued, take care to dry them. To do this, avoid the appearance of drafts, the presence of which leads to uneven drying, which means spreading, tearing or peeling of the wallpaper.
Many years ago it was fashionable to paint panels in different colors. Water-based paint is mainly used, which is low in price and easy to use. Before painting, prepare the walls using sanding or sandpaper. Level the surface to a perfectly flat state. Next, prime and apply the first layer of water-based paint, which is mixed with the required color. The mixture must be thoroughly mixed until smooth. Painting begins from the far corner of the room. In order for the color to be saturated, several layers are applied, which must be alternated horizontally and vertically, then the surface will be beautiful and neat.
Ceramic tiles are also often used, which are vapor-proof and have found their application in the decoration of the walls of bathrooms, kitchens and corridors. When working with tiles, use a building level, and before applying the tiles, level the surface and apply a layer of primer.
Stages of preparing walls for decoration
 It is better to plaster aerated concrete with gypsum mortar.
 They begin preparing the walls with interior decoration, and then with the exterior. On the working surface, the glue from the previous wallpaper is cleaned off, the resulting potholes are scraped out, and possible recesses are filled with mortar, thereby creating a smooth wall. Next, a layer of primer is applied over the entire wall, the use of which is permitted in residential premises. At the next stage, beacons from a long profile are fixed vertically. Again, using a level, the evenness, verticality and horizontality of the beacons installed in parallel are checked. After this, a fur coat up to one centimeter thick is laid. The thickness should not be very large, but it should hide surface unevenness. The next layer is plaster; as it dries, leveling is done using a spatula. At the end of the work, you can remove the beacons and seal the remaining areas with mortar.
What mixtures should I use for aerated blocks?
A good solution used for processing aerated concrete blocks is important stage when decorating houses. When choosing which you should consider the following parameters:
- The ability of the mixture to firmly adhere to the surface being painted.
- To ensure a good consistency of the solution, mix 15 kg of plaster with 4 liters of water.
- It is better to use the prepared mixture immediately before use.
- Mixtures are selected and used for their intended purpose, i.e. if the solution is for internal uses, you should not use it externally.
- Before starting work, calculate the volume of material used; it is better if 15 kg of mixture is used for 4 squares of wall covering.
Decorating a house is an equally important stage in construction, so you need to take the choice of materials used seriously.
- Basic nuances of wall decoration
- Practical recommendations for wall decoration
The abundance of building materials allows you to construct a building using several types. For example, the outer part of the building can be constructed of brick or cinder block, and the internal partitions can be made of foam concrete or aerated concrete. The use of just such blocks for walls will allow you to save on building a house and improve the thermal insulation of the premises. The interior decoration of aerated concrete walls has several features that you need to know before starting work.
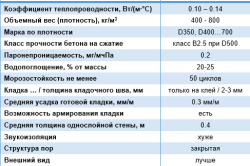
Features of aerated concrete blocks
The production of aerated concrete is a complex technological process. As a result of mixing cement, lime, and quartz sand, the basis for obtaining this building material is formed. After adding aluminum chips, bubbles begin to form in the concrete. After pouring into molds and hardening the resulting mixture, aerated concrete blocks are ready for use.
The advantages of aerated concrete blocks include the following properties:
- good thermal insulation;
- fire resistance;
- excellent sound insulation;
- frost resistance;
- the ability to maintain an indoor microclimate;
- duration of operation;
- ease of processing and weight;
- no possibility of fungi and mold penetrating into the material.
These advantages make it possible to use aerated concrete blocks for the construction of internal and external walls of buildings for any purpose in various climatic conditions.
Return to contents
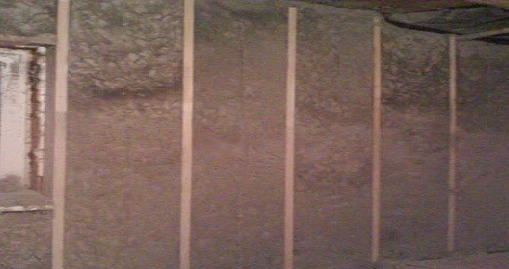
Basic nuances of wall decoration
![]()
When choosing finishing materials for walls made of aerated concrete, it is necessary to take into account several points that are mutually exclusive:
- The indoor microclimate provides for a certain humidity, which must be maintained by the building materials used for the walls.
- The hygroscopicity of building materials affects their wear resistance. To avoid excess moisture getting inside the aerated concrete blocks, it is necessary to provide for an increase in the vapor permeability of the finish.
The climatic characteristics of the room, the durability and strength of aerated concrete walls depend on the choice.
Finishing material that has good properties vapor permeability, is gypsum-based plaster. It will allow walls made of aerated concrete blocks to preserve specifications. This plaster is sold in the form of a dry mixture, which must be prepared in accordance with the instructions on the package. In addition to gypsum, the composition includes perlite sand and slaked lime. This combination of components allows you to increase sound insulation and increase the fire protection of the room. In addition, the plaster is applied to aerated concrete walls that have not been treated with a special primer solution and can be easily processed. Final leveling can be carried out without the use of putty.
The vapor permeability of aerated concrete blocks will allow for increased gluing of vinyl wallpaper. This finishing material reduces this figure by 10 times. Fixing a polyethylene or special film on a wall made of aerated concrete blocks also helps reduce vapor permeability properties. However, the use of such films can cause the formation of condensation, which can destroy aerated concrete blocks.
For interior finishing, ordinary plaster mortar is most often used. It consists of cement, sand (various additives can be used). But plastered aerated concrete walls can become damp during use, which causes peeling finishing material. Therefore, in order to achieve good vapor permeability in practice, a combination of building materials is used.
It looks like this: 1 layer of primer is applied to the surface, after it dries, another 2-3 layers, each of which must be absorbed. Next, the wall made of aerated concrete blocks is plastered with a gypsum mixture. After this, the final finishing of the premises is carried out. The choice of material for these purposes is also important. For example, if the surface of the walls is painted with oil paint, the vapor permeability will decrease. Water-based paint compositions do not give such an effect, and the rate of steam penetration into aerated concrete does not change.
Return to contents
Tools required for work
To carry out the construction process, the following devices are needed:
- perforator;
- hammer;
- level;
- roulette;
- Bulgarian;
- screwdriver;
- plumb line;
- lacing;
- metal scissors.
Return to contents
Types of finishes: some features
Depending on the method of application or fastening, finishes are performed with or without the use of a frame. If you choose frame method, then the finishing of walls made of aerated concrete blocks can be done with plasterboard sheets, OSB boards, decorative panels. Before framing work, waterproofing and vapor barrier film. They will preserve the wall material from moisture penetration and increase its service life. First, the frame is built. If plasterboard is used as the cladding material, then aluminum profiles are used for the frame. They are attached with dowels to aerated concrete blocks. It is necessary to strictly monitor compliance with vertical and horizontal lines using a building level.
After completing the sheathing, screw the sheets of plasterboard onto the self-tapping screws.
The drywall caps need to be deepened a little. After the drywall is fixed, putty work is performed. If the finishing is done with decorative panels, then the frame is made of bars with a cross-section of 25x25 mm. The wooden sheathing is made using dowels, drilling holes or self-tapping screws. The first block is attached to the ceiling, the second - to the floor. Between them, after pulling the thread, the remaining bars of the sheathing are mounted at a distance of 50-60 cm, depending on the size of the panels. Compliance with the horizontal is controlled by a level. This is necessary in order to prevent distortions of the decorative panels. A special profile is fixed at the corner into the groove of which the panels will be inserted.
If you decide to use frameless finishing, for example, painting, wallpapering, then you must perform the following steps:
- hardening and rough leveling;
- grinding.
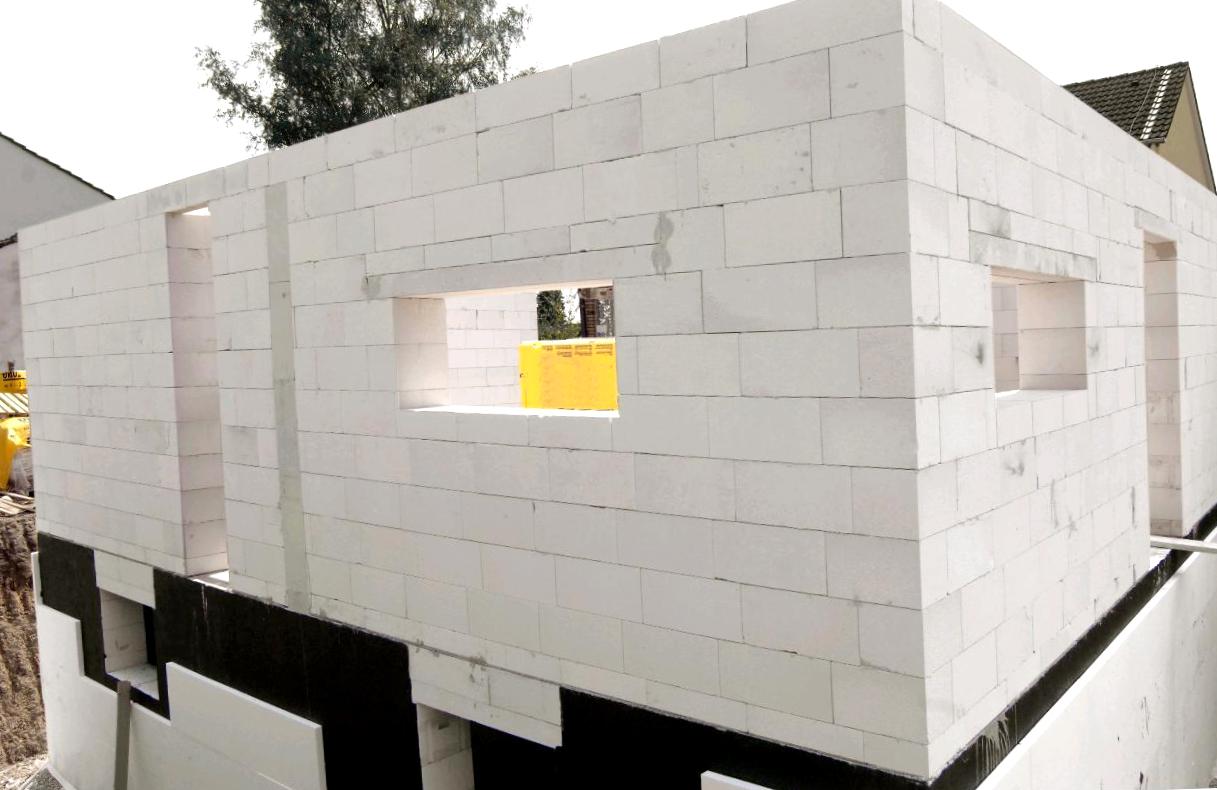
The outer walls of the house are the foundation of the entire structure, so they must be made of a reliable base. Therefore, they are often built from aerated concrete, because this material has high strength and wear resistance, but there is one significant drawback - its unpresentable appearance. In addition, it absorbs moisture like a sponge, so over time it begins to crumble, crack and collapse. It is for this reason that it must be protected. Typically, the finishing of the facade of a house made of aerated concrete blocks undergoes additional finishing, during which they use various materials. But initially it is worth considering the basic qualities of the materials.
Often, when building houses, cottages, and residential buildings, a block of aerated concrete base is used. Aerated concrete is a type of building material, namely a type of artificial stone, which belongs to the cellular type of concrete. It is made from concrete, which is combined with lime and quartz sand. All this is diluted with aluminum blowing agent. The components are diluted with water, after which a reaction is observed that releases hydrogen and foams the cement mass. The finished solution is poured into special molds. After the entire reaction has taken place and the solution has completely set, it is divided into blocks and dried in intended ovens for this purpose. The result is ready-made aerated concrete for building houses.
Aerated concrete blocks
Houses made from these blocks have the following qualities:
- houses made of blocks are light in weight, so there is no need to build a massive foundation;
- due to the fact that this material has an optimal ratio of light weight and size, during construction there is no need to order additional equipment for lifting loads, which as a result saves money and reduces labor costs;
- the block can be easily cut, sawed, there will be no difficulties when laying the subsystem, communications and other important parts of the house;
- rapid construction of buildings made of aerated concrete. It will take about 1 month to build one box of a house from this base;
- no additional finishing for insulation is required, because aerated concrete has excellent thermal insulation properties. For this reason, houses made from this base are always warm and cozy, especially in the cold season.
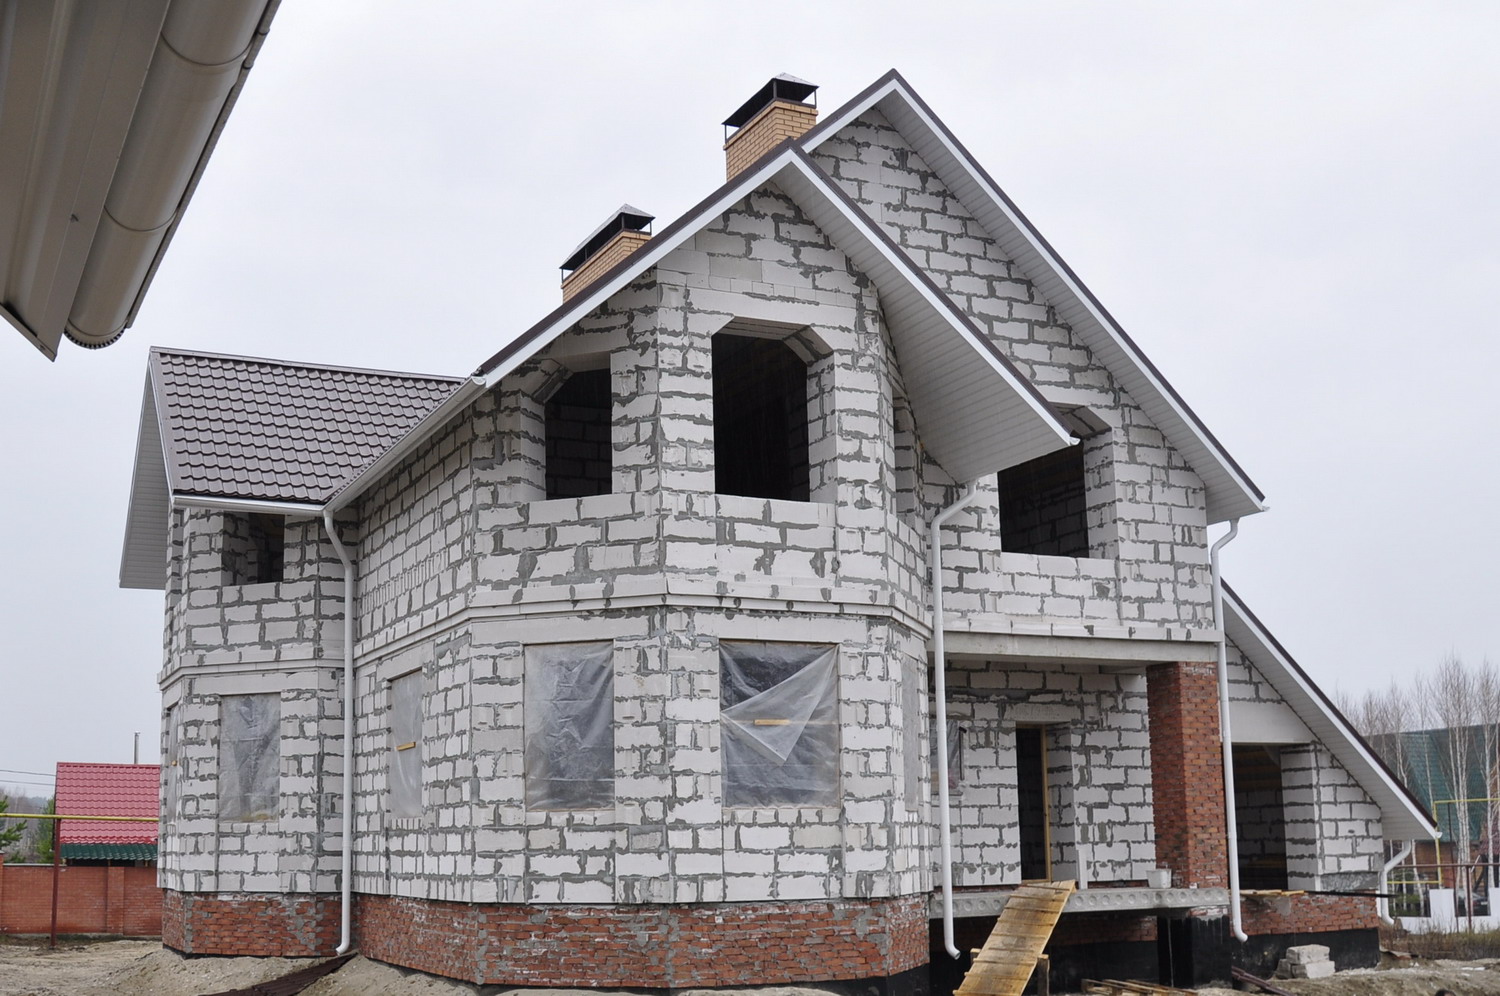
Options for finishing facades made of aerated concrete blocks
However, despite the high quality of aerated concrete, it still breaks down over time due to various negative influences. weather conditions. And the appearance is not always pleasing to the eye. Therefore, you should beautifully design the façade of aerated concrete. It can be finished with a variety of materials, from brick to ordinary plaster. But in order for the cladding to be able to protect external walls from negative factors, extend the life of the building, and also give it a presentable appearance, it is worth carefully familiarizing yourself with the features of each material for the facade finishing of aerated concrete buildings.
Brick
Finishing the external walls of a house made of aerated concrete with bricks greatly improves its appearance, makes it presentable, and makes it much more beautiful and brighter. In addition, various color solutions bricks, will allow you to choose the material that will fit perfectly into the style landscape design. But during finishing it is necessary to use no ordinary brick, because it can put extra pressure on the blocks.
In addition, so that the finish can last a long period, during construction work You must follow several important rules:
- Before installing the brick on the block, you need to prepare the mortar. To do this, it is thoroughly mixed, this will help to avoid sand settling, all components will be distributed evenly. After installation, the brick will adhere well both to each other and to the gas blocks;
- The mixture should be spread evenly. This will make the seams stronger;
- to enhance the strength of the entire structure, the thickness of the seam should be at least 10 mm;
- If mortar gets on the brick during the laying process, it should be removed immediately, otherwise it will dry out and ruin the entire aesthetic appearance of the building.

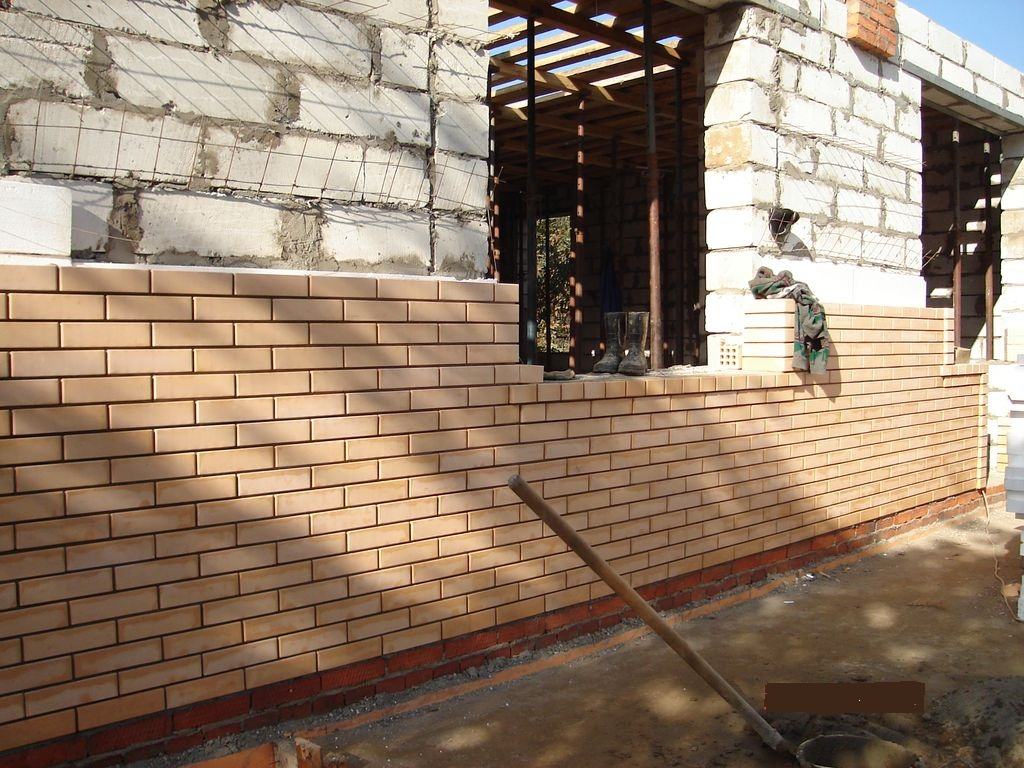
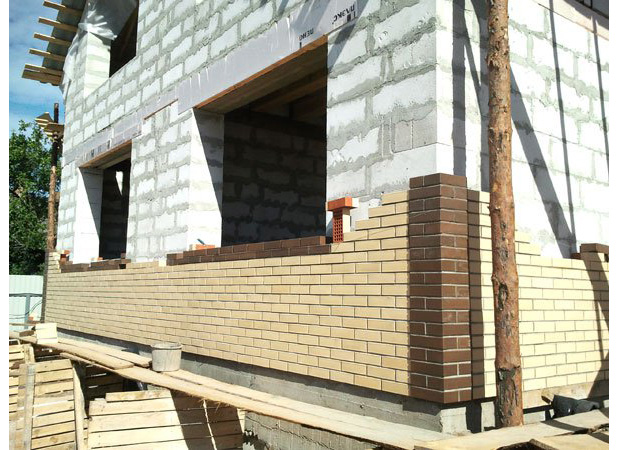
 Scheme for finishing aerated concrete facade with bricks
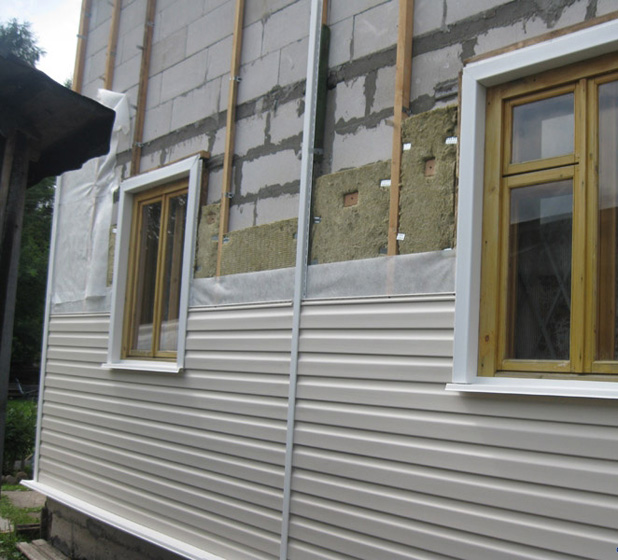
 Siding
When choosing a material for finishing block houses, you should choose siding. This material has good qualities that allow it to maintain the quality of the entire structure for a long time. Advantages of siding material:
- the base of this material is heat-resistant, so this material does not deteriorate as a result of temperature changes, it can withstand severe frosts or extreme heat;
- has high moisture resistance. Rain, snow, hail will not have a negative impact on this base;
- When finishing a house with this material, a gap remains between the siding facade and the walls in which an insulating base can be installed.
For insulation, two types of insulation can be used:
- materials with a soft base - various versions of mineral wool;
- products with a solid base - polystyrene foam with an extruded base or polystyrene foam.
By appearance the result is an ordinary ventilated façade, only, unlike a subsystem with ventilation, it has a reduced cost and is no different in properties. In addition, during installation it is necessary to comply with certain requirements, since the aerated concrete block has low strength. For this reason, the “frame-wall” fastening units require additional strengthening.
When strengthening, the dowel should expand with a self-tapping screw, for this reason it must be chosen 1-2 mm smaller than the dowel. The standard dowel size is about 6 mm. The mounting depth must be at least 50 mm.
 Scheme for finishing a wall made of aerated concrete with siding
 Plaster
The finishing of aerated concrete walls can be done with a variety of finishing materials, not only siding and brick. Plaster is often used for finishing aerated concrete bases. To decorate a house, you should not choose ordinary cement mixtures, because the block will immediately absorb all the moisture from them, which will ultimately cause the destruction of the material. In addition, after drying, multiple microcracks form on the surface of the plaster. For this reason, you should purchase special mixtures that are used specifically for aerated concrete blocks. These mixtures are based on additives that prevent the absorption of moisture into the aerated concrete material.
Wall finishing with plaster is carried out sequentially:
- The first step is to prepare the working surface of the walls. It consists of cleaning the surface from dust and excess solution;
- after this, the walls need to be primed with a special mixture, which is intended for aerated concrete material;
- the next stage is to create a plaster mesh. To do this, you can use a fiberglass or metal mesh with small cells;
- install the mesh to the wall using self-tapping screws;
- the presence of a mesh guarantees high-quality adhesion of the plaster to the wall surface. If it is not installed, then after some time the work will have to be redone again, because the layer of plaster may come off over time;
- after this you need to knead the solution. Dry ingredients are poured into the container, water is added to them, everything is mixed;
- after that we proceed to plastering the walls;
- When the entire finishing process is completed, you can begin cladding the facade. To do this, you can paint it completely or paint individual parts.
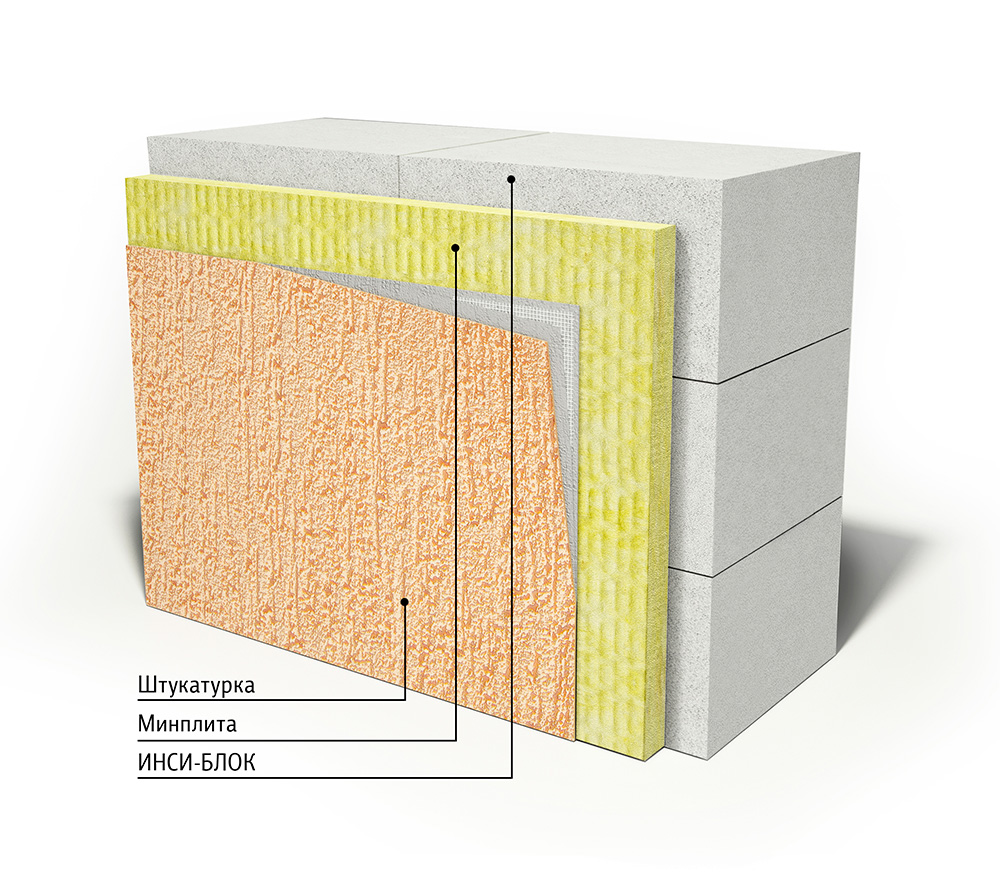 Scheme for finishing aerated concrete facade with plaster
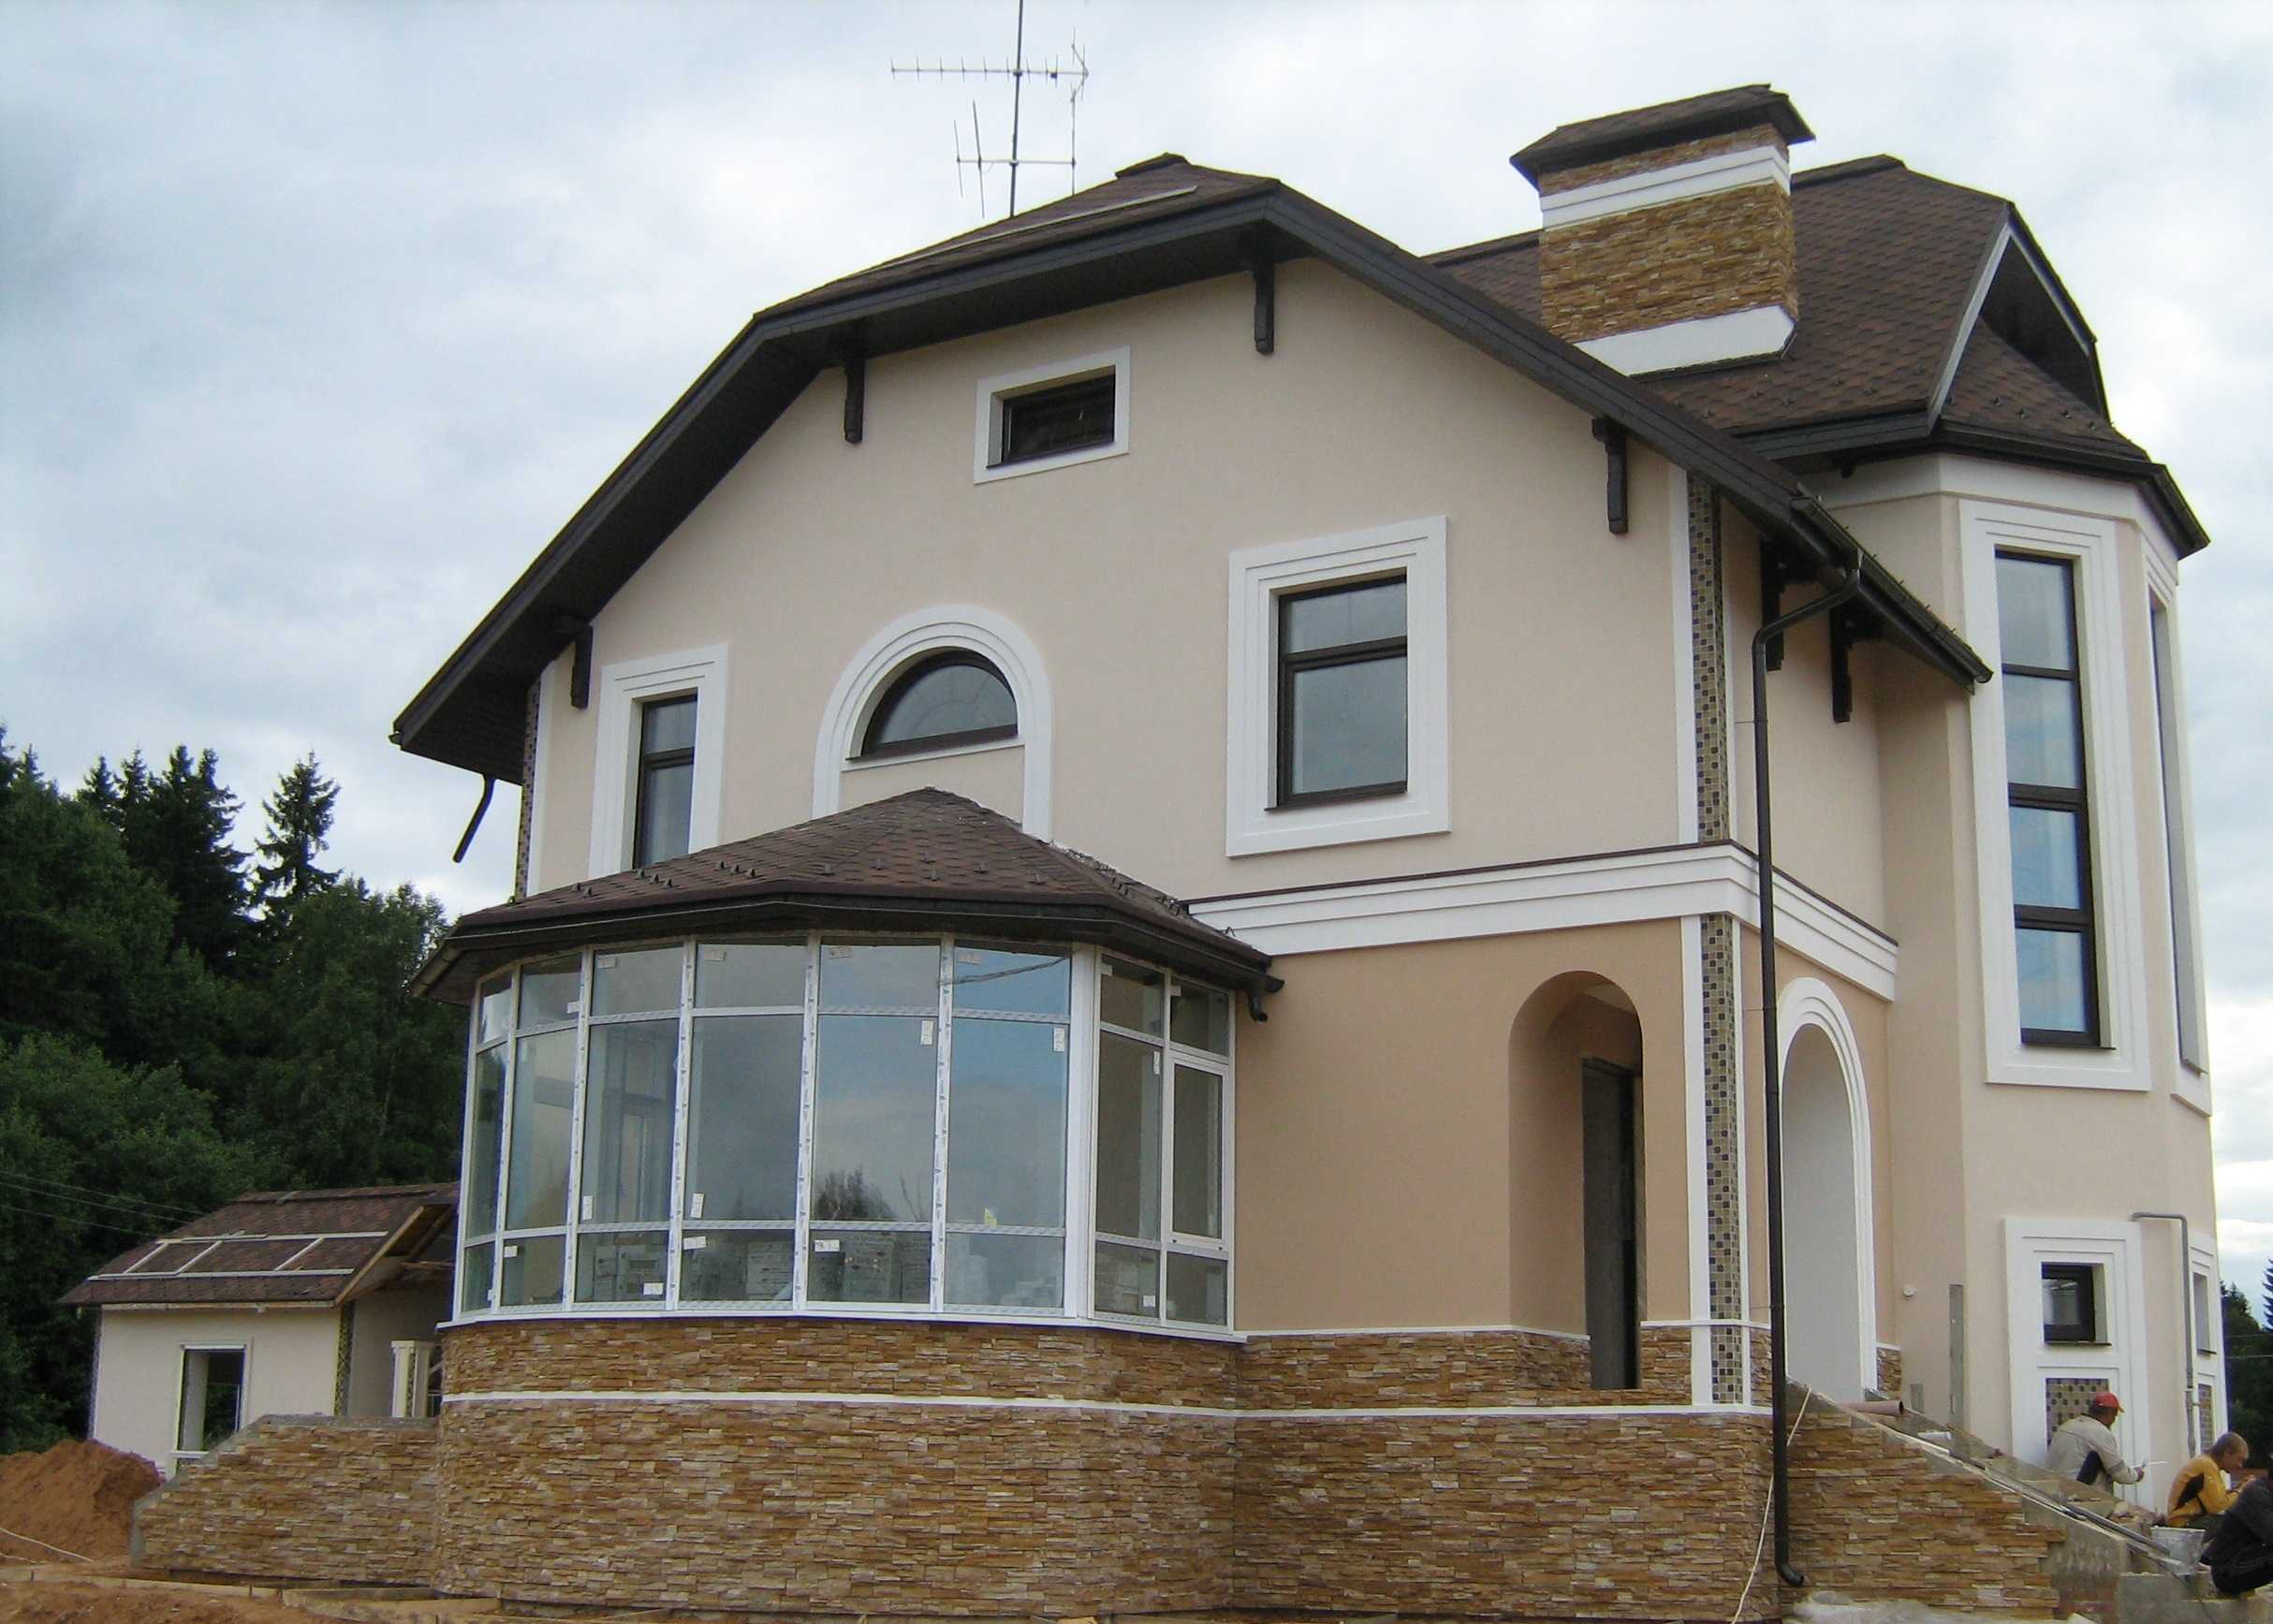
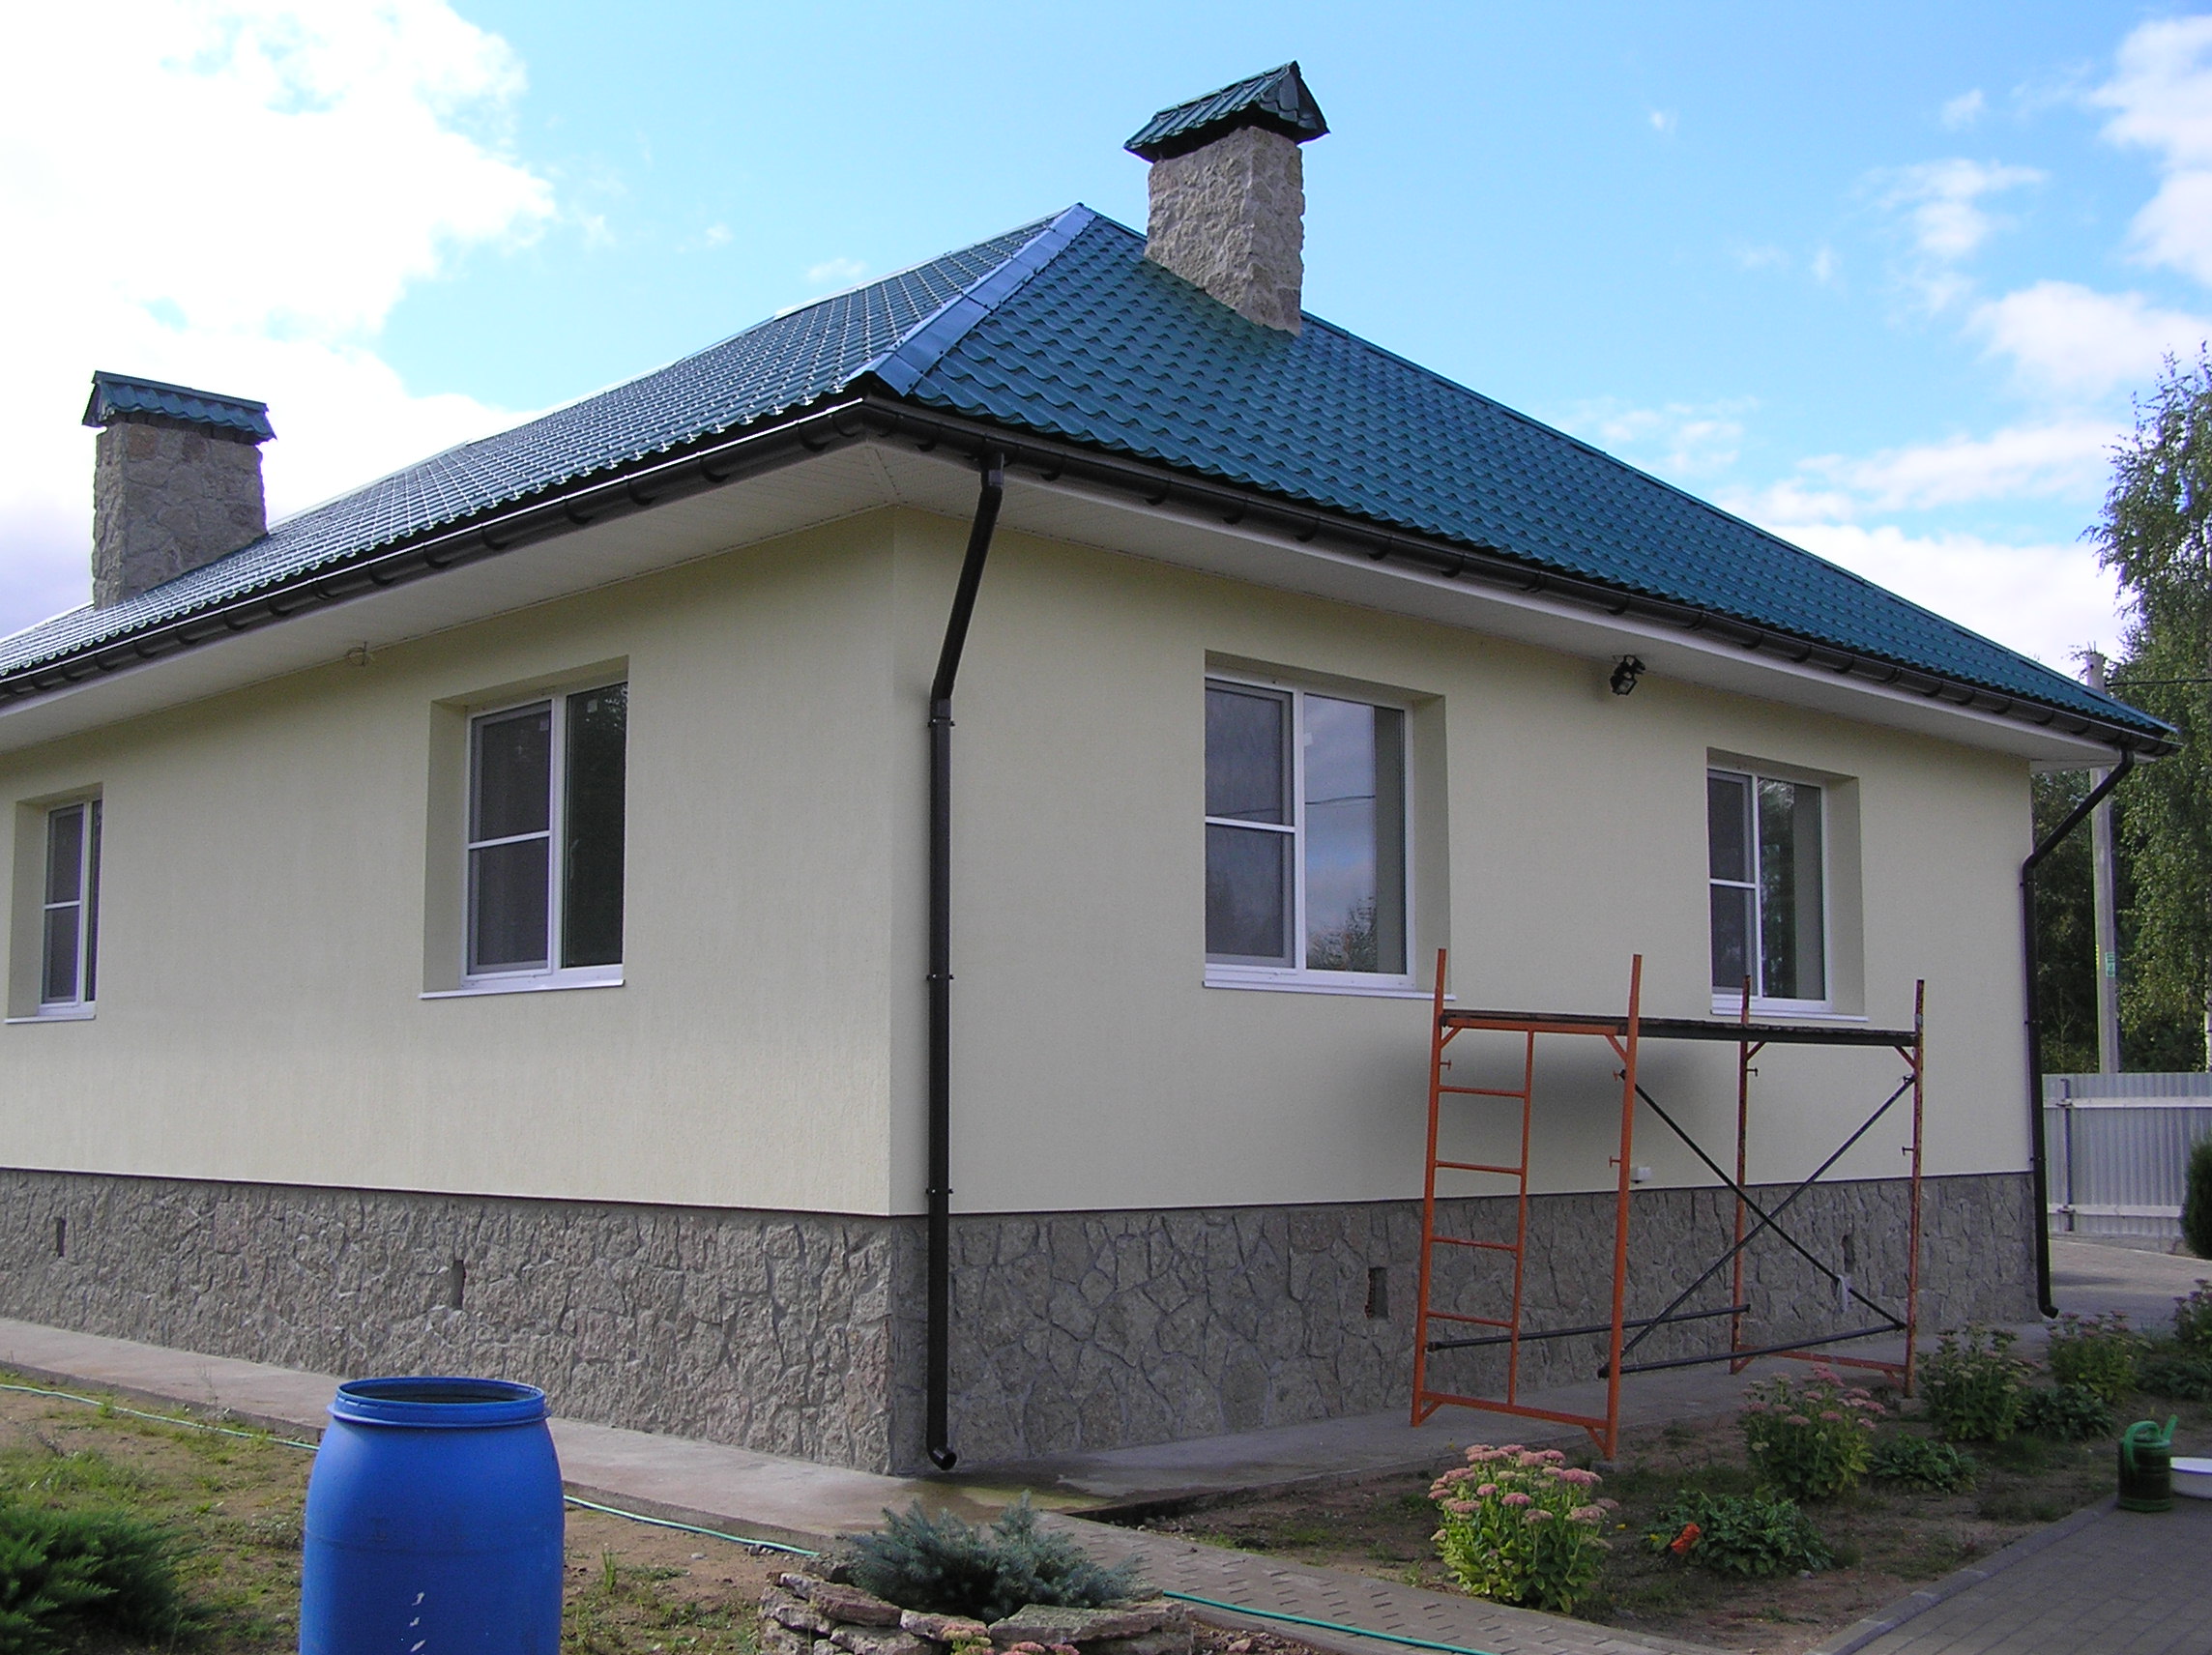
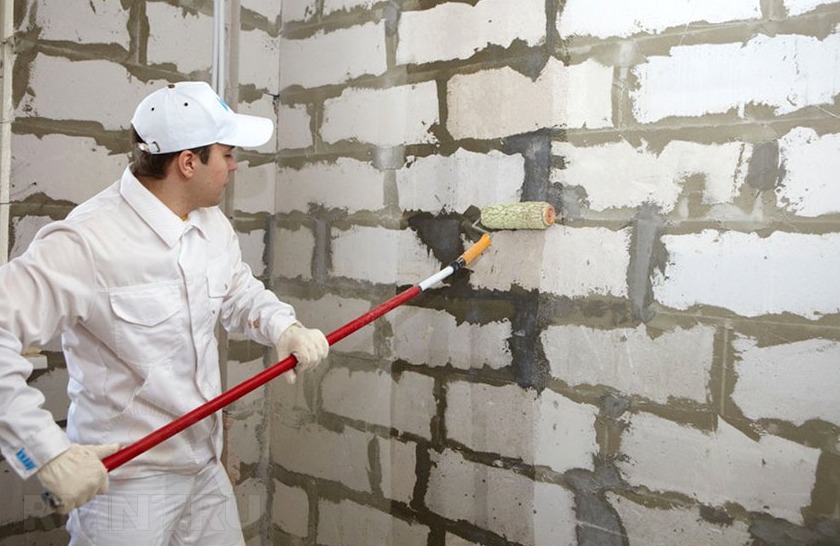
Protective painting
After finishing the facade with plaster, it is necessary to paint it. This will give an expressive, bright look to the entire structure. The most economical option would be to use special paints or vapor-permeable plasters.
Features of facade painting are as follows:
- In order to paint the facade, the desired color should be added to the plaster. Then the walls need to be finished with the resulting mixture;
- if suddenly you don’t like the color, you can dilute the mixture with another color and paint the facade again;
- the coloring mixture is applied with a special roller or brush;
- If unevenness, various connecting scars, or seams appear during painting, they must be carefully rubbed down. Next, using a plane, everything should be sanded;
- If you are already planning painting in advance, then it is better to purchase an already processed block.
Paint protection
The final stage after plastering should be protective covering walls with a special composition. Typically, hydrophobic compounds are used for painting, which contain special water-repellent components. These compounds are called water repellent. But there are special compositions for aerated concrete material. Mixtures that are used for finishing brick and concrete are not suitable for this material.
Treatment of painted facades with hydrophobic mixtures:
- hydrophobic mixtures can be applied using a regular paint brush or roller;
- They should be applied to the blocks in a small layer. This layer will be enough to protect the walls from dust adhesion and from the effects of various negative precipitation;
- Application should be made to the entire surface, including corners and other hard-to-reach places.
Ventilated facades
A ventilated facade is considered the optimal way to finish walls made of aerated concrete. For wall cladding using this method, a large amount of sheet or linear finishing material is used - siding, lining, block house, porcelain stoneware slabs, sheets of plastic or metal base.
Finishing features of the ventilated base:
- In order to install such cladding on a block, it is necessary to use a system of guides; if necessary, a lath is made. This facing will provide clearance;
- the entire structure is installed using nails, dowel or anchor type fasteners;
- When finishing a facade made of aerated concrete blocks, systems with vertical guides with slats made of a wooden base are often used. And on the outside they can be sheathed with horizontal materials - clapboard made of wooden base, block house, siding;
- cladding made of sheet material is usually made together with sheathing, which is nailed to the facade and secured with self-tapping screws;
- the resulting gap between the cladding and the facade is insulated with mineral wool and basalt thermal insulation.
On sale you can find ready-made facade systems made of sheet material. They are already equipped with everything necessary. Their high reliability makes it possible to use them for the construction of private buildings, as well as for multi-story structures.
Finishing buildings made from aerated concrete base is a mandatory requirement for the building to last for a long period. You can use various materials for it - brick, plaster, siding. The main thing is that the material is of high quality and wear-resistant. Also, its installation should be done correctly so that in the future it does not move away or crumble.
Finishing the external walls of a house made of aerated concrete is a mandatory event, the need for which is dictated by the physical and technical characteristics of the material. We will consider the most popular options for finishing a house made of aerated concrete different ways.
Why is cladding necessary?
When constructing structures made of brick, wood or concrete external finishing It is considered optional and performs mainly decorative functions. In the case of aerated concrete, the situation is different - finishing is considered mandatory.
To understand why cladding is necessary, it is enough to consider this material in more detail. So, we have cellular concrete, which is obtained by adding aluminum paste to a cement-sand mortar.
Aluminum reacts with calcium hydroxide, which is present in the solution, and as a result hydrogen is released, which foams the solution and leaves in it many cells ranging in size from 1 to 3 mm.
After hardening the solution and autoclave treatment, the blocks gain strength and stability, and their structure resembles hardened stone foam. The cells are not completely closed, and therefore communication is possible between them.
Important!
Due to the interconnected cells, the material has an increased ability to absorb moisture and in this respect resembles a sponge.
As a result of contact with water, the thermal conductivity of the material increases sharply, its mass increases, and all the advantages of aerated concrete as a structural and thermal insulation material are lost.
In addition, after the interaction of aluminum with calcium hydroxide, the content of salts – calcium aluminates – is observed in the composition of the blocks. These salts react with slightly acidic sedimentary water, and the material darkens. It must be said that the darkening occurs unevenly and sharply reduces the attractiveness of the facade.
External protection of walls from precipitation, moisture, frost and solar radiation is important. However interior decoration also should not allow direct contact of the material with water or steam.
Cladding options
Siding
One of the simplest, cheapest and effective ways siding protects external walls from environmental influences.
It is particularly suitable for our purposes due to the following properties:
- Completely waterproof coating. The panels consist of polyvinyl chloride, metal, plastic or artificial stone. All these materials are able to calmly hold back even pressure water, and they completely protect against precipitation;
- The presence of a ventilation gap between the façade covering and the walls allows one to maintain one of the main advantages of aerated concrete - high vapor permeability. This allows the enclosing walls to breathe and maintain normal humidity in the rooms;
- Possibility of simple installation of external thermal insulation within the ventilation gap. This is especially true for regions with cold winters, but given our climate we can say that this advantage significant for the majority of Russian consumers;
- Relatively low price of materials and work. Finishing the facade with siding is noticeably cheaper than facing the house with brick, stone or tile.
Important!
The listed advantages will be correct for any type of ventilated facade - lining, blockhouse or hanging panels made of porcelain stoneware or plastic.
Facing brick
Facing an aerated concrete facade with brick is the most reliable, but also the most expensive and labor-intensive type of exterior finishing.
There are many features to consider here, including:
- The width of the foundation walls must be sufficient to accommodate block masonry, facing brick masonry, and also provide the required 40-centimeter ventilation gap between these masonry. The maximum overhang of facade bricks from the base walls should not exceed 30 mm;
- Between main and facing masonry Flexible communications must be provided. To do this, use a system of anchors made of stainless steel, galvanized or plastic rods. The elements are embedded in the masonry or driven in using dowels;
- Up and down brick wall There must be vents - openings for ventilation of the facade. Their total area must be at least 1% of the total wall area.
Important!
There is a cladding technology in which there is no gap between the blocks and the brick.
However, to maintain the vapor permeability of the walls and increase comfort indoors, we recommend not neglecting the ventilation of the facade.
If it is necessary to trim blocks or punch technological holes for laying utility networks, cutting reinforced concrete with diamond wheels or diamond drilling of holes in concrete is not required, since the material can be processed like wood - with a saw and drill.
Plaster
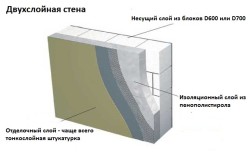
If your region does not experience cold winters and high rainfall, then you can decorate the facade of your house with plaster. There are two options here: wall-insulation-plaster or wall-plaster.
If external insulation is used, it is better to use rigid mineral wool blocks. Polystyrene foam and polystyrene foam have very low vapor permeability, and therefore are less suitable.
The work is carried out according to the standard scheme: first, they are laid on the wall, fixing them with glue and special disc-shaped dowels. Then the seams between the sheets are puttied, and a fiberglass reinforcing mesh is placed on the glue.
Plastering is carried out over the mesh in two or three layers, and at the end the coating is primed and coated facade paint. To work with aerated concrete blocks use vapor-permeable types of facade plasters.
In the absence of insulation, the walls are sanded with a plane to remove protrusions and irregularities, the seams are covered and leveled with the general plane of the wall, and then the façade mortar is applied with a spatula or mortar. It is possible to work with or without beacons.
Important!
Plastering is suitable for areas with a mild, dry climate; for the northern and northwestern regions of Russia, this finishing is less suitable than others.
Installation of siding on aerated concrete
For those who are ready to finish the facade with siding with their own hands, we have prepared instructions:
- First of all, the wall is covered with a sheathing made of wooden beam or metal profile. The pitch between the slats is no more than 500 mm; slats are required at the corners and around the openings. The slats must be in the same vertical plane and attached to the blocks through brackets;
The process is completed by installing decorative and additional elements.
Important!
Do not forget to observe the deformation gaps between the panels specified by the material manufacturer in the instructions.
Conclusion
Aerated concrete blocks require obligatory façade cladding to protect them from moisture and other destructive influences of the external environment. The video in this article and our instructions will help you deal with finishing your home in a way that is convenient for you.
Many opponents of aerated concrete call the main disadvantage of this material its hygroscopicity. Indeed, aerated concrete can absorb moisture. To extend the life of a house made of aerated concrete, interior and exterior finishing is necessary. In addition, it makes the building more attractive.
Exterior decoration
There are different finishing options:
- finishing with siding or panels;
- facing with brick or artificial stone.
The choice of exterior finishing method is determined by financial capabilities, feasibility and operating conditions of the house. Finishing the outside of a house with aerated concrete allows you to protect the house from getting wet, weighing down, oxidation and loss of attractiveness.
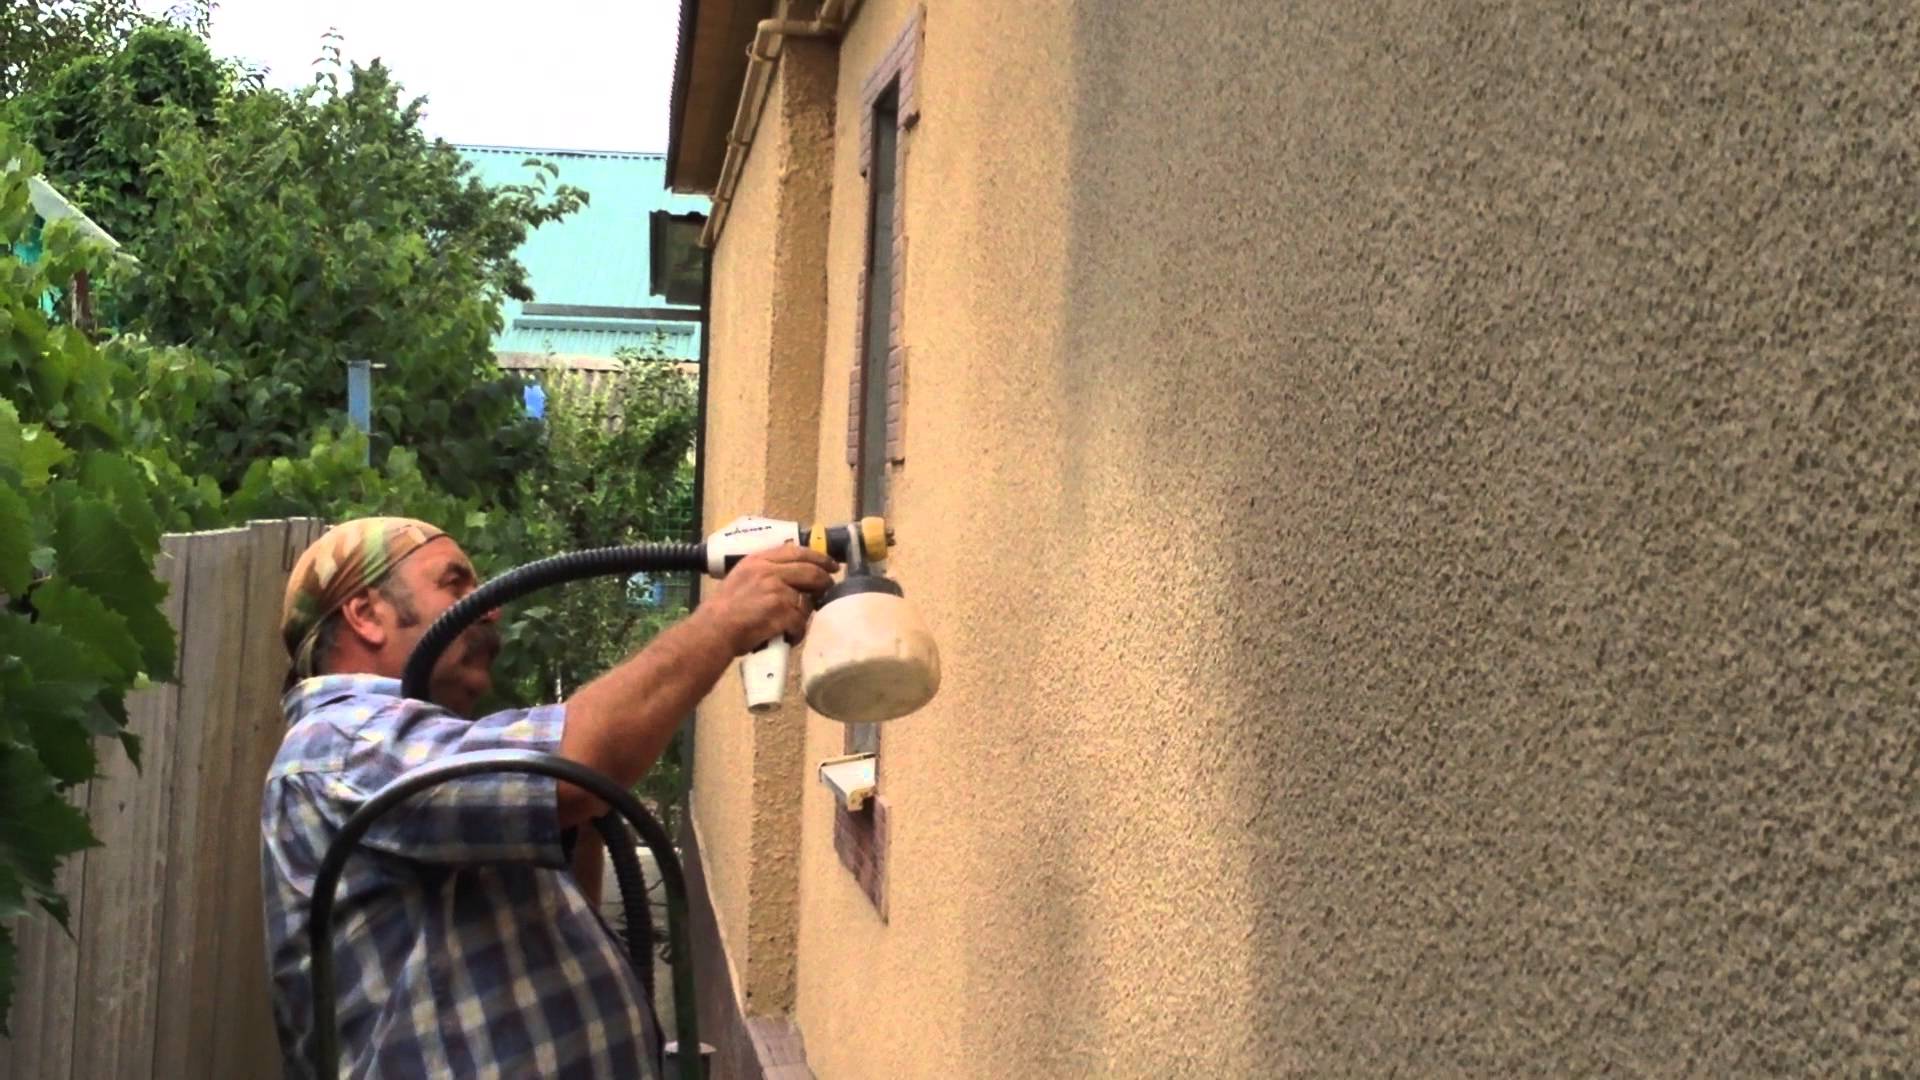
Plastering
The most affordable finishing method is plastering. You can use almost any plaster mixture - aerated concrete is not fussy in this regard. Sometimes gypsum plasters are used with special additives that prevent aerated concrete from absorbing moisture. These are thin-layer plasters that allow the walls to “breathe”.
Sequence of work:
- cleaning the surface from dust, if necessary - removing uneven surfaces, filling seams;
- coating with a special primer for aerated concrete;
- plastering;
- fixing the plaster mesh;
- staining – instead of painting, you can add decorative additives to the plaster;
- coating with a water repellent - a product that protects against precipitation.
Foreman's advice:
Plastered walls can be combined with other types of finishing - for example, the base of a plastered house can be faced with finishing stone.
Video: plastering aerated concrete walls
Brick cladding
One of the most expensive methods is finishing the facade of a house from aerated concrete. facing bricks. Brick is used as a finishing material only for buildings no higher than two floors. In other cases, it is better to use clinker tiles. This option, as well as the use of porcelain tiles, are more economical, and such finishing also reduces the load on the foundation.
The decision to face a house with bricks should be made even before laying the foundation, since it must be of sufficient width and strength to withstand not only the walls made of aerated blocks, but also the finishing
The finishing is done in one brick. There should be a small gap between the gas blocks and the brickwork, which can be filled with insulation boards in the frame. By doing brickwork After 4 rows, it is necessary to lay bricks across the row so that they rest on the aerated concrete wall.
Siding finishing
The installation of ventilated facades for houses made of aerated concrete is very popular, as it is affordable and increases the level of comfort of living in such a house. The house “breathes”, it is warm and dry.
A sheathing is attached to the walls made of aerated concrete, inside which insulation boards are laid, and siding, decorative panels or, for example, a blockhouse are mounted on top - this option is especially good for finishing a bathhouse
Interior decoration
Interior decoration of walls made of aerated concrete is possible in several options:
- coloring;
- tiling;
- plastering followed by wallpapering;
- the use of frame structures covered with plasterboard or decorative panels.
You can paint aerated blocks with special paints; for this you need to carefully prepare the walls. The final cost of such work turns out to be too high; in addition, finishing aerated concrete requires a large consumption of material, because even special primers do not greatly reduce paint absorption.
Photo examples of interior decoration of aerated concrete houses
Tile tiles are usually laid in bathrooms using special primers for aerated concrete and tile adhesive.
Plastering inside is carried out in the same way as outside, strengthening the walls and especially the corners with reinforcing mesh. This finishing method is only suitable for houses with external insulation or houses built in regions with a warm climate.
Usually, insulation is made in houses made of aerated concrete, for which they are ideal frame structures with subsequent covering decorative materials or drywall. Aerated concrete walls At the same time, they waterproof, use special films to reduce vapor permeability, and put insulation into the sheathing (expanded polystyrene, ecowool, mineral wool etc.), and then covered with plasterboard. The resulting surface can be wallpapered, painted, or tiled. This option for interior decoration is the most appropriate and practical.
