Country house with your own hands, how to build a country house, useful tips
Residents of big cities have always tried in the warm season to leave their apartments at least for a while and go away from the bustle of the city to their country house in order to have a good rest, work in the garden and breathe fresh air. However, the dacha can be used for completely different purposes. It can be just a place to relax, summer weekends with friends, family and relatives. The design, location and layout of the country house directly depends on how the dacha will be used. Several types of country houses can be distinguished: for visiting in the summer, permanent residence and for recreation. When planning the construction of a summer cottage, you need to immediately decide on the functions of the house in order to avoid modifications and inconveniences in the future. If you are going to permanently move from the city to the dacha, then you need to make sure that all the amenities that you are accustomed to while living in an apartment are present in your country house. It goes without saying that all the necessary infrastructure should be nearby: a hospital or a medical center, a school, shops, and more or less normal roads to them. If you use a country house exclusively in the summer, it is best to build it from wood. In a building made of wood in the summer heat, a comfortable temperature is maintained, the house "breathes". You will also need to take care of the adjacent territory, arrange it properly. But when you consider the dacha just as a temporary shelter, then all requirements can be minimized. The main conditions are electricity and drinking water.
Do-it-yourself country house: what to build from
It is quite possible to build a residential building in the country on your own. For a small plot, a 6x4 country house would be an ideal option. The living space of such a house allows you to place all the necessary furniture and comfortably accommodate 3-4 people. Alternatively, the space under the roof can be used as a second floor. Modern building technologies allow you to build a house very quickly and economically, even if you do it yourself. It should be noted that brick and block country houses are surely becoming a thing of the past. Currently, frame technology is ideal for the construction of country houses. It is quite possible to build a frame house on a summer cottage on your own over the summer, and enjoy a vacation in it with your family for the next year. And if the frame house is properly insulated and all communications are connected, then it can be used as a full-fledged country house.
Designing a frame country house
Any more or less serious construction project begins with the creation of a project, and even a small country house is no exception. The project will help to calculate the amount and range of building materials. In the design process, new original ideas often appear - how best to use the living space, decorate the room, add something, save somewhere, etc.
When designing a frame house, be sure to consult with your family, because a frame house must meet the requirements of all owners, especially children. Perhaps during the design process, it turns out that you need a house of a larger or smaller size. In the course of construction work, it is also possible to change the dimensions, of course, but this will be fraught with a number of problems. During the construction process, you will definitely need the following tools:
- Several hammers.
- A small carpenter's hatchet.
- Electric or chainsaw.
- Roulette at least 5 meters long.
- Plumb line, level.
- Electric drill, screwdriver.
- Electric planer.
The foundation for a country house
Frame houses are usually one-story. This is due to the materials used in their construction. Of course, it is possible to build a full-fledged two-story frame house, but then it will be comparable in cost to a brick one, and it will take the same amount of time to build it. Therefore, as we mentioned above, the attic is usually used as the second floor in a frame house. Since dry and light wood materials are used for the frame house - timber, OSB, board, slats, there is no need for a powerful monolithic foundation. Options for foundations for a frame country house:
- Screw piles.
- Columns.
- Shallow strip foundation.
When choosing one or another option, be sure to take into account the type and characteristics of the soil on your site. For small frame buildings, it is more advisable to use a base of asbestos-cement posts filled with concrete, which can be ordered here.
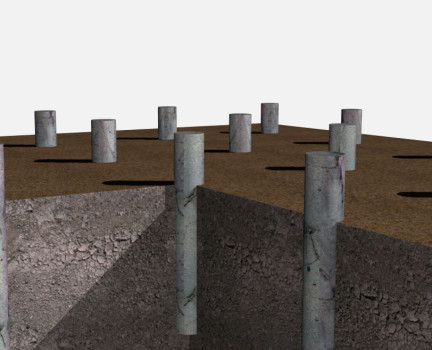
To build such a foundation, we need:
- Asbestos-cement pipe.
- Ingredients for concrete: fine gravel, sand, cement grade 500.
- Manual or gasoline drill.
- Plumb line, tamping device.
- Concrete mixer and mortar trough.
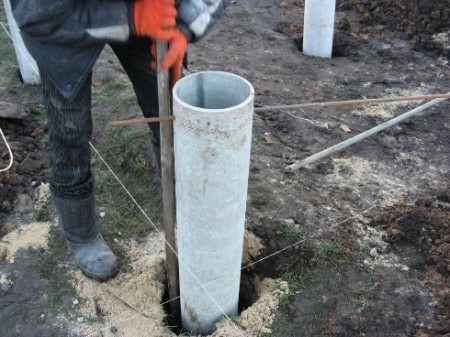
Before starting the foundation, they mark the construction site. According to the markings, recesses for the posts are made, keeping a distance from 80 cm to one meter.
The posts must be installed strictly vertically, using a plumb line. The space near the posts is sprinkled with sand, each layer is carefully tamped. In this case, it is important not to break the vertical, and constantly check each column with a plumb line. To make the sand better compacted, it is spilled with water.

After that, a concrete solution is poured into the columns. The grout is prepared in the following proportion: 1 part of cement, 4 parts of sand and 5 parts of crushed stone. The concrete should be of such a consistency that it freely fills all the space inside the column, there should be no voids.
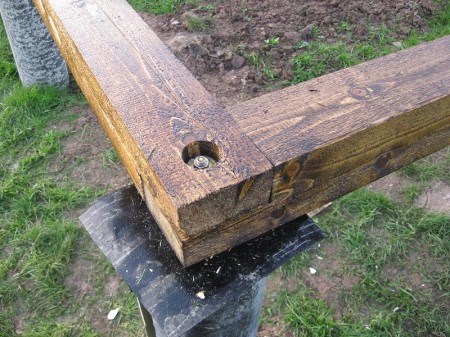
On top of the posts, steel plates are installed, on which the logs are subsequently attached. A steel pin or reinforcement with a cross section of at least 20 mm must be welded to the center of the plate and concreted inside the post. After the concrete has completely hardened, you can continue to work.
Erection of the frame
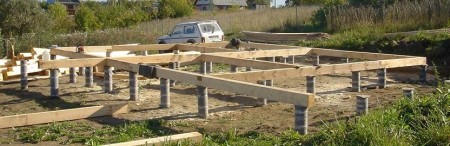
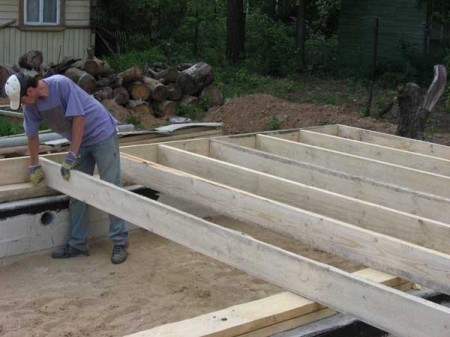
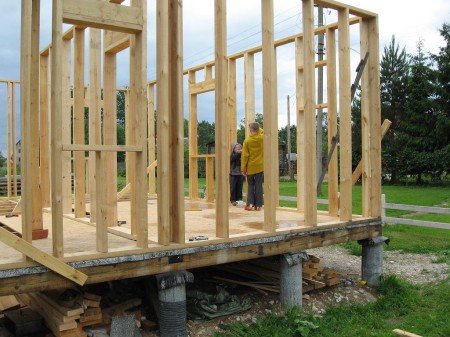
The frame can be made from different materials. But if you are building a country house on your own, then it is better to use wood. They begin to build the frame from the floor. The bottom harness is installed first.
Bars 150x150 mm in size are laid on metal plates fixed on posts, previously roofing material is placed on the plates in several layers. Internal strapping boards are interconnected with screws 120 mm long, middle and lower strapping boards - with screws 95-100 mm. After all the boards of the lower harness are fixed, the upper part is carefully leveled with an electric plane, checking the horizontal diagonal and all corners. The bottom rail must be perfect, the slightest unevenness will affect the geometry of the whole house.
Next, with a saw or jigsaw, we make grooves for vertical racks in the corners and in the harness for mounting the lag. The width between the joists should correspond to the width of the insulation that will be used for the floor. If you plan to install a heavy stove or fireplace in the house, the logs in the place of their installation should be laid with a shorter distance. The lags are laid in grooves and securely attached to the harness and foundation posts.
Across the lag, a board or beam with a section of 40x40 mm is attached to their lower part for a sub-floor.
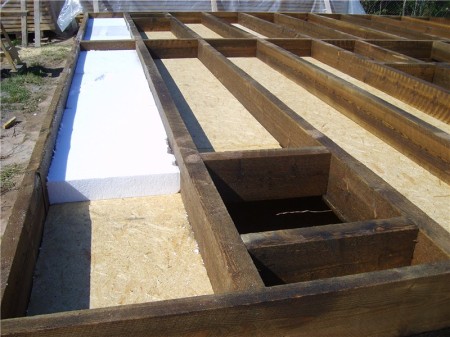
Sheets of plywood or OSB of the required size are laid on the board, screwed with self-tapping screws. A waterproofing layer and insulation are laid on top. The thermal insulation must be overlapped, without gaps. The entire surface is covered with a vapor barrier film, including insulation and logs. The seams between the vapor barrier canvases are glued with tape. The film is attached to the logs with a stapler. A 40x10 board is placed on top of the vapor barrier for the ventilation gap necessary to protect the material from decay. After that, the finishing floor is laid.
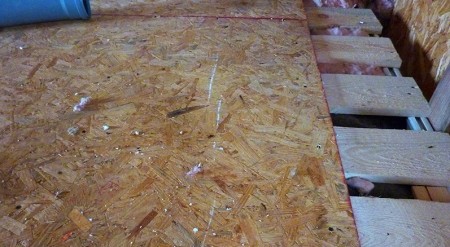
As a material, a board or plywood with a thickness of 5 centimeters or more is used. Laminate, parquet or linoleum can be laid on such a base. All materials used for flooring must be treated with antiseptics. Once the floor is finished, you can start building the wall frame.
Vertical racks are attached to the grooves pre-made in the lower trim. The vertical is strictly checked by the level, each rack is fastened with jibs, which are nailed to the rack and the floor. After the first floor is ready, the jibs are dismantled.
For transverse lintels, a 40x40 mm bar is used. It is installed in the groove and fastened with nails.
After installing all the jumpers, you can proceed to sheathing the outer walls with OSB or plywood sheets, while leaving only door or window openings. For the upper strapping, the same bar is used as for the lower one. It is also placed in the grooves.
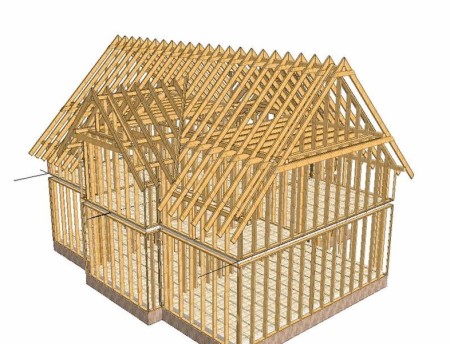
Installation of the roof of the country house
As soon as the frame is ready, the roof is erected. Ceiling beams are installed on the upper harness, fastening them with small jibs. The distance between the beams should be about 60 cm. An untreated board is nailed to the bottom of the beams across their location, onto which sheets of plywood or OSB are attached. Insulation is placed between the beams. It can be mineral wool, expanded clay or coal slag. Next, a vapor barrier film is pulled onto the beams, OSB or plywood is attached from above.
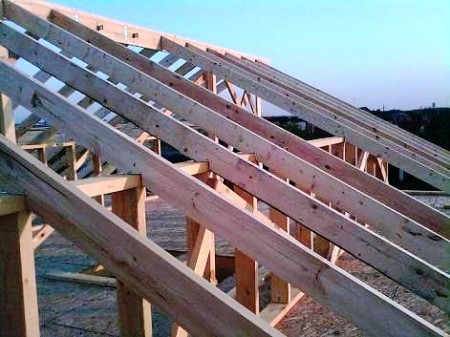
A rafter structure is attached to the beams. The lower end of the rafters should protrude beyond the walls by at least 50 cm. The rafters are additionally fastened with short slopes to give the structure additional rigidity. After that, a crate from an untreated board is stuffed onto the rafters. Roofing material can be used as waterproofing, as the simplest and cheapest material. The canvases are laid with an overlap and fastened with nails with a wide head. Next, the roofing material is installed. As such, you can use ondulin, roofing metal-sheet, metal tiles. The main condition is that the material should be light and should be very carefully attached to the crate.
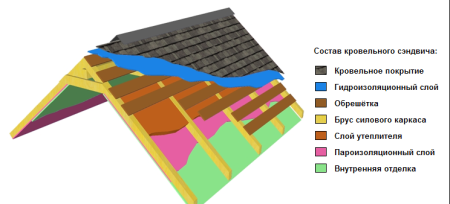
If the attic space is residential, then it must be insulated. To do this, a heater is placed in the space between the rafters, a vapor barrier is mounted and covered with OSB or plywood. Next, the outer walls are sheathed with the same OSB or plywood. The sheets are attached to the frame with self-tapping screws, after which the walls are insulated from the outside. The process of wall insulation is similar to floor insulation with the only difference that the ventilation gap is not made.
Outdoor finishing materials for a frame country house
The choice of outdoor finishing material for a country house is a matter of personal preference and financial capabilities of the developer. It should be noted that there are no restrictions on the frame structure.
block house
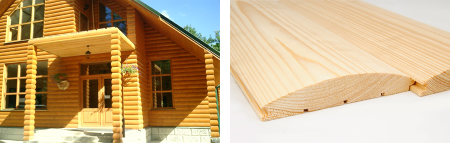
One of the most popular finishes, which allows you to create the effect of a log building. Advantages: environmental friendliness, simplicity and speed of installation.
plastic siding

The advantages of this material are relatively low cost, simplicity and speed of installation, a large selection of parameters and colors, there is no need for preparatory work. Among the disadvantages: the material is flammable, the finished surface looks rustic, it is impossible to finish complex structures, which, however, is not important for a simple country house.
brick or stone
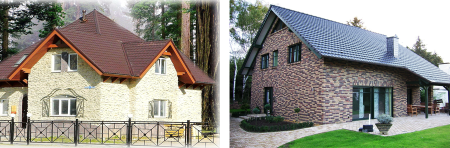
A very time consuming option, but also the most effective. Stone or brick cladding perfectly protects wall panels, but such cladding necessarily requires a ventilation gap. There are a lot of disadvantages: high cost, labor-intensive process, difficult to dismantle, a strong foundation is needed. Advantages: very beautiful appearance, excellent protection and strengthening of walls, non-combustibility of the material.
plaster
Oddly enough, this method is great not only for brick buildings. There are a lot of options for the texture and color of plaster for frame houses, you can choose a finish for any style. Advantages: incombustibility, good thermal insulation, attractive appearance. Disadvantages: very poor vapor permeability, skills are needed in this kind of work.
expanded polystyrene panels
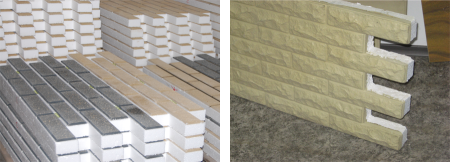
A relatively inexpensive and practical option for a country house. The panels have a large area, the outer side imitates brickwork. Advantages: ease and speed of installation, low weight. There are no significant drawbacks.
Country house design
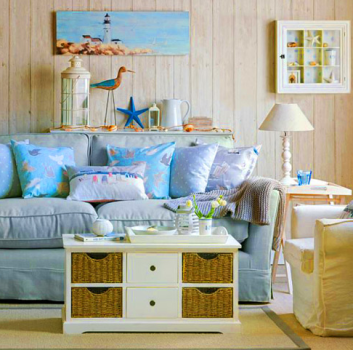
It looks very interesting and unusual. The walls can be painted blue or green, using stripes, like a vest - it will turn out quite original. In addition, you need to use the appropriate decorative elements - paintings, figurines of fish and sea animals, etc.
eco style
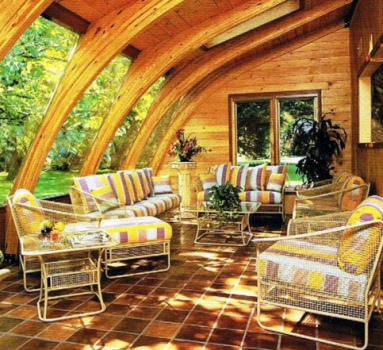
One of the simplest and most interesting design options for a summer residence. You can use wicker furniture, decorate the room with a variety of plants in original pots.
ethno-design

Quite an interesting option, especially if you choose a Japanese or African design style. It's pretty simple and the effect will be very impressive. As decorative elements, you can use figurines, masks, paintings, etc.
country style
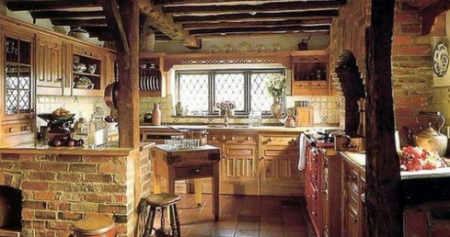
Russian classics are perfect for decorating a summer residence. The interior of the country house can be finished with high-quality wood - a wooden vault, simple furniture made of high-quality species - all this will look relevant and interesting.
Country house options
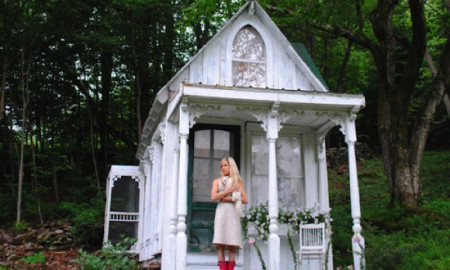
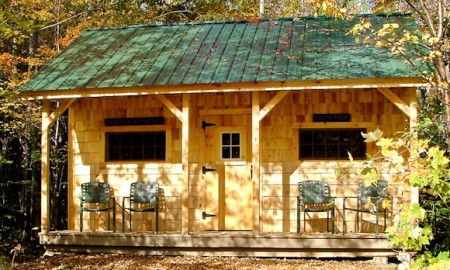
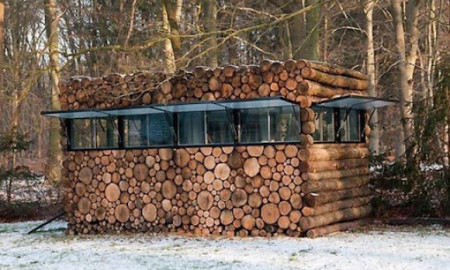
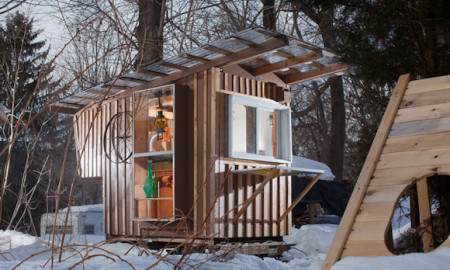
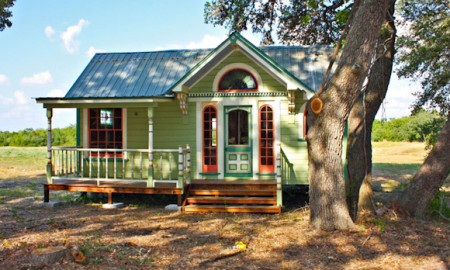
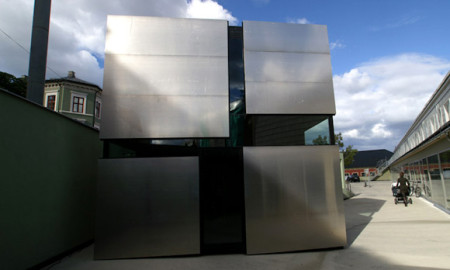
Of course, the example of the construction of a frame country house given here is far from the only and possibly not suitable option for everyone. This is a matter of purely personal preference and financial capabilities. Or maybe you want an original country house that will stand out among the mass of the same type of country buildings? The photos below show very original and beautiful country houses from all over the world: Victorian style
Prefabricated dacha-constructor
High-tech house
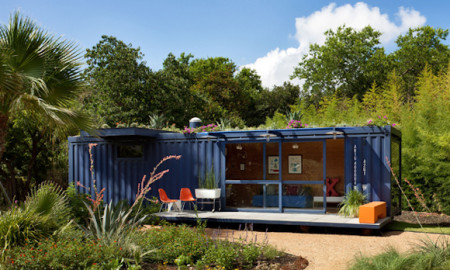
House-container