Do-it-yourself step-by-step construction of a house from vulture panels from foundation to facade
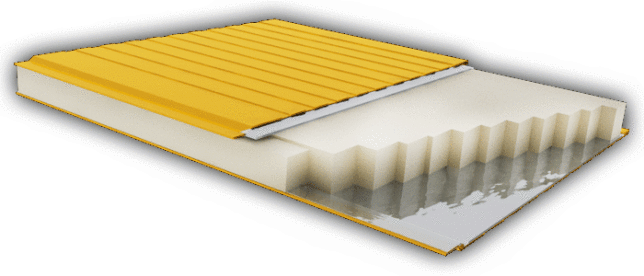
A sandwich panel is a structure that consists of insulation and a few words of roofing material and is used as the main building material for the construction of buildings of varying design complexity. For the manufacture of sandwich panels, only materials that have been tested and are suitable according to standards are used. The main material for the cover layer is usually "corrugated board" (polymer-coated galvanized steel).
Heaters
When choosing sip panels, it is better to still seek help from specialists. But if this is not possible, it is worth studying the main types of insulation and their characteristics.
There are three main types of insulation:
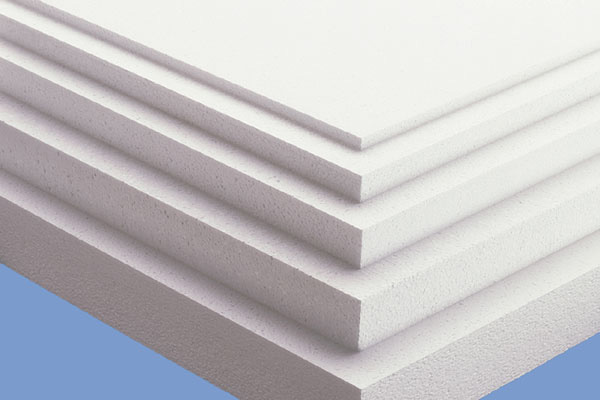
- polystyrene (expanded polystyrene);
- mineral wool (basalt insulation);
- polyurethane foam.
And each of these heaters has its own advantages and disadvantages.
 Styrofoam filling in the panel
 Polyfoam is positioned as insulation, characterized by its durability. Moreover, it is an environmentally friendly material. It has waterproof properties and is not afraid of the sun. But at the same time, such material is very flammable and burns quickly.
Mineral wool practically does not burn and is also harmless to health.
This insulation also tolerates biological and chemical influences well. But with a set of such important advantages, basalt insulation has a very low resistance to moisture.
Polyurethane foam does not conduct heat well and is highly flammable, but at the same time has a high insulating threshold.
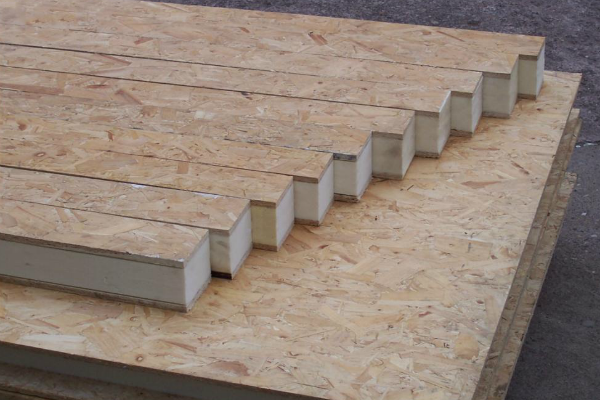
 Polyurethane foam as a starting point for a sandwich panel
 The thickness of the building material, and, accordingly, the price directly depends on the thickness of the insulation itself.
The price of the Sip panel is 1,300 rubles per square meter. Its thickness is 174 mm, width - 1250 mm, height - 2500 mm.
In our country and the CIS countries, sandwich panels of the following sizes are used:
12 + 100 + 12 = 124 mm;
12 + 150 + 12 = 174 mm;
12 + 200 + 12 = 224 mm.
OSB (OSB)
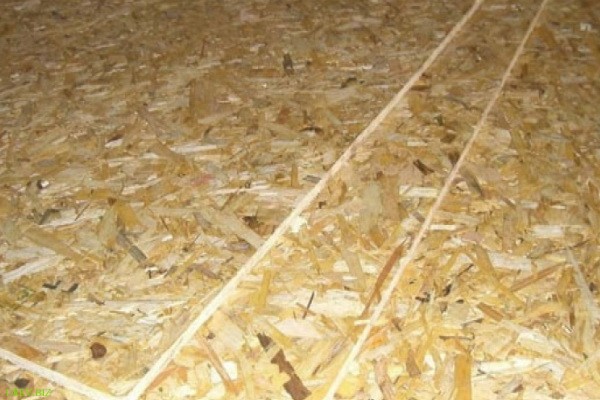 OSB for SIP-board
 Acquaintance with the concept of OSB boards should start with a general classification. There are four main types of OSB. Each of them differs from others only in its indicators of moisture resistance and strength.
- OSB 1 is a board with the lowest moisture resistance values. This type of slab is often used in the assembly of lightweight parts. The advantage of these plates is their low price.
- OSB 2 - has a low moisture resistance threshold and at the same time high strength. Such boards are used mainly for the production of furniture, sometimes for load-bearing elements. Less often OSB 2 is used in the construction industry, and then only for internal structures.
- OSB 3 is one of the most popular types of boards. These boards combine strength and moisture resistance at an attractive price. They are used more often in construction for the construction of both facade and interior finishes. Sometimes OSB 3 acts as a roofing material or overlap.
- OSB 4 - these OSB boards have the highest threshold of strength and moisture resistance. They are used for the construction of structures with a high level of stress and in areas with high humidity.
Construction of houses from sandwich panels: advantages and disadvantages
As with any material, the use of sandwich panels has both advantages and disadvantages.
First about the pleasant... The main advantage of this building material is the compliance of its quality, which is evidenced by the high strength of the material, relative to the price. This factor plays a very important role in calculating construction estimates. After all, the use of this material significantly reduces costs. Due to the lightness of the panels, the weight of the overall structure is lightened, which means that there is no need for a reinforced foundation.
For more house projects, see the heading "House projects" on our website.
House made of sandwich panels with your own hands
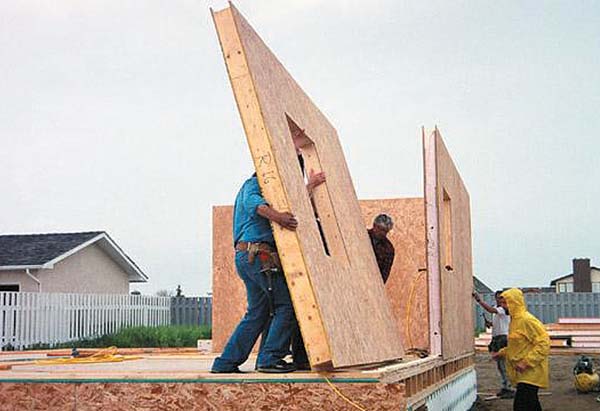
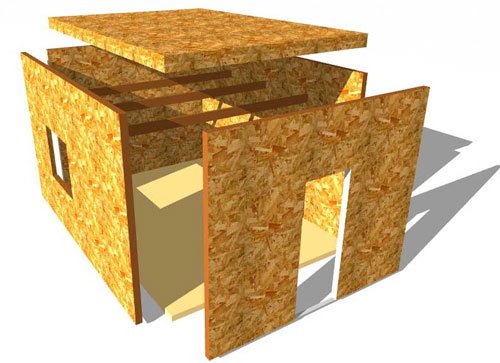 Building a house from SIP panels - how to assemble a constructor
 The first thing that will be needed in this matter is the project of the future building. You should pay special attention to its construction, not forgetting about the requirements and wishes. If it is not possible to build it yourself based on the complexity of the calculations, then there are many companies ready to help in this matter. We will try to show you all the stages of construction in a photo report, with step-by-step instructions. But, all houses are individual, our photo can only be viewed as an information guide.
By the way, from SIP panels you can build not only houses, but also extensions to residential buildings. They can accommodate verandas or kitchens.
The next step is to order SIP panels or to produce them independently. You can order them directly at the enterprise that is engaged in production. Here you can also look at the catalogs and select everything you need for subsequent installation. When choosing panels, do not forget about the base - the foundation. For a structure made of such a material, usually the foundation is installed on screw piles.
Water supply, heating and electricity for the future house must be diluted even before the foundation is poured.
In order to avoid curvature of corners or mismatch in height, all panels must be checked for integrity and dimensional accuracy before installation. If inaccuracies are noticed, contact the supplier for a replacement material.
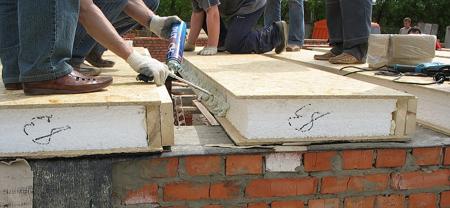
After the foundation is poured, you need to strap it with a wooden beam. Then the corners are set and holes are made with the help of a percussion tool. Using these holes, the timber is fastened to the concrete with 12 mm anchors. The recommended distance is 2.5 m. Further, the building itself is assembled on the established foundation. The assembly begins with zero overlap, while the first SIP panels are laid on the timber.
Wall frames are assembled from timber. A mortgage board is fixed along its perimeter with special nails. The main thing here is to withstand the vertical calibration and the corners of the frame. After all, if you miss at least 1 mm somewhere, the wall will turn out to be crooked and there will be no way to fix it. After installing the frame, panels are applied to it.
After the construction of the general structure, the filling of the holes begins. The joints and corners of the panels are filled with edged boards measuring 25 * 100 mm. All cracks are treated with hermetically sealed polyurethane foam.
Overlappings between floors and all supporting structures are best made of wood. You can use both timber and boards. Photos of the stages of construction are just below.
Foundation for a house from SIP panels
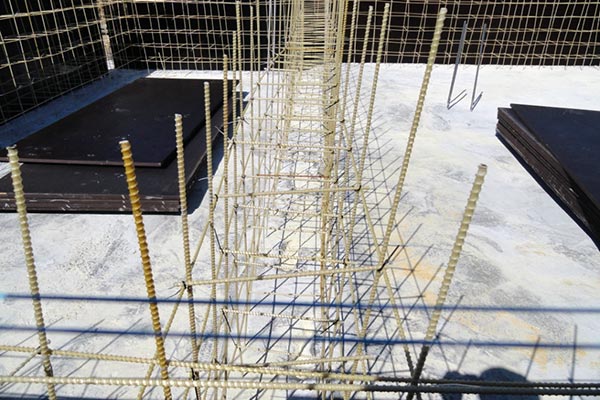
A foundation is, first of all, the foundation of a building. It transfers the entire load of the building to the underlying soil layers. In addition to the strength of the foundation itself, you need to consider:
- the total area of support on the soil;
- the supporting capacity of the soil itself;
- groundwater levels.
Experts believe that the most common mistake when pouring a foundation is an excessive abundance of concrete and metal in it.
The most popular types of foundations are:
- pile (pile-tape);
- columnar (columnar-tape);
- shallow monolithic slabs;
- tape deepening;
- tape deepening with plinth.
But, it is worth noting that among this variety, for frame panel houses, shallow deepening would be the best option.
Laying the strapping (crown) timber

For laying, a bar of 2.5 * 1.5 cm is taken. Laying should be started from the middle of the foundation, while measuring its horizontal calibration. Further, the timber must be connected at the corners using a cut. After that, the details are fixed. For proper fastening, holes are drilled in the timber 1–1.5 cm long with a diameter of 2 cm and the dowel is driven.
Fastening the timber to the foundation is done using recessed anchor bolts. The fastening distance is about 1.5–2 m. The size of the bolts should be 35 cm in length with a diameter of 1–1.2 cm.
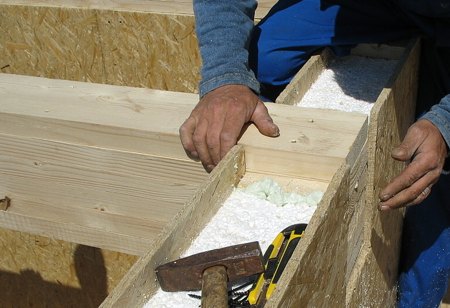
Arrangement of the floor in the house from SIP panels
Another proof of the distinctive property of Canadian construction technology is the technology of flooring.
Floors and ceilings are also built from SIP panels.
Although many contractors recommend laying an ordinary wooden floor in such houses with insulation between the logs and beams. These floors are more durable and reliable. In addition, this floor will be easier to disassemble or repair.
Erection of walls from SIP panels
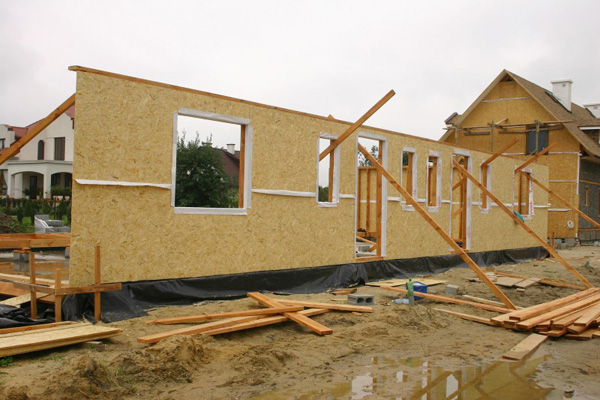
When erecting walls, you need to carefully go to the choice of the source material, because the quality of the future dwelling largely depends on its quality. The best option for outdoor work would be a beam with a diameter of 15 cm. As for the height, there is a minimum of 1.5 m.For the inside, 10 * 15 cm is suitable. These are acceptable dimensions that will help save on consumables, minimize the number of seams and joints and achieve the ideal smoothness of future walls. Building walls is not easy, experience is needed.
Before laying the timber in the crowns, all materials must be adjusted in accordance with the height and given the desired shape. For corner joints, it is better to use the "half-tree" or "root spike" method. It is better to connect the outer parts with a cut or on veneers. And the inner sections of both joints and corners are best connected with a half frame.
To begin, direct installation is necessary with laying a crown bar treated with an antiseptic agent in the foundation.
Arrangement of a roof in a house from SIP panels
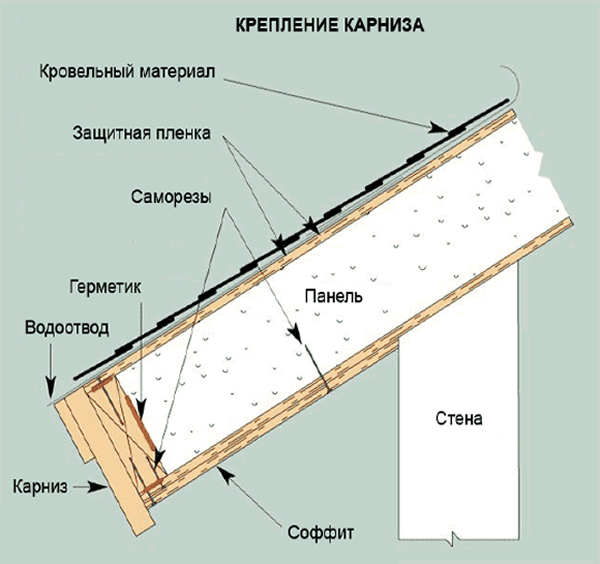
The roof for a house built using this technique can be the most common rafter. This type of roof is characterized by a support in the form of grooves or Mauerlat, which are cut into the beams on the attic floor. The rafters are installed on supports, the crate is stuffed on them and the roofing material is laid.
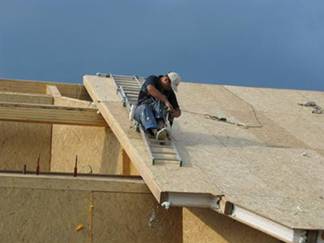
As for insulation, it is not necessary for a cold attic. But if the plans are to install an attic, then between the rafters it is worth putting insulation and covering it with a vapor barrier film.
In addition to the rafter, a roof made of SIP panels is no less popular. For this type, the first thing to do is install the starting rafters, which are bolted to the Mauerlat. And only after that the panels are laid. The panels are mounted on one side of the roof, gradually increasing in length with a ridge. As soon as the work with the first skate is finished, you can proceed to the next one.

This installation method is more painstaking than the traditional one, but no less reliable.
Facade finishing
Facade decoration is the final stage of construction. Each owner makes it according to his taste and financial capabilities. Among the finishing options are now very popular: facing bricks, siding, decorative plaster.
Video
Watch an interesting video about building a house from SIP panels.
