How to start building a house with your own hands?
Living in your own home has a huge number of advantages over living in an apartment. Couples of different ages dream about it. To realize your dream, you can go in two ways: buy a plot with a house; buy a plot and build a house on it. Let's talk about the second option, because it is much more extensive and requires more attention.
Building a house, and what is required for this?
Not everyone is aware of the attendant difficulties. How to start building a house? First, we divide the whole process into several stages. After that, you will have to carefully consider all the necessary actions for each part of the plan.
We offer such stages of building a house with our own hands.
- The choice of a land plot.
- Planning.
- Preparation.
- Construction.
- Additional work.
Choice of land
Let's start with the first question: "Where are we going to build?" The choice of location depends on the comfort of living on it. You should familiarize yourself with the criteria for choosing a site:
- proximity to the center of the settlement;
- land area;
- distance to public transport stops;
- the quality of the adjacent road;
- the need to demolish capital buildings;
- district infrastructure;
- supply of communication lines;
- ecological situation;
- additional preferences (proximity to water, landing, school, place of work);
- the authenticity of the owner's documents and the compliance with the size of the plot;
- soil type;
- groundwater bedding.

Most of the answers can be obtained independently or by interviewing local residents. But you cannot do without using the services of specialists. You will need:
- lawyer;
- geologist and / or hydrogeologist.
The lawyer will check the correctness of filling out the owner's documents, and the possibility of building the house as a whole depends on the verdict of the geologist. On some types of soil, the foundation cannot be poured, which means that capital structures cannot be erected. This specialist must establish the depth of the aquifers and the possible level of groundwater. The information is used in the future to plan the placement of objects on the site.
Recommendation: The optimal ratio of the area of the house to the size of the plot is 10% or less. A large house on a small plot will look awkward. If there is a need for large-scale living space that does not correspond to the site, then you should think about a two- or three-story building.
Planning
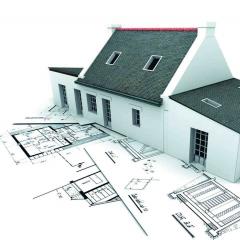
After choosing a land plot, you can start planning. This includes the following actions:
- paperwork;
- disconnection from the system and permission to carry out the demolition of the building from utilities (if necessary);
- designing a house and other objects on the site;
- selection of materials for construction;
- calculation of the approximate total cost of work;
- the ability to connect to public utilities.

It is better to start the construction of a private house by designing. You need to have a clear idea of the amount of work, otherwise the planning will be too arbitrary.
The paperwork will take a huge amount of time. You need to prepare for this in advance so as not to miss the optimal time for construction.
A few words about self-construction
It is impossible to start construction work and demolition of buildings without obtaining permits for these actions. The construction of capital buildings is punishable by a fine, freezing of construction, and demolition.

Nevertheless, the law stipulates the possibility of unauthorized construction, after which the owner of the site will be the owner of the real estate. It is better not to resolve the issue on your own, but to contact firms specializing in the legalization of such procedures. The cost of their services exceeds the cost of obtaining permits several times. And, of course, strict requirements are imposed on unauthorized construction.
Preparatory work
After everything you need to build a house has been collected, you can start implementing your plans, but before that you need to prepare the site, because the upcoming work will drag on for 2 or even 3 seasons.
Would need:
- reliable fencing of the site along the perimeter;
- creation of entrances for equipment to the place of work;
- allocation of space for storing building materials and equipment;
- creation of a recreation area;
- preparation of a place for washing and toilet;
- demolition of old buildings (if any);
- protection from adverse weather conditions.

The placement of dilapidated buildings does not require obtaining permits.
Fencing and gates
A temporary fence serves several useful purposes.
- Isolation of the street and neighbors from the noise of the work carried out.
- Protecting valuable materials from theft.
- Concealment of work from outsiders.
- Protection of passers-by from accidental injury.
- Reduced dust spreading area.
In rare cases, this fence remains after the construction of the house and its settlement. Therefore, the fence must meet the following requirements:
- ease of installation and dismantling;
- relative ease;
- strength;
- resistance to environmental influences;
- the convenience of use;
- fire safety;
- ease of transportation;
- low cost.
The most suitable for these parameters will be a fence made of corrugated board.
The movement of special equipment, the unloading of materials is impossible without a gate. Standard swing and retractable construction devices would be good options.
Dilapidated buildings on the site
The simplest versions of dilapidated buildings can cope with the task. A shed of hammered boards covered with slate will provide minimum storage conditions. An advanced construction option consists of corrugated sheets. The gap between the sheets and the corner joints are treated with insulating materials.
We must not forget about the natural needs of the body. A temporary toilet should be located on the site and a place for bathing should be provided.
A small lounge will come in handy. You can build it or install a trailer that will serve as a place for changing clothes, and even for sleeping.
Construction
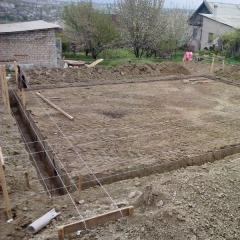
Where to start building a house with your own hands, if not pouring the foundation. For the construction of private houses, the strip type of foundation (including small-strip) is most suitable, as well as slab - the most expensive, but also the most durable.

The foundation is reinforced by installing reinforcement parts welded together. A drainage system is created near the pouring point, through which moisture will escape. And after the foundation has stood, it is treated with waterproofing. If possible, a layer of heat insulator is also applied here to make future housing warmer.
Advice:
- The foundation is made from freshly prepared concrete.
- The aging period lasts a month. For the first time after pouring, dynamic loading is completely contraindicated.
- The optimal filling time is May-August.
- The foundation needs waterproofing preservation for the period of standing and winter.
Plinth
This part of the structure is subjected to the greatest stress, therefore it is worth taking care of the high-quality preparation of the basement. Primary requirements:
- thermal insulation;
- water resistance;
- durability;
- strength;
- pleasant appearance;
- maximum inertia.
Most durable materials are considered heavy, and lightweight materials do not always cope with their functions. The most popular option is various brick options.
Walls and roof
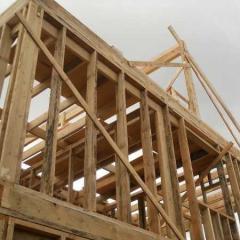
The process of erecting walls and roofs entirely depends on the type of material chosen. During this period, it is advisable to avoid conservation of the construction site.
This is the last important point at this stage.
Additional work
The house is built, but it still needs to be worked on. The final stage involves the following procedure.
- Installation of windows, doors.
- Carrying out insulation works.
- Water, gas, electricity supply (network wiring inside the building), sewerage, heating.
- Installation of batteries and heating equipment.
- Plumbing placement.
- Creation of partitions.
- Wall treatment.
- Other finishing works.

Completes the construction of the blind area, which is carried out after all external finishing work. Experts recommend installing it 8-12 months after the foundation and basement have been erected. It is advisable to create an additional insulating layer of gravel or similar material under it.


