Residential extension to a wooden house projects. Extension of a country summer kitchen in the courtyard of a private house (with photo)
August 27, 2016
Specialization: master of internal and exterior decoration(plaster, putty, tiles, drywall, lining, laminate and so on). In addition, plumbing, heating, electrical, conventional cladding and balcony extensions. That is, the renovation of an apartment or house was done on a turnkey basis with all the necessary types of work.
Have you noticed that a bathtub and toilet next to the kitchen are designed in almost all standard residential buildings, from Stalin buildings to buildings being built today. Have you ever wondered whether these are shortcomings in the building design, saving living space or a technical necessity?
If you don't know the answer, but are thinking about doing an extension or building your own home, I will try to answer it, and you will also have the opportunity to watch the video in this article regarding this topic.
What does the kitchen have in common with the bathroom and toilet?
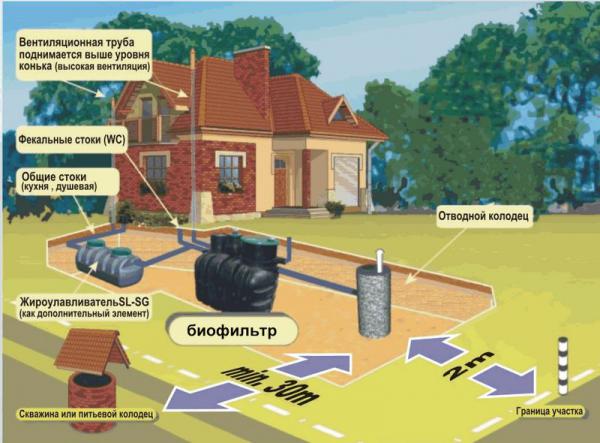
Sewage system
In order to understand the essence of the issue, you need to understand the principle of the system.
Table of slopes of pipes of different diameters
To install a sewer system, there are certain instructions and different priorities:
- first of all, sewer systems of this type do not have forced drainage, therefore the slope of the pipes is required - there is no way to do without it;
- Moreover, this same slope is different for different pipe diameters and the allowances for ± there are small. This means that we have to look for a common denominator for all plumbing fixtures;
- the drainage from the house to or any storage tank is made by the hundredth, one hundred and fiftieth or, in rare cases, the two hundredth pipe, which is laid at an angle in the trench;
- all other plumbing fixtures are connected to it;
- therefore, from a technical and technological point of view, it is much more profitable and convenient to install all plumbing units as close to each other as possible.

In the schematic image above you see the standard arrangement of bathrooms, whether it is a kitchen and toilet extension to the country house or they are pre-designed in the house:
- Please note that the toilet is the last one, the outlet of which is connected to the hundredth pipe (it is designed for it). Although, if you have a larger pipe diameter, then in such cases you simply install a reducing adapter;
- all other appliances, with the exception of automatic washing and dishwasher are connected by the 50th pipe, and the mentioned exceptions are connected by the 32nd.
Imagine that the toilet, that is, the toilet bowl, will be located at a distance of, say, 20 m from the kitchen sink, which means that the outlet at the sink siphon should be at a height of 70 cm. Agree that this is not entirely convenient and practical!
That is why the plan for a kitchen-bathroom-toilet extension to a house is made as if in one unit, although separated by partitions.
Nuances of arranging an extension

The extension where the water supply and sewerage lines will be located must be warm, regardless of what material it is made of (wood, brick, foam blocks, concrete, etc.). Otherwise:
- pipelines will freeze in winter;
- if it is metal, it will burst;
- and polypropylene and PVC will simply stop functioning.
Now I’m not talking about pipe heat insulators, but specifically about a warm room, that is, fairly thick walls and heating devices inside.
So, in order to build a warm extension, you will have to insulate it yourself, using synthetic materials such as mineral wool, polystyrene foam or extruded polystyrene foam. But each region has its own insulation coefficient for residential buildings.
Using this coefficient, the thickness is calculated thermal insulation material. But if you don’t want to deal with formulas, you can simply focus on your home and make the wall thickness the same.
If you additionally insulate the walls in the extension, it is better to do it outside. If the insulation is inside, the wall still freezes, therefore, the efficiency of the arrangement decreases.

If you are making an extension for the kitchen with bathrooms, then most likely you will do it in modern style Therefore, you will want to hide all the pipelines under the finishing. This means that they will move to a colder area of the building and you will need additional protection from the cold.
Foamed polyethylene is the best choice here, which is made in the form of a pipe with a seam on one side - the shell is opened and put on the pipe required diameter(the price of such material is quite affordable and depends on the cross-section).
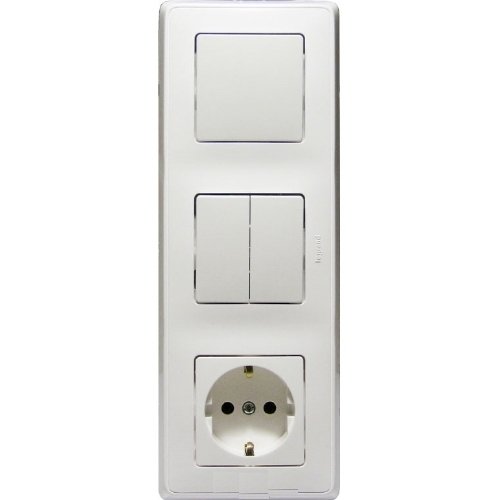
In such extensions it is very convenient to arrange all the electrical wiring, for example, a switch block for the bathroom-kitchen-toilet and one or two sockets. This not only saves space, but also facilitates possible repairs.
But in the bathroom or kitchen there may be appliances such as an electric boiler or an automatic washing machine, and they need separate wiring, moreover, with grounding. Grounding for the private sector is not a problem - you can easily make such a circuit yourself, protecting not only electrical appliances, but also your health.
Conclusion
Of course, you have the opportunity not to install bathrooms in the extension directly next to the kitchen and separate them, for example, with a pantry. You can even make two extensions, but in this case you will have to install a separate sewer line.
In any case, it's up to you to decide! If you have any questions or want to add to the topic, write about it in the comments.
August 27, 2016If you want to express gratitude, add a clarification or objection, or ask the author something - add a comment or say thank you!
There are a variety of designs for summer kitchens, for every taste and income - large and small, in the form of an extension to the main house or as a separate building combined with a bathhouse or a playground.
To choose suitable option, you need to decide the following questions for yourself:
- how spacious should the kitchen be;
- will it be designed only for seasonal use (for this you can simply build wooden frame with a roof) or it is planned to use it all year round for a long time (then it is better to build a closed house of stone or wood);
- what will be the purpose of the kitchen, i.e. how functional it will be (combination with a relaxation area with benches or swings, combination with a bathhouse, kitchen with a barbecue oven and a huge table for friendly gatherings, etc.);
- what it should be architectural style buildings (it must fit into the overall design of the site);
- what material the kitchen will be constructed from (the choice depends on the desired functions of the kitchen and its seasonality).
Guided by these basic principles, you can clearly determine for yourself what your dream kitchen should become.
Summer kitchen in the yard in the photo
If we are talking about a seasonal stay at the dacha, the owners may want to move the process of cooking, canning for the winter outside the living area of the house, and also have a delicious lunch with a large company of friends in a secluded corner in the fresh air.

Summer kitchen remote from the living area in the photo
In this case, the main requirement for the kitchen is the location of the hostess’s workplace and the summer recreation area remote from the living area. Any housewife wants to have a comfortable kitchen - well ventilated, not hot, spacious enough and so that everything is “at hand”. I also want all the fumes and odors that appear during the cooking process to not get into the residential area so that you can make noise and rattle dishes in the kitchen at least around the clock, without interfering with the rest of the family and possible guests.
But the main thing that every housewife dreams of is a large and spacious kitchen during the period of canning vegetables and other preparations for the winter. Such a kitchen should have a lot of shelves, racks and countertops, where all the necessary products and jars could be safely placed. Regular kitchen in country house, as a rule, is poorly suited for this.
For a man, one thing is needed from a summer kitchen - so that he can eat deliciously not in a stuffy house, but in the fresh air. Well, so that its owner would be completely satisfied with her “laboratory” with all its saucepans, spoons and ladles. Therefore, the summer kitchen should be well equipped - with everything necessary for the housewife, as well as for the owner and the whole family.
It is desirable to have it so that you can cook delicious meat, as well as comfortable furniture to invite guests. It would be nice if the kitchen has a TV and a stereo system with karaoke.
All this is more feasible in frame structure. It does not require an expensive and heavy foundation, and the structure itself is quite simple and light, and therefore not very expensive, so it will not be difficult to build it with your own hands. In addition, such a kitchen will easily withstand freeze-thaw cycles without damaging the structure, decoration and geometry of the building, and in the summer heat its walls will remain heatproof.
In the southern regions of Russia, it is customary to build kitchens in a dacha extension next to residential building. This has its advantages, and if there is free space next to the house, then a summer extension to the kitchen in the form of a closed veranda or an open terrace is possible. If there is no space near the house, it is probably worth sacrificing one of the rooms of the house and using it to expand the kitchen - but then it will no longer be a summer kitchen.
Making a summer kitchen as an extension to the house makes sense when there is a large family or a lot of people stay at the dacha, all year round. If the family is at the dacha only from spring to autumn, it is better to build a separate summer kitchen, so that it would be more pleasant to spend time in it in the summer heat thanks to good ventilation and fresh air.
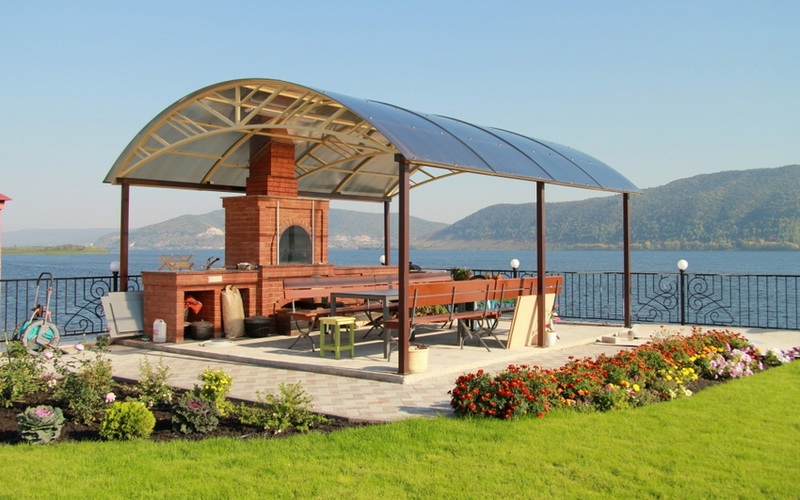
Open summer kitchen in the photo
An open summer kitchen will be better ventilated and will not be so hot in the summer. If you make the summer kitchen closed, you can comfortably stay in it in rainy or windy weather, and in hot weather, and most importantly, you can use it until the coldest weather.
Open kitchen for the summer (photo)
If you plan to make the summer kitchen the main one for the summer, that means you will need to install a stove, furniture, and kitchen appliances in it. Naturally, a closed kitchen is better suited for this.
If the main function of a summer kitchen is only cooking and eating, then it makes no sense to build a closed house, especially since the cost of a closed summer kitchen is much higher than an open one, and its construction will also require more time.
Look at the summer kitchen extensions in the photo, where a variety of construction options are presented:
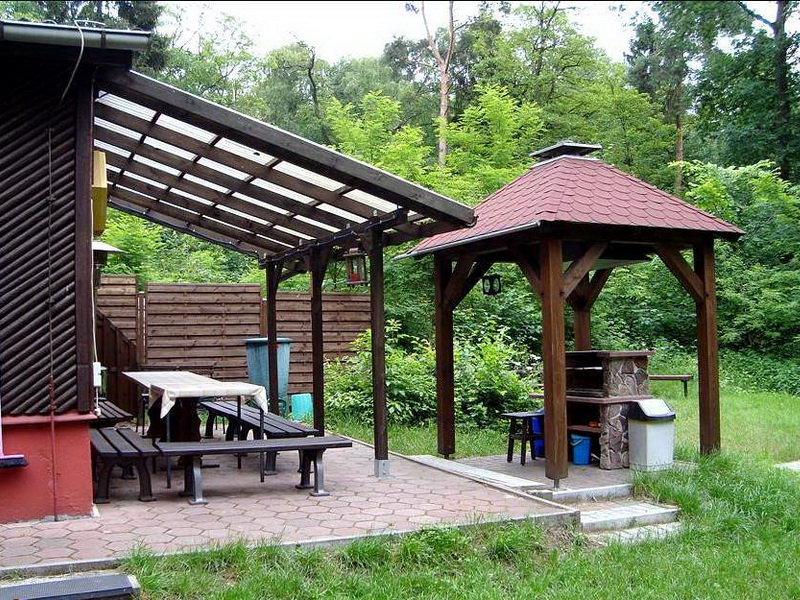

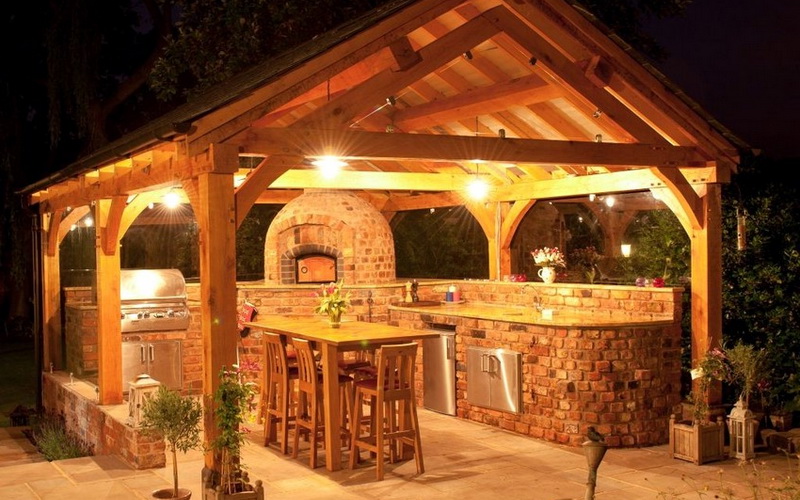
If the size of the plot allows and there is the opportunity and desire, you can build not just a separate summer kitchen, but a whole complex. Some people like a summer kitchen with a terrace, and then there is a convenient division of functions: they prepare food in the summer kitchen and eat on the terrace. Thus, we get a complex of a full-fledged kitchen and dining room at the same time in one building. Ideally, such a structure should be built so that the terrace opens onto the garden, river or pond, which would give family lunches and dinners a special charm.
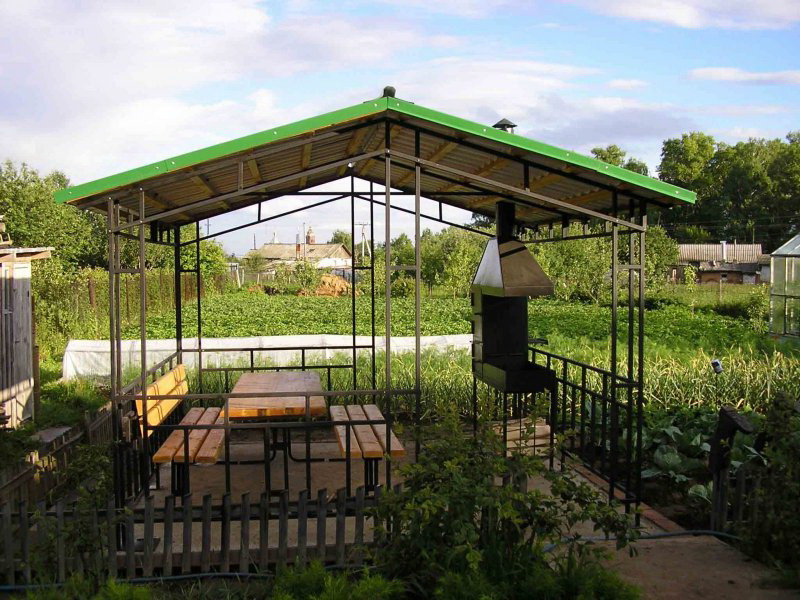
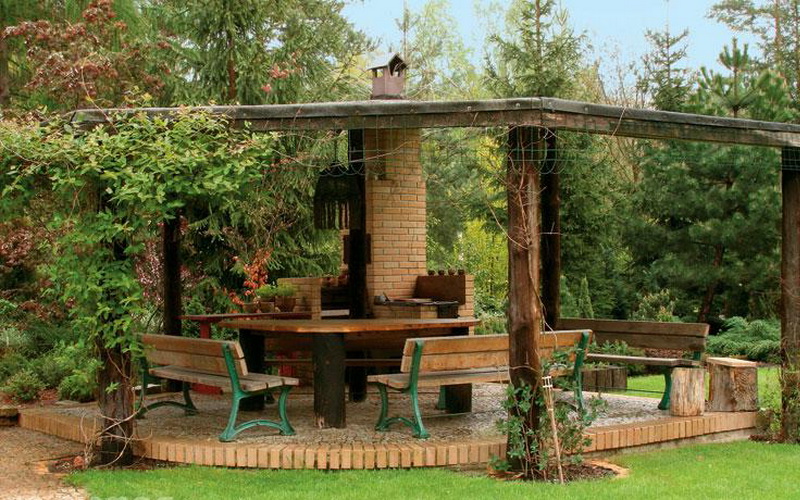
You can combine a summer kitchen and a gazebo in one building. In this case, as in the design with a terrace, there will be two zones - for cooking and a dining area, which can also be a relaxation area. It should be noted that a summer kitchen with a gazebo, unlike a regular kitchen, is a more active element landscape design and should not stand out from the general landscape, therefore its design and location should be carefully considered.

A free-standing summer kitchen can also be supplemented with a veranda, and this option, like the previous two, is also quite popular. At the same time, the veranda serves as a dining room, and the kitchen is used for its intended purpose. The veranda can be made completely or partially closed, which makes it possible to furnish it with appropriate furniture.
The foundation of such a building must be higher than the surface of the soil so that its base is not flooded with melt water or rain.

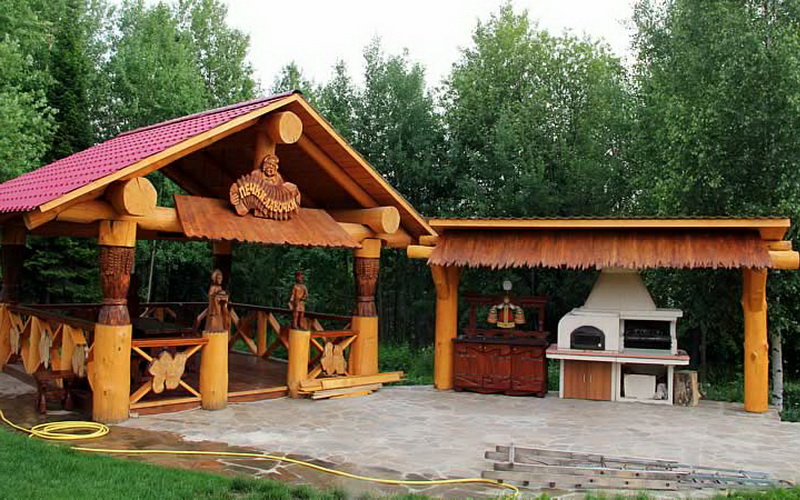
A summer kitchen can be combined with a bathhouse, a workshop, a garage, a recreation room or a play area with a tennis table. The choice of the type of summer kitchen depends on the set of functions that this room, according to the owners’ plans, will perform. For a small dacha and a small family, when visits to the dacha are limited only to weekends, a summer kitchen in the form of an open terrace or gazebo may be sufficient. And for a large family and if available warm home when it is supposed to be in winter permanent residence or frequent visits, it is more advisable to choose a closed kitchen, perhaps in combination with other extensions. In this case, it is very important to have a stove in the kitchen - both for cooking and for heating the room.
One way or another, you need to choose the type of summer kitchen based on your needs. If there is no one to use the bathhouse, then there is no point in building it. And vice versa - if there are people in the family who like to steam, and even in winter, you cannot do without your own bathhouse. And it will be more profitable to build it in conjunction with the kitchen - then it will be possible to heat two rooms with one stove.
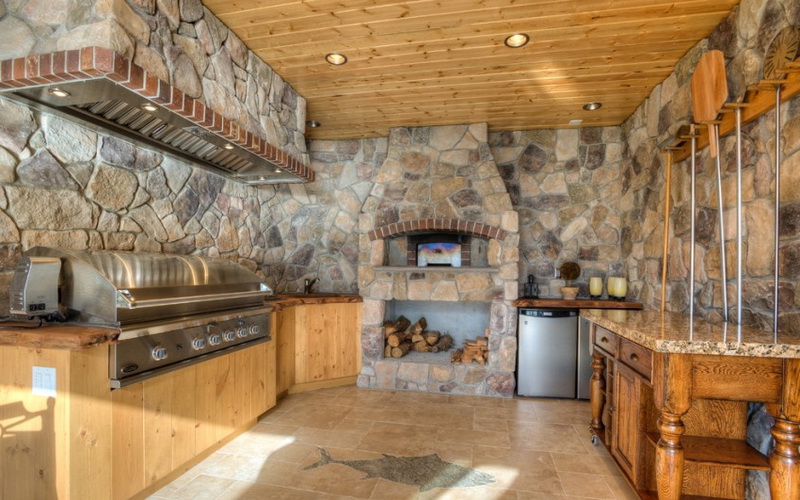
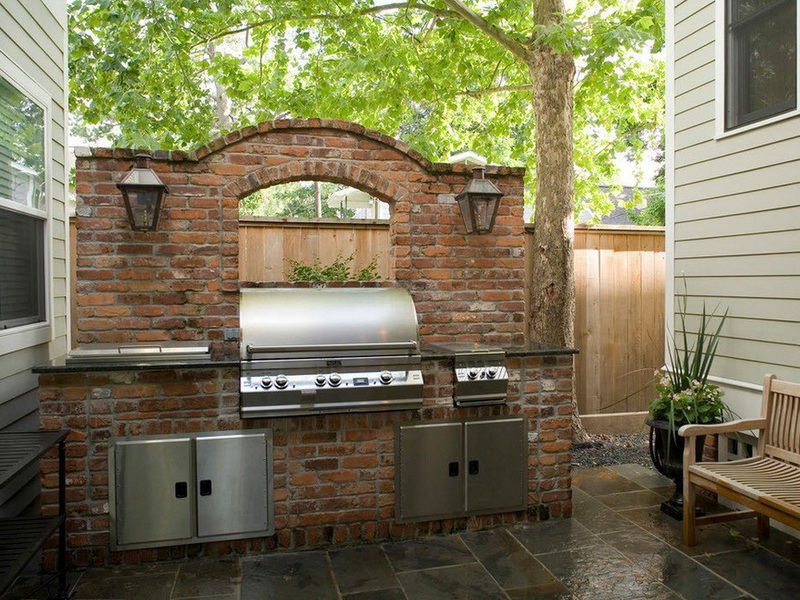
When installing a summer kitchen in the yard, it is important to consider what equipment will be used. If this is a whole high-tech kitchen complex with a gas hob, a folding barbecue and a smokehouse, or a Russian stove or fireplace, then we should be talking about building an enclosed summer kitchen. You should also think about adding a dining terrace to it. True, in such a kitchen you can install a regular gas or electric stove. Summer kitchen and country house must functionally complement each other.
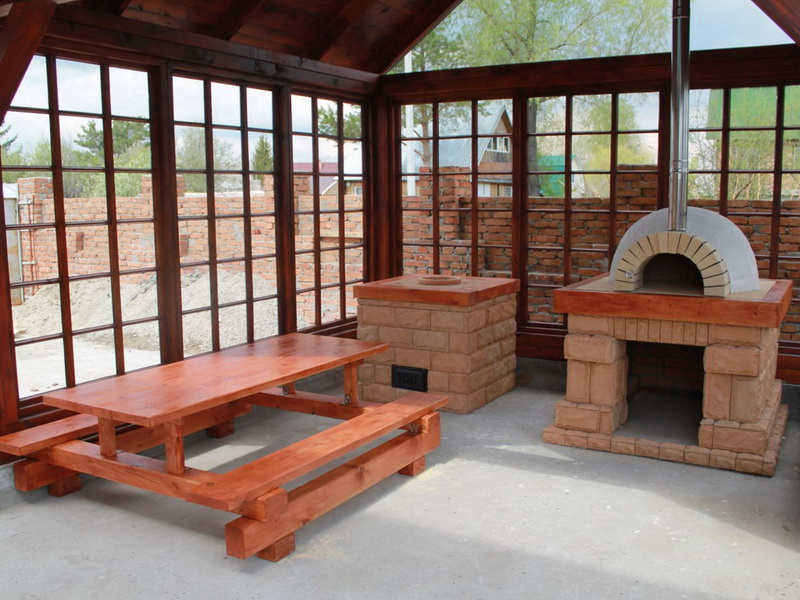
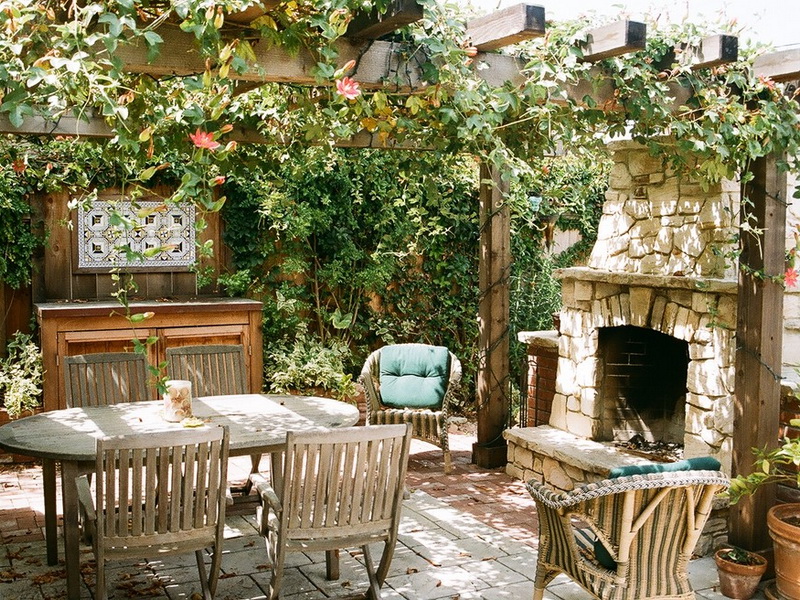
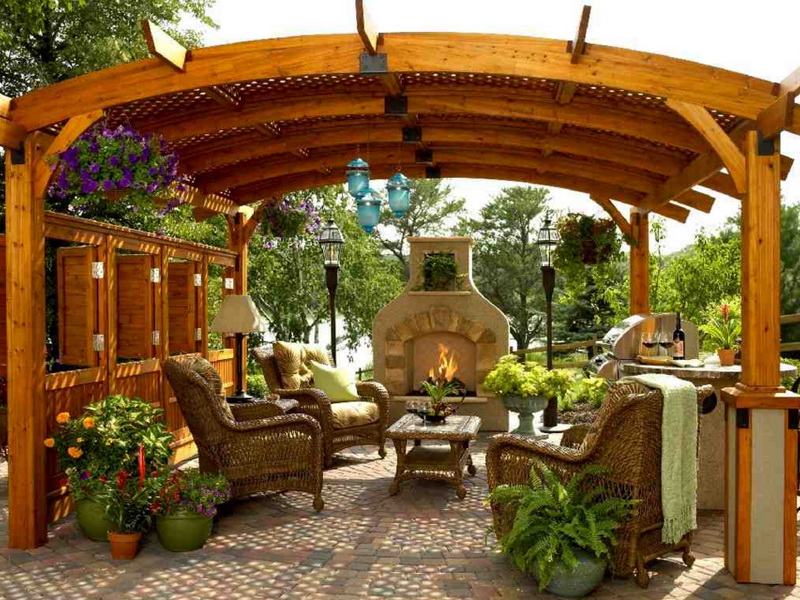
The presence of a stove implies the construction of a closed kitchen, and when installing a folding barbecue, you can get by with an open gazebo or even limit yourself to a canopy just over the table. You can get a kitchen generally at minimal cost, like an island area under the canopy of a tree - using a barbecue and installing wicker furniture. Such country kitchen gazebos are currently enjoying increased popularity due to their simplicity and low cost of project implementation.
Ultimately, since no trip to the dacha is complete without a barbecue, there must be a barbecue on the site, and what kind of environment there will be around it is a matter of taste, desire and financial capabilities of the dacha owners.
Today it is very fashionable to add your own flavor to any building, and this becomes easy to do if you build it yourself. Even a summer country kitchen with a veranda of the simplest design can be made original by adding some unusual element, generated by your own imagination and made with your own hands. It is not at all necessary to build a summer kitchen similar to the living-dining room in an apartment.
Open summer kitchen in the photo
You can make an open and transparent lightweight structure, decorated with plants or wood carvings, wicker furniture, pottery or homemade toys.

Summer kitchen-Italian patio in the photo
You can build a kitchen, only symbolically separated from the street and with its entire appearance reminiscent of an Italian patio, or you can approach this issue more thoroughly and build an entire kitchen complex.
Deciding what the future kitchen should be like is the owner’s right, and when the choice is made, all that remains is to implement it efficiently. Of course, DIY construction requires some experience, but the information presented below will make this task much easier. On our website, novice builders will find a step-by-step description of construction work and basic recommendations and advice on how to carry it out. So, with some diligence, you will definitely be able to build a completely beautiful and modern summer kitchen.
Look carefully at the country summer kitchens in the photo, consider all the possible options for arranging the area adjacent to the house:


Having already chosen the type and shape of the summer kitchen, you need to develop a project plan, drawing detailed diagram buildings. The plan must include all elements and details of both the structure itself and its internal equipment - the area of the summer kitchen, its location, possible extensions, the location of the barbecue or stove inside the facility, the position of kitchen furniture and other equipment that is planned in it arrange. It is important to correctly calculate the dimensions of the foundation, walls, roof, the position of windows and doors, the location of the electricity and water supply, as well as the outlet of used water.
As for the power supply, in addition to the location of the power supply entry, it is necessary to think in advance about the location of all power points inside the kitchen (sockets, switches, etc.) and indicate them on the plan.
You should think in advance about how the wiring will be connected to the summer kitchen - underground or over the air. If the kitchen is located in an extension to the main house, then in this case it is important to determine in advance where the wiring and all branches from it to electrical points will go. To supply the kitchen with electricity, a separate line with a separate panel and an emergency shutdown system is required, and the location of this entire system must be thought out in advance and included in the plan of the summer kitchen.
No less careful consideration should be given to the water supply system with the outlet of the water supply point to the kitchen and the sewage system, taking into account the location of the drainage hole or ditch for draining used water.
All these preliminary calculations are necessary in order to determine what and how many materials will be needed for the electrical and water supply of the kitchen and sewage system.
The presence of open fire is always a risk factor. That's why important detail in the kitchen project - the location of the stove or barbecue, which requires the construction of a special foundation, as well as a special roof structure with a chimney and everything related fire safety object.
It is important to take into account every little detail here - the distance to other buildings, the proximity of trees and plants, etc. This is especially important if a stove is supposed to be installed in the summer kitchen, and the kitchen itself will be wooden.
Any construction works should be based on careful calculations - this will allow you to correctly plan your budget and not turn not the most complex kitchen construction into an endless long-term construction or renovation. After drawing up the drawings, it is advisable to present the building in three-dimensional dimension, and if there is a possibility and availability of appropriate software, then this can be done on a computer. Then the whole picture of construction will clearly appear before your eyes and it will be more convenient to make any adjustments or changes.
Instructions
First, a plan.
Not worth building kitchen in the form of an extension to the house at random, without first drawing up a precise plan. In this case, it is necessary to compare the size of the future kitchen with the size of the house, take into account further fastening of the joints, as well as the roof. In addition, do not forget to indicate what communications will be in your kitchen extension and how you plan to carry them out.
The basis of the foundations is the foundation.
The most important rule that you should remember forever when building an extension is that its foundation should be similar to the foundation of the house. Let us remember that the type of foundation, which is determined depending on the type of soil, is especially important for the stability of the entire structure.
Roof.
Waterproofing when building an extension is incredibly important. Due to this, Special attention We encourage you to take the time to match the roof of the extension and the house. In this case, it is better to make the slope of the roof of the extension greater than the slope of the roof of the house, because this way rain will not accumulate on it in winter and rainwater will drain faster.
Relatively recently, kitchens of non-standard shapes have come into use; one type of such kitchen is a radius or oval kitchen. Its main feature is the presence of oval-shaped kitchen units. The shapes can be different - from ordinary ovals and circles, to different lines, eights, etc.
Why are such kitchens made? Just to create an intricate room design, but is it convenient? Let's find out what the benefits of an oval kitchen are.
Advantages of oval kitchens
With a round or oval kitchen you can adjust non-standard elements of the room. For example, in the kitchen there is a triangular or rectangular bay window and you need to place the work area near it. It is impossible to build in a rectangular kitchen set here, but oval shapes will highlight the beauty of the bay window - the result will be amazing! An oval kitchen can also cover a protruding box (pipe shaft or air duct). After all, at the whim of Soviet builders, small heating pipes can protrude in the most unexpected places, and round kitchen will hide them.
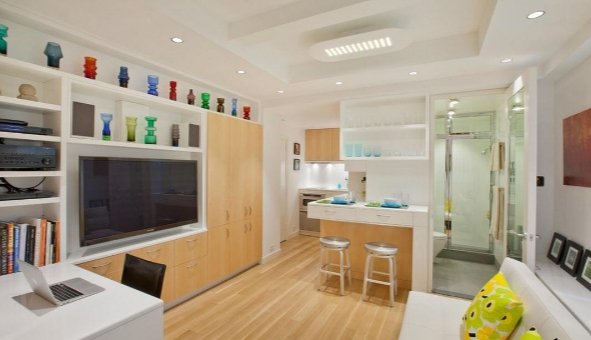
Using oval shapes you can increase the working surface. An oval kitchen island can be attached to the main kitchen unit or can be made free-standing. This design is suitable for a kitchen with an area of at least 10 sq.m.
Small kitchen
It is impossible to build in a kitchen island in a small kitchen, but oval shapes can be used here too. For example, with the help of oval fronts you can slightly expand the size of the countertop and the depth of the kitchen unit. This is convenient when the working surface is small in length - it can be increased in width. It is enough to install semicircular facades on the bottom drawer, thus expanding the drawer itself.
Exclusive design
The interior design is usually of decisive importance, so you can make an oval kitchen purely for aesthetic reasons. Your kitchen can be a figure eight, wavy, made of several ovals or other smooth shapes - here you can fantasize as much as you like. In addition, such kitchens are usually made according to custom design, so you get an exclusive kitchen set.
But the oval kitchen also has a significant drawback - its cost. The entire semicircular kitchen costs twice as much as a standard one. But if you do not plan to make the entire kitchen to order, if it is enough for you to make only a few kitchen elements oval, then large financial costs it won't cost.
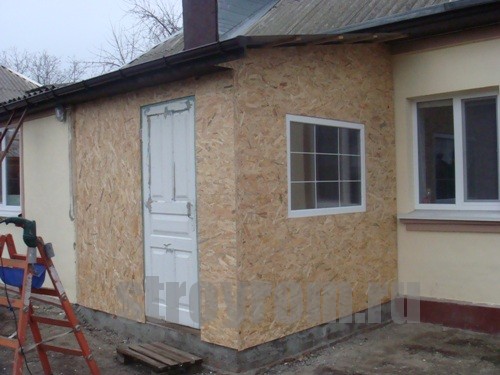
The best option to expand the usable space in a private house is to build an extension to it. Attached premises can be different forms, sizes and have their intended purpose. As a rule, the selection of certain building materials, from which the attached part of the house will be built. In this version, after overhaul and redevelopment of the house, it became necessary to add an entrance hall. As with any construction, a drawing sketch was first made, showing the geometric view of the extension and the main exact dimensions and heights. The next step is choosing building materials and calculating estimates for their purchase. Having considered and calculated different options for building an extension, taking into account the minimum financial costs and the minimum construction time, the optimal solution was chosen in next sequence and from such building materials.
How to build an extension
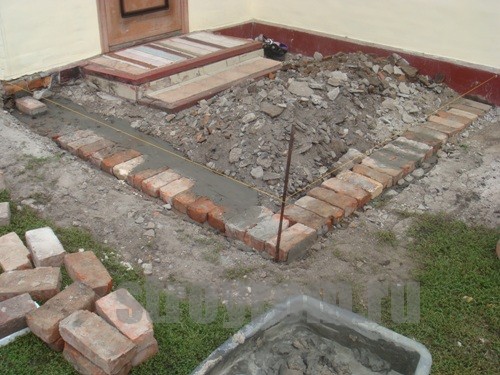
The shape of the extension is L-shaped, the size of the foundation is 2.7 x 2.7 meters. First of all, we mark the perimeter and prepare the site.
The fastest way to build walls is frame. The advantages of this method include minimal waste of building materials. All you have to do is choose the right length of bars and their number.
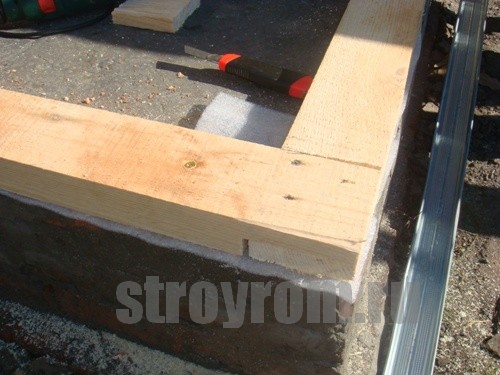
We begin the installation of the frame by screwing the beams to the base of the floor using a hammer drill and dowels. They must be level with the foundation and must have insulating tape. Cut polyethylene foam 5 millimeters thick was used as tape.

Then we level the side beams and nail them to the walls. At this stage, it is necessary to correctly calculate the height and slope of the entire frame. In our cases, the roof will be a continuation of the existing roof. Having fixed the corner beam in an even vertical position, we lay the upper beams and twist the main frame with self-tapping screws.

Next you need to mark the door and window openings. We know the dimensions of the door and window in advance. In order not to trim the OSB sheets on the side of the doorway, we retreat from the wall a size equal to the sheet width of 125 centimeters, and set the timber level. Having measured the width of the door, we install the second beam, this will be the opening for the door. On the other wall we mark and install racks under the window, and install horizontal lintels to them. Having formed the window opening, we deliver and screw in the required number of post beams with self-tapping screws, and then we reinforce the entire structure with transverse insert lintels.

The wall frame is ready, we are starting to install the roof. The roof is pitched, the slope is a continuation of the existing one, it is enough to correctly measure the width of the beams and add the thickness of the sheathing. You should also take into account the wave depth of the roofing material.
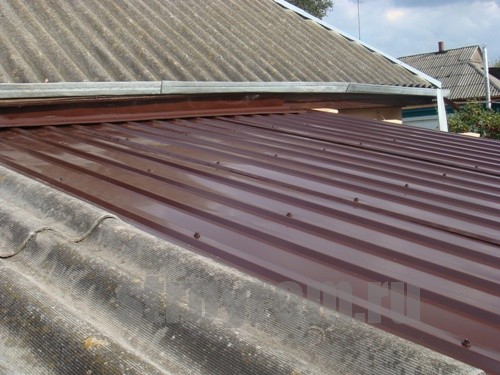
It is necessary to lay roofing waterproofing under the sheathing. Corrugated sheets were used for the roof. The material is quite good and not expensive; besides, it can be ordered to the required length and laid without additional work.
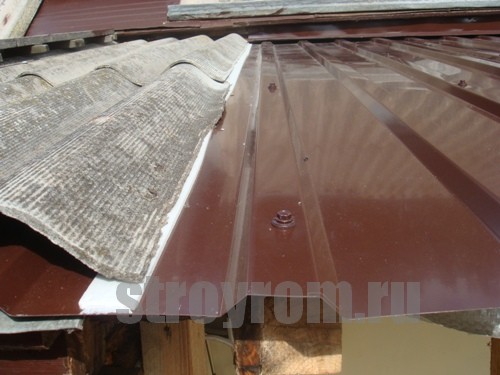
We glue insulating tape to the place where the two roofs overlap, so that during climatic changes there is no corrosion in this place.
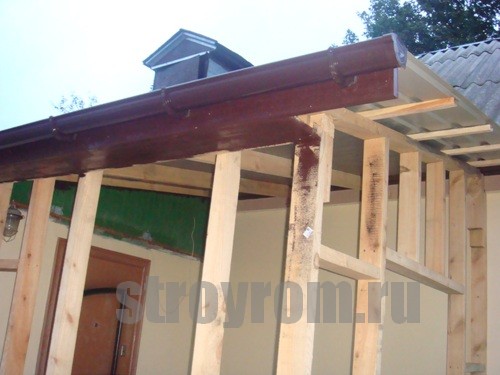
We line the box flush with the old one, paint it and install the ebb.
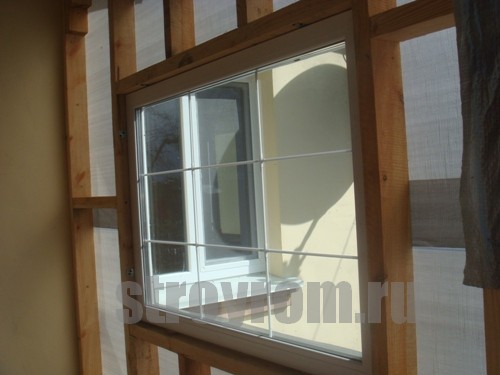
Installing a window.

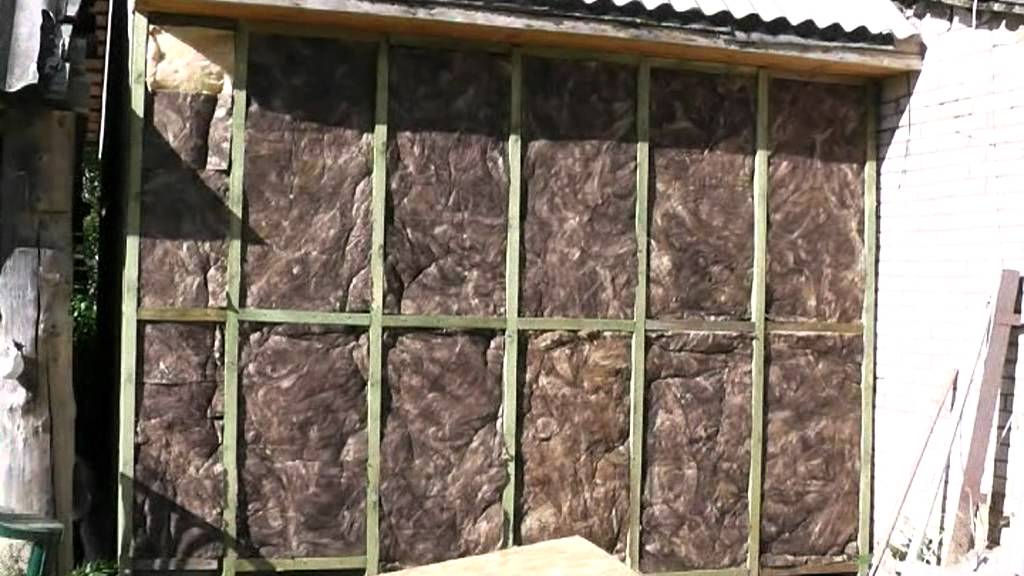
The frame will be covered with OSB sheets 10 millimeters thick. Used as insulation mineral wool 10 centimeters thick.

Let's start covering the frame.
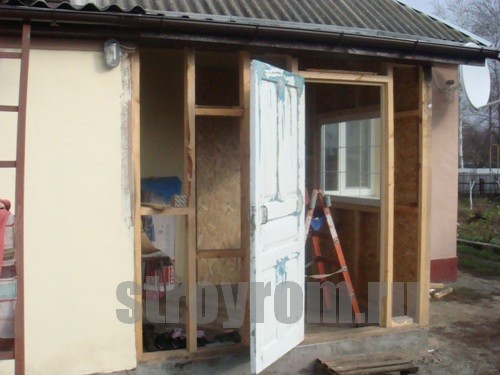
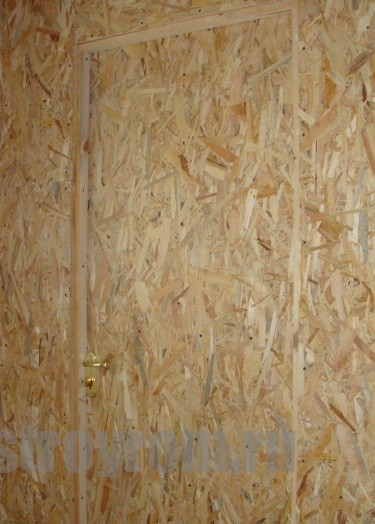
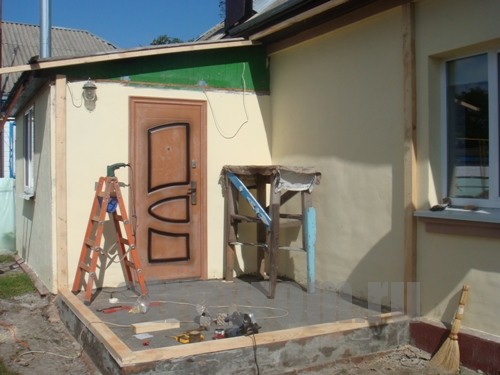
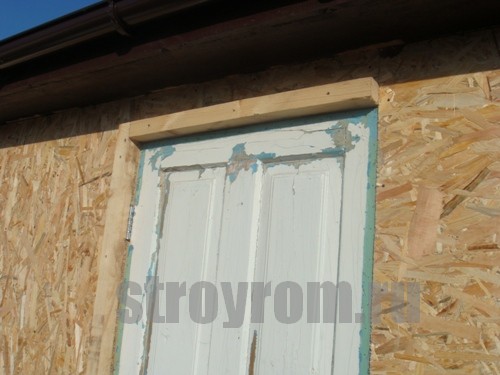
Before sheathing the wall with the doorway, we hang the door. They decided to use rack beams as the door frame, and the old door was made of solid boards. Of course, you could buy a front door, but ours turned out to be in pretty good condition, although it is over 40 years old, with the exception of many layers of paint. Having hung the door on a pre-marked rack, we adjust the second one in place and install the upper lintel. On the inside, along the perimeter of the closed door, we screw a 2x4 cm rail that will serve as a door quarter.
After completing external cladding We proceed to the interior, having previously laid mineral insulation.
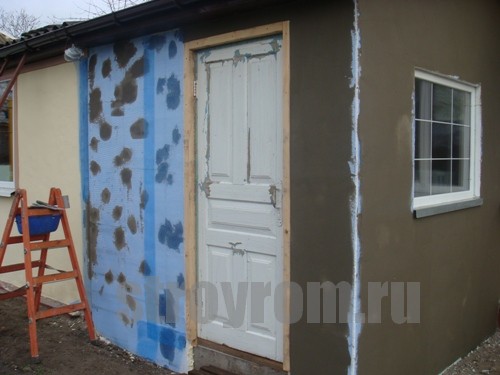
The next step is insulating the walls with polystyrene foam and finishing them to match the general appearance of the house facade. Since the house is plastered and painted, this option is the most optimal and not expensive.
The thickness of the foam is 5 centimeters, so as not to make door slopes, and then they can be damaged, we screw a 5x5 cm timber around the perimeter of the doorway, the thickness of the foam.
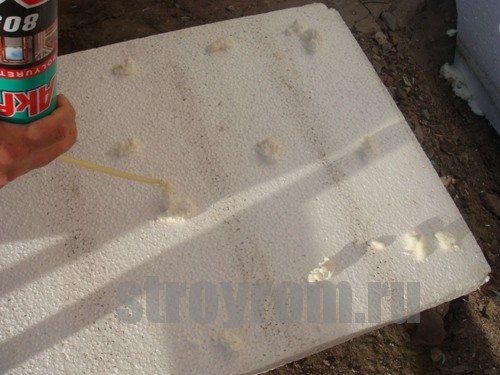
The installation of the sheets was carried out as follows. Polyurethane foam was applied to the sheet in small dotted sections.

The entire joining perimeter of the sheet was also foamed.
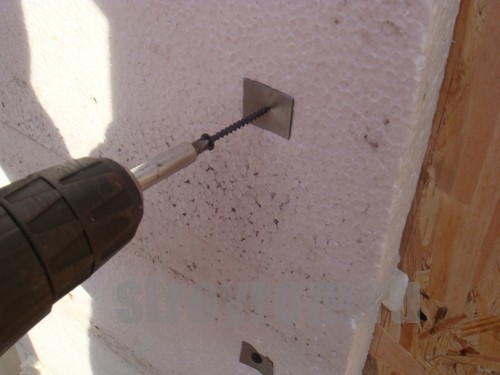
The sheet was pressed tightly and screwed with self-tapping screws with a plastic spacer.
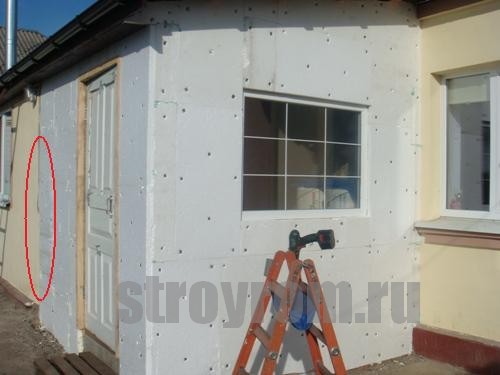
This option for wall decoration was calculated initially. It is marked in red that the joining of the existing wall and the new one is made in the same plane. To do this, the foundation and the wall were initially shifted by the thickness of the insulation.
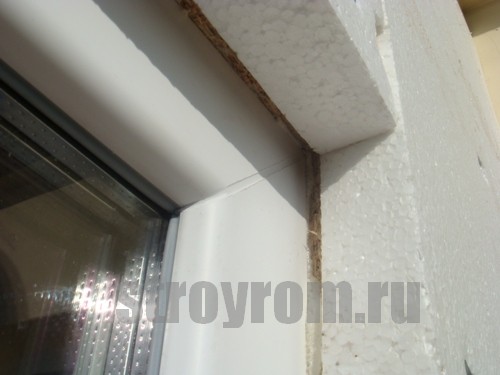
Along the perimeter of the window, under the level, smooth factory edges of polystyrene foam were installed with an overlap onto the frame.

We fill the void with polyurethane foam.
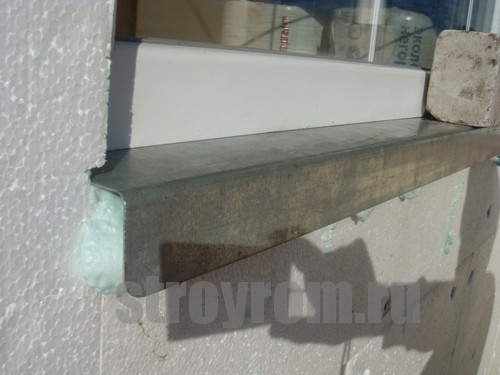
We install a window sill.
Before applying the reinforcing mesh, remove all excess hardened foam.
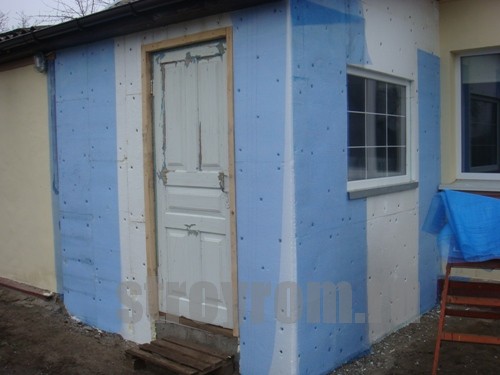
Apply the first layer of a special reinforcing mortar.
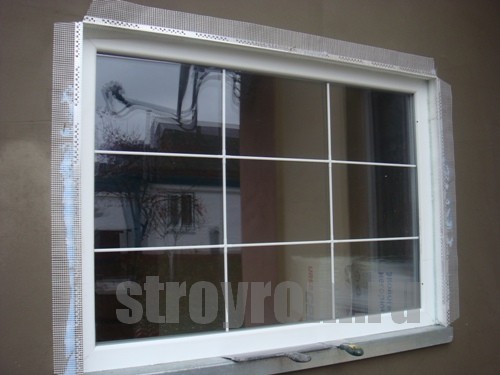
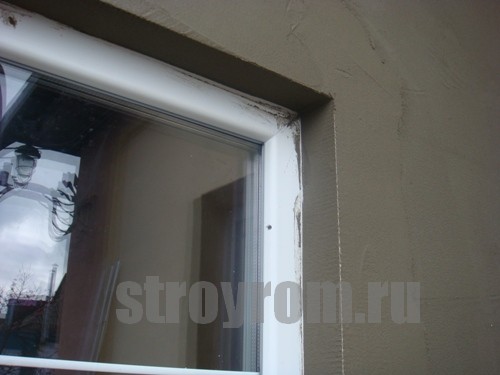
We put perforated corners with mesh on the corners.
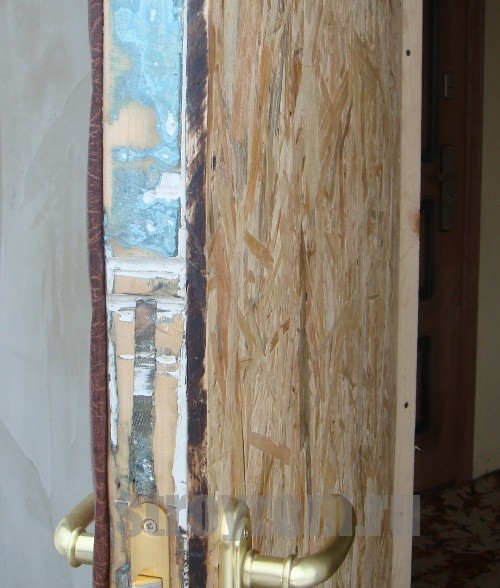
The doors are sheathed on the inside with OSB sheets and on the façade side with a leather substitute. The photo shows that the end of the sheet is burnt; it was specially cut out with a grinder and a regular cutting wheel. With such a cut there are no burrs or chips, the end is perfectly smooth, just open it with varnish.