Calculation of aerated concrete blocks for building a house. How to calculate the number of gas silicate blocks per home
Before starting construction, it is advisable to correctly calculate how much aerated concrete is needed for a house or cottage. This will optimize the initial investment in construction, exclude overpayment for surplus, downtime for specialists during the construction of a building. You will not need to spend additional money and time on delivery of missing materials.
The specialists of the ZBIK company in Irkutsk will provide you with professional assistance in the calculations. But initially, you can navigate the numbers yourself by calculating gas blocks for building a house on our online calculator.
Available material types
The dimensions of the gas silicate blocks are clearly regulated by the manufacturer. In the case of using materials from our production, you will be dealing with cellular structures of three standardized dimensions:
- 198x295x598mm, weight of one - 22 kg - type "1";
- 98x295x598mm, weight of one - 11 kg - type "2";
- 398x295x598mm - weight 44 kg - type "3".
Exact dimensions and correct geometric shape simplify both calculations and the construction process itself. You can easily count aerated concrete for a house, having decided on the parameters and layout of the building.
The practice of several decades of use has shown that cellular gas-filled blocks are an inexpensive, reliable and practical building material. The use of a non-autoclaved aerated block in wall structures further reduces the total cost of the building without losing its performance.
Initial data
- The total length of all walls along the foundation is the perimeter of the building.
- Building height - needed to calculate the area of the wall surface. Also, knowing the height of the walls and the size of an individual element, you can determine the row of masonry;
- The total area of the masonry is determined by the product of the perimeter and the height of the building minus the total area of all window and doorways... By the way, this value will correspond to the area of the required insulation;
- The thickness of the walls - the method of installation and the initial choice of the size of the elements depend on it. This parameter is also influenced by the thickness of the adhesive (mortar) seam. But based on the permissible small thickness of the glue layer (3-4 mm). This parameter does not significantly affect the final size of the building;
- The number of elements is a calculated value determined by the initial parameters of the building.
- The total mass of gas silicate and the total volume are necessary to determine the optimal method of delivering materials to the object. When determining the load on the foundation, the mass of the glue mortar and the masonry mesh is added to the total mass of the "bricks".
When determining the number of elements for internal partitions, it is necessary to calculate separately using a similar algorithm. In this case, the thickness of the partition walls is usually determined by the height of a separate element, which fits on the side face, that is, in half of the block.
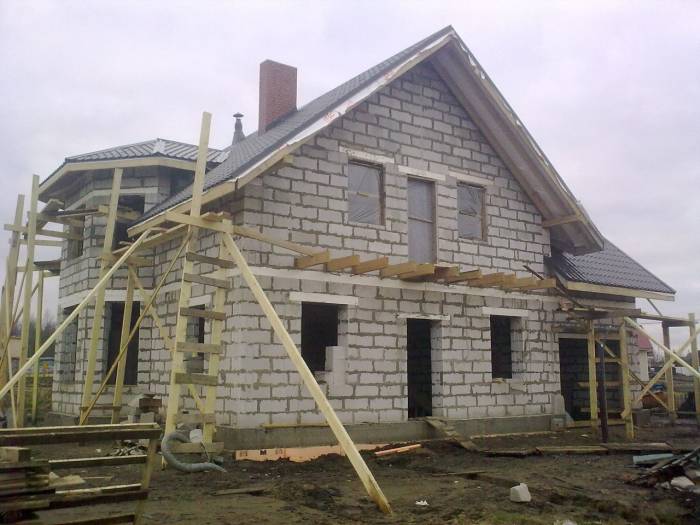
Important! If the gables of your house are also planned to be erected from a gas block, you will also have to calculate their area.
Masonry mesh - it reinforces the masonry, enhancing the mechanical strength of the entire building. Usually each row of masonry is reinforced.
Alternative simplicity
Execute calculation of aerated concrete for a house with an online calculator- everything is simple here ...
- Choose one of three types of block produced by ZBIK.
- Add up the lengths of all the walls of the house and enter the value in meters.
- Determine separately the total area of all windows and all doorways.
- Choose the thickness of the walls. Option "2x198 mm" can be used when organizing additional insulation in a two-layer wall structure.
- You automatically get the required total volume.
Important! Please note that all initial parameters are indicated in meters and square meters.
Further on the gas blocks page, according to the table, you can calculate the approximate cost of the material depending on its type and unit price, or you can contact our manager, and he will advise you on all issues free of charge.
Aerated concrete - lightweight and inexpensive material, born as a heater, but continued life as a wall stone. The construction of aerated concrete buildings saves money and time. Is it so? Let's count together.
What is the advantage.
Aerated concrete blocks are formed from sand, cement, water, blowing agents and plasticizers. The material itself is a kind of aerated concrete, the name of which is explained by the presence of internal oval and round pores. The quality of concrete and the thermal insulation properties of the blocks depend on the uniform placement and the number of these pores. Blocks are lightweight, not small, inexpensive. They are easy to lift to a height, quickly build houses and at the same time save money.
Manufacturers offer stones of various sizes. Their thickness (height) ranges from 50 mm to 400 mm. Examples are samples with parameters (length × width × height) 600 × 300 × 200 mm; 400 × 300 × 100 mm; 600 × 300 × 250 mm; 400 × 300 × 150 mm. The most convenient are not even stones, but groove-comb structures. The walls made of them are stable, fold like a constructor with a significant saving of the bonding mortar. Blocks provide thickness load-bearing walls from 60 cm, interior sound-absorbing walls from 10 to 40 cm and partitions from 5 cm.
House 12 × 12 × 3m build and count.
Let's calculate the need for aerated concrete for a 1-storey house with an area of 12 × 12 m and a height of 3 meters from blocks of 600 × 200 × 400 mm:
- The perimeter of the house will be equal to the sum of the lengths of its 4 walls - 12 × 4 = 48 m;
- Wall area 48 × 3 = 144 sq. M .;
- Wall area for doors and windows - 24 sq. M (suppose);
- We choose blocks of aerated concrete with dimensions of 600 × 200 × 400 mm, where 400 is the thickness;
- Block surface area 600 × 200 = 120,000 sq. Mm = 0.12 sq. M;
- The number of blocks for the construction of walls 120 / 0.12 = 1000 pcs.
Calculation of the cost of aerated concrete blocks for the construction of a 1-storey house with an area of 12 × 12 m and a height of 3 meters from blocks of 600 × 200 × 400 mm:
- Let's calculate the volume of 1 gas block 600 × 200 × 400 = 48,000,000 cubic mm = 0.048 cubic meters;
- How many cubes are there from 1000 pieces? 0.048 × 1000 = 48 cubes;
- The cost of 1 cubic meter is 3500 rubles (suppose);
- Total for the construction of walls 48 × 3500 = 168,000 rubles;
- The estimated cost of 1 block is RUB 168.
It is better to buy aerated concrete with a margin. After all, the block can accidentally break off.
We build and count a house 10 × 14 × 3m.
Let's calculate the need for aerated concrete for a 1-storey house with an area of 10 × 14 m and a height of 3 meters from blocks of 600 × 300 × 300 mm:
- The perimeter of the house will be equal to the sum of the lengths of its 4 walls - 10 × 2 + 14 × 2 = 48 m;
- Wall area 48 × 3 = 144 sq. M .;
- Wall area for doors and windows - 24 sq. M;
- Area for stacking blocks 144-24 = 120 sq. M .;
- We choose blocks of aerated concrete with dimensions of 600 × 300 × 300 mm;
- Block surface area 600 × 300 = 180,000 sq. Mm = 0.18 sq. M;
- The number of blocks for the construction of walls 120 / 0.18 = 667 pcs.
Calculation of the cost of aerated concrete blocks for a 1-storey house with an area of 10 × 14 m and a height of 3 meters from blocks of 600 × 300 × 300 mm:
- Let's calculate the volume of 1 gas block 600 × 300 × 300 = 54,000,000 cubic mm = 0.054 cubic meters;
- How many cubes will there be from 667 pieces? 0.054 × 667 = 36 cubes;
- The cost of 1 cubic meter is 3450 rubles (slightly lower than the first option);
- In total for the construction of walls 36 × 3450 = 124,200 rubles.
Which load-bearing walls are cheaper.
So, the outer walls in both houses have the same area, but different thicknesses. For the first house, blocks 200 mm wide were needed 333 more than blocks 300 mm wide for the second. In addition, the first cost almost 40 thousand rubles more due to the higher price. To save money, we choose the second construction option, however, we assume that the walls of the house will be 10 cm thinner.
We are planning the construction of interior walls with an area of 150 sq.m.
For construction inside the house, it is better to choose thin blocks. Reducing the thickness of the block to 10-15 cm leads to a decrease in the price of aerated concrete in comparison with the above options. Let's assume that the cost is 3150 rubles / cubic meter. For 150 square meters of walls, you will need 1250 blocks with a surface area of 600 × 200 = 120,000 square mm = 0.12 square meters (150 / 0.12 = 1250). The volume of one gas block 600 × 200 × 100 mm is equal to 12,000,000 cubic mm or 0.012 cubic meters. The number of cubes required is 1250 × 0.012 = 15. Therefore, the partitions are 15 cubic meters × 3150 rubles = 47 250 rubles.
How to calculate the cost of glue
Aerated concrete blocks can be put on special glue. The average consumption of glue is usually 1.5 kg per 1 sq. M.
Let's calculate the funds required to buy glue for a 1-storey house with a base perimeter of 48 sq.m. and a height of 3 meters:
- The area for laying blocks on the outer walls is 120 sq.m .;
- The area of the interior walls is 150 sq. M .;
- Total wall area 120 + 150 = 270 sq. M .;
- Glue consumption 270 × 1.5 = 405 kg;
- The number of bags of 25 kg - 405 / 25≈16 pcs;
- The cost of glue for a bag of 250 rubles - 16 × 250 = 4,000 rubles.
When purchasing glue, you should consult with the contractor. Perhaps the specifics of the case will require an increase or, on the contrary, a decrease in the amount of material.
Let's summarize.
We spent 168,000 rubles for the purchase of aerated concrete blocks intended for the construction of load-bearing walls 400 mm thick. The inner walls of aerated concrete 100 mm thick cost 47 250 rubles. It took 4,000 rubles for the glue. More than 219 thousand rubles were spent in total.
To calculate the total cost of a house, it is necessary to take into account the price of the foundation, floor slabs, materials for the roof, screed and floor, reinforcing belt, plaster, cladding, insulation, installation of doors and windows, laying communications, etc. payment for the project, transportation costs for the delivery of goods, the cost of consumed electricity and water, incentives for the work of foremen.
Most owners of gas silicate houses are satisfied with their choice. For those wishing to start new construction, we suggest using our recommendations. Based on the market situation and price increases, the cost building materials will change. But the calculation algorithm will remain the same, and you can always use it.
One of the varieties of aerated concrete, characterized by high strength characteristics, is called sibit. This material resembles wood in some of its properties. It is just as lightweight, breathable and good at keeping warm. According to thermal insulation characteristics of Sibit 3 times better than brick... As a result, the Sibit house retains heat well in the cold season and does not allow the rooms to heat up in the sultry summer. In our article we will describe the features, advantages and disadvantages of this material, and also tell you how to build a house with your own hands from a sibit.
Material features
From this type of aerated concrete, you can build both a multi-storey building and an ordinary one. country house from sibit. Moreover, this material can be used not only for the construction of external and load-bearing walls, but also for the installation of reinforced panels or ceilings.
The foundation for a house made of sibit can be lightened due to the low specific gravity of the material. As a result, you will receive significant savings on materials, volumes will decrease earthworks, which means that the construction time will increase.
In addition, Sibit house projects are very popular due to the high thermal insulation characteristics of the building and the optimal human-friendly microclimate that forms in the house due to the natural microcirculation of air in the walls.
The base of the sibit is aerated concrete. The hardening process of this material takes place in a special autoclave. The result is porous, lightweight and durable material, which compares favorably with brick and concrete.
Advantages and disadvantages
Before ordering a project of a house from Sibit, it is worth examining the pros and cons of this material in order to make right choice... Among the advantages of the Sibit, it is worth mentioning the following qualities:
- Finished houses made of this material are distinguished by high heat and sound insulation characteristics. The thermal insulation performance of the material is 3-4 times higher than that of traditional bricks. If you calculate how much money you need to heat a conventional brick house then heating two-storey house from Sibit, you can save up to 30 percent.
- Thanks to the honeycomb structure, the house built from sibit has a favorable microclimate. The material accumulates heat well. In this regard, the building is very similar to a house made of timber.
- To make sibit, only components of mineral origin are used, so it can be argued that a country house made of sibit or any other building made of this material is an environmentally friendly housing.
- It is non-combustible material.
- The construction of houses from Sibit is beneficial because the construction is being erected much faster than brick house... It's all about the size of the blocks. If we calculate how many blocks are needed to build a house, then their number will be many times less (8-10) than traditional bricks.
- Transporting and placing the material is also straightforward. As a result, you can build a small country house from Sibit with your own hands without using construction equipment.
- The material is easy to process. It can be easily cut with a hacksaw to the desired size.
- You will be able to reduce the cost of equipping the foundation by two, or even three times. All this is due to the low specific gravity of the material.
- To build a country house from Sibit, you need much less labor. The thing is that the dimensions of the sibit block are 6 x 2.5 x 2 dm, and the weight is 18 kg. It can be equated to 20 bricks.
- According to thermal engineering calculations, the thickness of the outer brick wall should be 8 dm without taking into account thermal insulation material, while the enclosing structures of the described type of aerated concrete can be 5 dm thick.
- Due to the porous structure, moisture from the room evaporates quickly, which contributes to maintaining an optimal microclimate.
- Reinforced floor slabs can be made from sibit, which will not be inferior in strength reinforced concrete structures... So, each square meter of such a plate can withstand a load of 8 centners.

Among the shortcomings of the material, it is worth noting the following points:
- The main disadvantage is the low strength of the material, especially when compared with concrete or brick.
- It is not recommended to hang cabinets, shelves, heavy metal structures, heaters, etc. on partitions and walls made of sibit. To install them, you need to get special mounts.
- When building a house, it is very important how many floors you plan to build. So, one-story houses from sibit do not need additional reinforcement, while for construction above 5 floors, you will have to make a strong frame.
- Often developers have a question about how to plaster the walls. The thing is that to protect porous walls from destruction, it is necessary to apply special vapor and moisture resistant compounds. If the walls are plastered incorrectly, then the open pores of the material will cause a decrease in the thermal insulation qualities of the enclosing structures and their subsequent destruction.
Attention: the construction of a house from this type of aerated concrete should be carried out in spring or summer, when the temperature will be within +5 ... + 25 ° С. If the temperature rises above the specified limit, the blocks will have to be additionally moistened before laying.
Design

There are different brands of sibit. All products are durable and heat conductive. In order to take aerated concrete products from sibit, the density of which is 1000 kg / m³. They are ideal for creating load-bearing and enclosing structures. If you are building a house with an attic, then blocks with a density of 300 kg / m³ will be needed to complete it or equip an attic roof. For the construction of internal partitions, it is better to use elements with a density of 500-900 kg / m³.

When choosing house projects from a photo, it should be borne in mind that the facade decoration used is directly related to the use of one or another brand of gas blocks. The thing is that when using some brands of Sibit, additional protection of the walls from the negative effects of the environment may be needed.
Important: to perform waterproofing of the walls, it may be necessary to process with special compounds, special plaster, cladding decorative material... When attaching the facing layer, it is necessary to leave a ventilation gap between the wall and the finish.
When designing houses from aerated concrete blocks, it is very important to make a sufficiently rigid base in order to completely eliminate the risk of deformation of the walls and the appearance of cracks. That is why, most often, tape monolithic bases are equipped for such structures.
Installation sequence
If you want to build a small square house in plan, then a building measuring 6 x 6 m will be enough for a family of 2-3 people. To increase the usable area of the house up to 100 sq. m., you can use a small extension, in which it is better to arrange the kitchen and bathroom, as well as attic floor... If your family has 4-5 people, then it is better to equip a two-storey house measuring 6 x 8 m, where the living area will be at least 100 squares.
Foundation

For execution strip base you need to first prepare the construction site by clearing it of debris, unnecessary plantings. Further work is carried out in this order:
- We carry out a breakdown of the future structure on the ground.
- After that, we dig trenches or a foundation pit, if the house will be with a basement.
- We carefully level the bottom of the trench and ram it.
- At the bottom, we make a pillow of gravel and sand, which we also ram well after moistening with water.
- After that, we proceed to the installation of the formwork. It must rise at least 30 cm above the ground.
- We make reinforcement cage and install it in the formwork on a pre-poured and hardened layer of concrete 5 cm high.
- Pour concrete and ram.
- The formwork can be removed after 5-7 days.
Walls

Before starting the installation of the walls, you need to make a horizontal waterproofing of the base. To do this, on the concrete surface of the base, we lay two layers of roofing material on bitumen mastic. In addition to sibit and reinforcement, you will need the following tools to complete the masonry of the walls:
- Master OK;
- wall chaser;
- rubber mallet;
- notched trowel;
- dust brush;
- planer for gas blocks;
- corner;
- saw;
- cord or fishing line;
- level.
Further work is carried out in the following sequence:
- The first row is laid on a cement-sand mortar. The height of the mortar layer is 1 cm. First, the corner blocks are laid, and then the fishing line is stretched between them, and the rest of the elements are placed. The first row needs to be perfectly flat, so you need a level, cord and mallet.
- Some blocks will need to be resized by sawing them.
- After completing the first row, you need to wait several hours, during which the solution will have time to grab.
- All other rows are laid in the same way, that is, first the corner elements are mounted, then the cord is pulled and the middle blocks are installed. It is only worth remembering that the blocks of the second row should be stacked with a shift of 8 cm. Also, in the second row, you can use not a solution, but a special glue to connect the blocks. We use a notched trowel to apply the glue. This way you will achieve a more uniform seam, besides the speed of drying of the glue is higher than that of the mortar.
- In order for the binder solution to lay down smoother and the adhesion to be stronger, the surface of the block can be treated with a plane, giving it a roughness.
- Each 3-4 row of blocks must be reinforced. To do this, on the surface of the laid blocks, several grooves are grooved in parallel. After cleaning from dust, reinforcement with a diameter of 10 mm is placed in the grooves. After that, glue or mortar is applied and the next row is laid.
Attention: it is not allowed to connect two reinforcement bars at the joints of blocks and in the corners of the masonry. Mandatory reinforcement is subject not only to the 3rd or 4th row of masonry, but also to the areas above the door and window openings, as well as the row on which the floor slabs will rest.
Overlapping
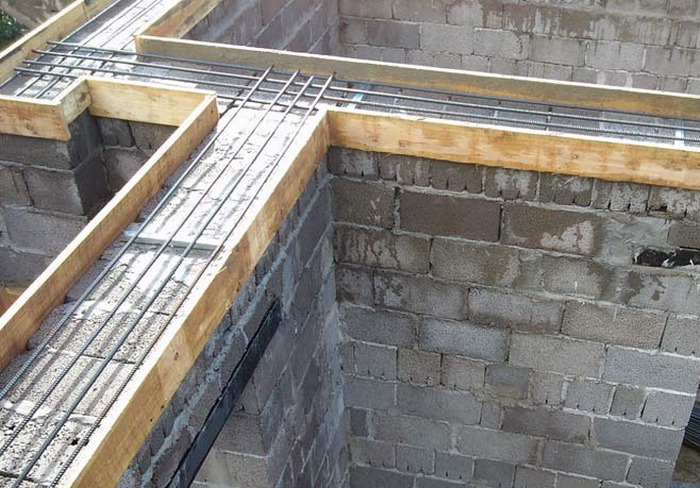
Laying floor slabs is allowed only on a monolithic reinforced concrete armored belt. To make it, do the following:
- Blocks are cut to a thickness of 10 cm and placed along the edges of the wall opposite each other. Thus, you get a kind of permanent formwork.
- A reinforcement cage is placed inside the formwork.
- After that, the space is filled with concrete.
- When the concrete gains the necessary strength, floor slabs are laid. The ends of the slabs are closed with clumsy blocks.
Tip: reinforced concrete slabs are not the only overlapping option, you can use metal or wooden beams or aerated concrete slabs.
The time has long passed when a developer could afford to buy materials without first calculating the number of gas silicate blocks. Purchasing in those days was almost always carried out by eye. Currently, before building a house, any person will carefully calculate the bricks or blocks that he needs for construction.
The time has long passed when a developer could afford to buy materials without first calculating the number of gas silicate blocks. Purchasing in those days was almost always carried out by eye. Currently, before building a house, any person will carefully calculate the bricks or blocks that he needs for construction.
Only at first glance it seems like a very simple procedure to calculate the correct number, for example, of gas silicate blocks for a certain structure. If you are going to build a house by architectural project, then there is no need to count anything, since this procedure was done by experienced architects at the planning stage. It is quite another matter if the construction is carried out according to its own idea.
Spreadsheet or electronic calculator?
Tables are more appropriate for the experienced builder. They have already taken into account the dimensions of the gas silicate blocks and the linear parameters of the future structure (length, width and height). You just need to correctly match all the components, and you will get an approximate number of units that you need to purchase.
This method of calculation is not suitable for an ordinary person for several reasons: using tables is as difficult as slide rule, and the result will be approximate, since the sizes of windows and doorways are taken into account only for standard buildings.
Calculators for the amount of materials that are present on the pages of the websites of trade organizations give slightly greater accuracy, although the program additionally requests a lot of structure parameters.
Calculation method
To calculate and determine how much a gas block is needed for construction, you can do this.
-
The perimeter of all walls of the house (internal and external) is determined. This is fairly straightforward to do, even if the configuration is not that straightforward. Based on the plan, the lengths of the sides are added.
-
The area of all walls is determined: the perimeter is multiplied by the height.
-
You also need to determine the total area of openings (windows and doors).
-
The area of the openings is subtracted from the value obtained for the walls. This calculation results in the area of the masonry.
-
The result obtained is multiplied by the thickness of the gas block. It turns out the volume of gas silicate material required for masonry, in cubic meters.
-
The volume of "bricks" made of aerated concrete, divided by their number in a cube, gives the amount of aerated block that will be required to complete the masonry, in pieces.
Now let's calculate the number of blocks using a specific house as an example.
We hope that our calculations will help you correctly calculate the required amount of a gas silicate block for the construction of your home. Good luck!
Another simple method
Take a look at the price list of the company that will arrange the delivery for you. All measurements of gas silicate blocks should be indicated there. Determine the volume of one and divide the previously obtained net result by it. You will calculate the number of units with an accuracy of one piece. But this is only with the proviso that the width of the wall thickness will be a multiple of one of the linear parameters of the material.
Is it worth purchasing the estimated amount of material for construction? No. Usually, during construction, blocks have to be cut, adjusted to a certain size. This means that a certain amount (about 5%) must be in excess of the norm. The second reason forcing the purchase of a larger amount of material is its quality and possible damage to products during transportation and handling.
In order to reduce the amount of building materials, it is recommended to think over the layout of the future structure, taking into account the size of the blocks themselves.
The parameters of the house must exactly match the linear dimensions of the gas silicate blocks. Simply put, the length of the structure must be a multiple of the length of the block. The multiplicity and width of the structure are determined in the same way. You will benefit not only in terms of the amount of materials, but also in the convenience of laying the walls, since you will have to cut the blocks a minimum number of times. If such calculations seem too complicated for you, then you can contact any construction organization for help. It will not be difficult for an experienced builder to make the necessary calculations.
Calculation of materials
| WALLS: | |
| gas silicate Ytong (600x250x400mm): | |
| 74.49 m³ х 4440 rubles / m³ | RUB 330,736 |
| block glue: | |
| 60 pack х 290 rubles / pack (25 kg) | RUB 17400 |
| Ytong U-formwork blocks (500x375x250mm): | |
| 35 pcs. x 400 rubles / piece | RUB 14,000 |
| masonry reinforcement D10 AIII: | |
| 0.14 t х 37,500 rubles / ton | 5250 RUB |
| reinforcing bars D12 AIII: | |
| 0.27 t х 37,500 rubles / ton | RUB 10,125 |
| concrete mix B15-20: | |
| 2.3 m³ х 4200 rubles / m³ | RUB 9660 |
| : | |
| 0.2 m³ x 3700 rubles / m³ | RUB 740 |
| extruded polystyrene Penoplex 35: | |
| 0.4 m³ x 5100 rubles / m³ | 1020 RUB |
| facade plaster CT 24: | |
| 95 pack х 370 rubles / pack (25 kg) | RUB 35,150 |
| TOTAL: on the walls | 424081 rub. |
| FOUNDATION: | |
| sand bed: | |
| 5.8 m³ х 850 rubles / m³ | RUB 4930 |
| concrete blocks FBS 24-4-6: | |
| 48 pcs. x RUB 3,135 / piece | RUB 150 480 |
| masonry mix: | |
| 1.7 m³ х 2700 rubles / m³ | RUB 4590 |
| concrete mix B15-20: | |
| 22.5 m³ x 4200 rubles / m³ | RUB 94500 |
| reinforcing bars Ø10-Ø12 AIII: | |
| 1 t x 37,500 rubles / ton | RUB 37,500 |
| edged boards for formwork: | |
| 0.7 m³ x 6500 rubles / m³ | RUB 4550 |
| roll waterproofing RKK-350: | |
| 5 rolls х 315 rubles / roll (10m²) | RUB 1575 |
| TOTAL: by foundation | 298125 rub. |
| OVERLAPPINGS: | |
| wooden beams 150x100; 100x50: | |
| 3 m³ х 7000 rubles / m³ | RUB 21,000 |
| Knauf drywall (2500х1200x10): | |
| 27 pcs. x 260 rubles / piece | RUB 7020 |
| steel profile with fasteners: | |
| 232.6 r.m. x 49 rubles / r.m. | RUB 11397 |
| basalt insulation (Rockwool): | |
| 20.1 m³ х 3700 rubles / m³ | RUB 74,370 |
| waterproofing (Tyvek Soft): | |
| 193 m² х 68 rubles / m² | RUB 13124 |
| PE vapor barrier: | |
| 193 m² x 11 rubles / m² | RUB 2123 |
| plywood sheets FC 1525x1525x18: | |
| 1.4 m³ х 19000 rubles / m³ | RUB 26600 |
| edged sub-floor boards: | |
| 1.6 m³ х 6500 rubles / m³ | RUB 10,400 |
| TOTAL: by overlap | 166034 rub. |
| ROOF: | |
| pine racks (150x50mm): | |
| 4 m³ х 7000 rubles / m³ | RUB 28,000 |
| wood-protective impregnation: | |
| 59 liters x 75 rubles / liter | RUB 4425 |
| waterproofing (Tyvek Soft): | |
| 184 m² x 68 rubles / m² | RUB 12512 |
| onduline slate 2000x950x2.7: | |
| 106 sheets x 399 rubles / sheet | RUB 42294 |
| roofing nails 73x3mm: | |
| 23 pkg х 190 rubles / pack (250 pcs.) | 4370 RUB |
| figured ridge (1000mm): | |
| 13 pcs. x 290 rubles / piece. | RUB 3770 |
| edged boards lathing 100x25mm: | |
| 1.5 m³ х 7000 rubles / m³ | RUB 10500 |
10:0,0,0,290;0,290,290,290;290,290,290,0;290,0,0,0|5:192,192,0,290;192,290,57,57;0,192,102,102;192,290,141,141|1127:231,141;231,57|1327:167,60;167,111|2244:0,35;0,169;290,199|2144:79,0;79,290;223,290|2417:290,20|1927:224,-20
RUB 1,073,621.0
Only for the Moscow region!
Calculation of the cost of work
Do you want to know how much the work on the construction of your house costs and choose the contractors?
Submit an express application and receive offers from construction professionals!
Layout example 10x10 m for calculation |
||
 |
1.
Aerated concrete block d = 400mm; 2. Plaster finishing d = 5-10mm; 5. Reinforced concrete screed h = 200mm; 6. Extrusion foam d = 30-50mm; 7. Overlapping timber-beam d = 150-250mm; 8. Ondulin sheets; 9. Foundation precast-block tape h = 1.8m; |
|
Gas silicate block masonry with plaster facing

Aerated concrete masonry
Despite the fact that aerated concrete blocks are presented as an extremely technologically advanced and heat-efficient structural material, their use only makes sense in the case of buying necessarily branded goods, such as Hebel, Beston, Ytong, Hess, Wehrhahn and serious performance of the manufacturer's specifications, preferably with the involvement of specialists.
In terms of fire safety, acoustic protection, thermal insulation capacity, the aerated concrete block is many times ahead of traditional brick material.
Unlike other stone blocks, autoclaved aerated concrete blocks are characterized by a developed and uniform structure of micropores in volume, which determines their remarkable heat-insulating properties, as well as "breathing" ability.
Now on the construction market there are autoclaved aerated concrete blocks (Wehrhahn, Hebel, Ytong, Hess, Beston) with minimal dimensional deviations (within 1 mm), which can be assembled using specially developed masonry glue.
A wall folded according to this technology is characterized by insignificant heat loss, due to the fact that the “cold zones” formed by the masonry gaps made of cement binder are eliminated, and, importantly, the costs of laying blocks are minimized by about 30 percent.
Adhesive for a gas silicate block costs approximately twice as much as a classic sand-cement binder, at 5-6 times less consumption.
Facade wall cladding made of aerated concrete blocks should facilitate the passage of moisture vapor from the rooms into the surrounding space. Therefore, it is unacceptable to cover the walls of gas silicate blocks with cement-sand mortar, paint with vapor-proof paints, cover with expanded polystyrene.
In accordance with the standards for thermal insulation of buildings, there is enough for the central region of the country outer wall from aerated concrete with a cross section of 0.40 m.
When constructing aerated concrete walls, it is important to combine many prohibitions and technological nuances, otherwise, instead of reducing the cost of thermal insulation, you can get exaggerated, too cool, and even unsafe structures.
- According to the manufacturer's recommendation, it is advisable to reinforce the support places of the lintels and places under the windowsill, as well as every four to five rows of masonry, with fiberglass nets.
- For the purpose of laying reinforcement routes, on the surface of the wall, slots are cut with a surface grinder in thickness and depth of 30 * 30 mm, which, when installing the reinforcement, are poured with an adhesive solution for gas silicate.
- The installation of the initial row of aerated concrete blocks should be taken especially seriously, checking the level during installation of the horizon and vertical of the masonry.
- Excessively bulging or substandard aerated concrete block can be adjusted with a grinder to the desired size at the place of installation.
- Autoclaved aerated concrete can be planed, drilled, milled, cut with an ordinary saw, and channeled right on the construction site.
- On the top of the gas silicate blocks, in the plank formwork, reinforced concrete pouring, 200 mm thick, is performed. On the outside, the reinforced concrete screed is insulated with a 5-cm insert made of extruded foam.

Plastering of gas silicate blocks
The gas silicate wall must be protected from atmospheric moisture, for which, the roof of the building must have decent overhangs, and the plaster mixtures must have water-insulating properties. It is advisable to carry out the volume of the plaster coating from the street up to 2 times less than from the side of the premises, with an inverse proportion of the value of vapor permeability, so that the absorption of humid vapors into the wall is weaker than steam removal to the street.
When plastering the outer surface of blocks, you should buy professional plasters designed for foam and aerated blocks, because vapor permeability is an essential factor for aerated concrete walls outer cladding... Otherwise, intensive waterlogging of the walls is carried out, which causes the destruction of the finishing layer and a drop in heat-shielding qualities. Plaster mixtures for gas silicate should have, in addition to good steam conductivity, reduced cracking capacity, shrinkage, water absorption, as well as significant adhesion, frost resistance, weather resistance. Of the available plaster mixes suitable for aerated concrete, you can list, for example, Glims Ts40 Velur, Mask + MSh, CT 24 Ceresit, Atlas KB-TYNK, Sibit, Atlas Silkat.
Some aspects of plastering an aerated concrete facade:
- Originally produced internal work, interconnected with the moisture stages (puttying, plastering, painting, concrete screed, floor pouring, pasting), and only then, after drying, do the plastering from the front side.
- Plastering and finishing operations should be carried out only 6 months later, after the erection of the gas silicate masonry, and in a warm time.
- For external plastering, evenly folded aerated concrete masonry, a layer 5 ... 10 mm thick is quite enough. For thicker layers, a plaster mesh should be used.
- Painting of plastered masonry should be carried out only with the use of water-based dyes, characterized by the necessary vapor-transparent and waterproofing qualities.
Reinforced concrete block foundation
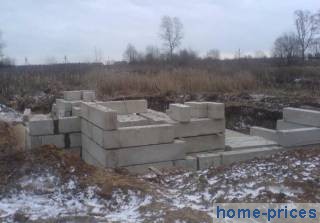
Foundation blocks are classified by types: FBS - solid, FBV - with a groove, FBP - hollow. Manufacturers make concrete blocks with a height of 60 ± 5 cm, the horizontal size varies within 900-2400 mm, the transverse size is fixed at 0.3-0.4-0.5-0.6 m.
When performing a prefabricated foundation on dry non-porous geo-foundations, it is permissible to install foundation blocks directly on the planned trench bottom.
In order to expand the area of the basement base, in order to reduce further deformations of the underlying layer, the FBS blocks are laid on the foundation supports laid in advance.
Foundation blocks are considered a popular building element that allows you to quickly complete the foundation of a private house.
The use of one or another type of concrete block follows from the section of the bearing walls of the building. For the construction of a private house, FBS blocks with a thickness of 40 or 30 cm are suitable. already the facade masonry of the walls of the building because they are much more durable.
For lands with a low rise of groundwater, building blocks can be made without reinforcing them, but a reinforced belt with a layer of at least 20 cm must be made from below and above them.
In cases where the structure of the underlying layers is not clear, it is worthwhile for insurance, instead of ready-made pillows, to arrange a monolithic concrete screed.
Currently, a foundation made of separate concrete elements, in terms of the range of important properties, and this also: resistance to lateral loads and efficiency, loses to another class - the foundation foundation to be concreted.
The choice of foundation blocks, as a material for the construction of the foundation, is usually explained by the all-season nature of the work or short terms.
- The installation of foundation pillows is supposed to be carried out from the outer corner of the house, and first the FL blocks are placed under the outer walls, and only then for the inside walls.
- On a sand cushion (100-150 mm) or laid concrete cushions, building blocks are placed alternately, fastened with cement mortar.
- The assembly of reinforced concrete blocks is carried out relative to the axial lines, along mutually perpendicular walls, combining axial risks along the theodolite. Ordinary reinforced concrete blocks are installed with a loader on a “bed” of cement-sand mixture.
- Installation begins with fixing the beacon blocks of the house and at the intersections of the center lines. It is worth starting the installation of wall blocks only after checking the orientation of the extreme blocks along the horizon and level.
- The geometry in the plan is controlled by measuring the linear size of the fragments of the zero level and the distances along the diagonal, and the vertical position - along the hose level or theodolite.
- Windows for conducting water supply and sewerage pipes to the technical floor are realized by pushing the blocks apart, with further embedding with bricks or mortar.
Girder-timber floor

Wooden floors are most common in suburban housing construction, due to the convenience and low cost of their implementation.
For beam floor as a rule, coniferous beams are used (for example: larch, spruce, pine), with an operating humidity of no more than 12-14%. The best beam is a bar with a sectional ratio of 7: 5 (for example, 0.14x0.10 m).
When designing a timber-beam floor, it is necessary to be guided by special diagrams that show the correlation of the parameters of the beam structure from the load and the span width; It is also permissible to proceed from the approximate norm that the wide side of the beam should be approximately 1/24 of the beam length, and the thickness should be 50 ÷ 100 mm, with a step of the beams of 0.5 and 1.0 m and a load of 150 kgf / sq.m.
For a complete replacement of beams of a given size, you should use hammered boards, while maintaining the overall size accordingly.
Typical rules for installing wood beams:
- In brick buildings, the ends of the beams are installed in masonry grooves, in which moisture condenses, therefore, between the cuts of the ends of the lags and the brick, a free gap is left for air circulation, and with a significant length of the opening, an additional thermal insulating layer is placed.
- The edges of the beams in wooden houses chipped in the form of a funnel, and then hammered into the finished opening of the upper log to the entire depth of the wall log.
- The gap between the stove channel and the beams must be at least 0.40 m, and the beam beams are pushed back from the wall no closer than 5 centimeters.
- The end parts of the girder boards are cut with an inclination of 60-70 °, covered with an anti-rotting agent (Tex, Cofadex, Biofa, Aquatex, Holzplast, Teknos, KSD, Tikkurila, Biosept, Dulux, Senezh, Kartotsid, Pinotex) and wrapped with bitumen cardboard, leaving the end uncovered, in order to avoid mold growth, which can occur when steam diffuses around the stone wall.
- The beams are laid in the following order: first, the first and last, and then, with level adjustment, all the rest. The bars should be turned on on wall structure not less than 15-20 cm.
The cover of the last floor is thermally insulated with a vapor barrier membrane under the insulation, the basement floor is thermally insulated with a vapor barrier film on top of the thermal protection, and interfloor overlap do not insulate.
If the problem of the structural strength of interlevel beams is mainly removed by simply adding the dimensions of the lags and their number, then with fire protection and acoustic protection everything looks not so simple.
A possible technique for improving the fire-retardant and anti-noise performance of wood-beam interlevel ceilings is as follows:
- To the bottom of the beams, at an angle of 90 degrees, with the help of elastic brackets, after 0.30-0.40 m, metal profiles are installed - a crate, onto which a plasterboard ceiling is knocked from below.
- On top of the lathing, a synthetic mesh is spread and fixed with a stapler to the beams, on which mineral wool slabs (Izorok, Rockwool, Knauf, Izomin, Isover, Ursa), 5 centimeters thick, are raised to the sides of the overlap.
- In the rooms of the upper floor, chipboard sheets (16 ... 25 mm) are screwed onto the beams with self-tapping screws, then, with a high density basalt fiber layer (25 ÷ 30 mm), and again, chipboard slabs for floor preparation are laid out.
Ondulin roof
 Ondulin slate (otherwise called: soft slate, euro slate, ondulin, bitumen slate, bituminous slate), is molded cellulose fibrous sheets, fixed with modified bitumen and colored with mineral-polymer, resistant to fading, pigment. bituminous slate is produced under various brands: Ondura, Nuline, Bituwell, Aqualine, Onduline, Corrubit, Guttanit. Typical dimensions of corrugated sheets: 200x95 cm, number of waves - 10.
Roofing material is laid on a solid frame made up of rafters and lathing preparation.
When individual buildings, traditionally a system of 2,3 spans with middle retaining walls and inclined rafters is used.
The gap between the rafter beams is usually in the range of 60-90 cm with a rafter section of 5x15-10x15 cm; the heels of the rafters are fixed to the Mauerlat with a section of 100x100-150x150 mm.
The main advantages of euro-slate roofing are ease of installation and low price. With regard to the problematic parties, it is fair to highlight a fairly rapid loss of freshness of color, as well as the natural flammability of bitumen-cellulose linen, in comparison with metal tiles.
- The distance between the boards of the sheathing and the inter-row overlap of the corrugated sheets of the ondulin slate are determined by the slope of the roof: when the slope is more than 15 °, the gap between the purlins is set 0.30 ... 0.35 meters, and the overlap is 170 mm.
- It is better to start fastening corrugated sheets of soft slate from the lower zone of the side part of the roof, opposite to the prevailing direction of the wind, in order to protect against their rise in the onslaught of the wind.
- The next row is carried out with an offset in half of the canvas, from the canvases of the lower level, so as not to get unnecessary thickening in the intersections of four touching canvases, leading to the formation of leaks.
- Euro-slate sheets are attached along the bottom line in each wave, along the 2 middle battens - through the wave, and the upper edge is covered with an overlap of the overlying canvas or a ridge profile. To fix one corrugated sheet, you need about two dozen stainless nails: length / diameter -73.5 / 3.0 mm or self-cutting screws: length -65.0, Ø5.5 mm with rubber washers.
- The in-row overlap of canvases is required to be arranged in 1 wave, but when the roof is tilted up to 10-11 ° - in two corrugated waves.
- Installation of ridge elements is carried out in the direction of laying the roofing sheets, with an overlap of 20 cm, with screws screwing into each rise of the corrugation of the covered corrugated sheet.
- To close the side sections of the pitched surface, chips are used, the fastening of which starts from the supra-cornice corner, with an overlap of 200 mm.
